Your UNANet account username and password is used to log into FirstClass, DMS Web and UNA apps.
If you use an Android phone, use the procedure outlined in this tutorial to sign into the UNA Data Management System (DMS) using the UNA App.
Tap on the menu button in the upper left corner to open the app’s menu. Tap on DMS. Login to DMS with your UNANet account.

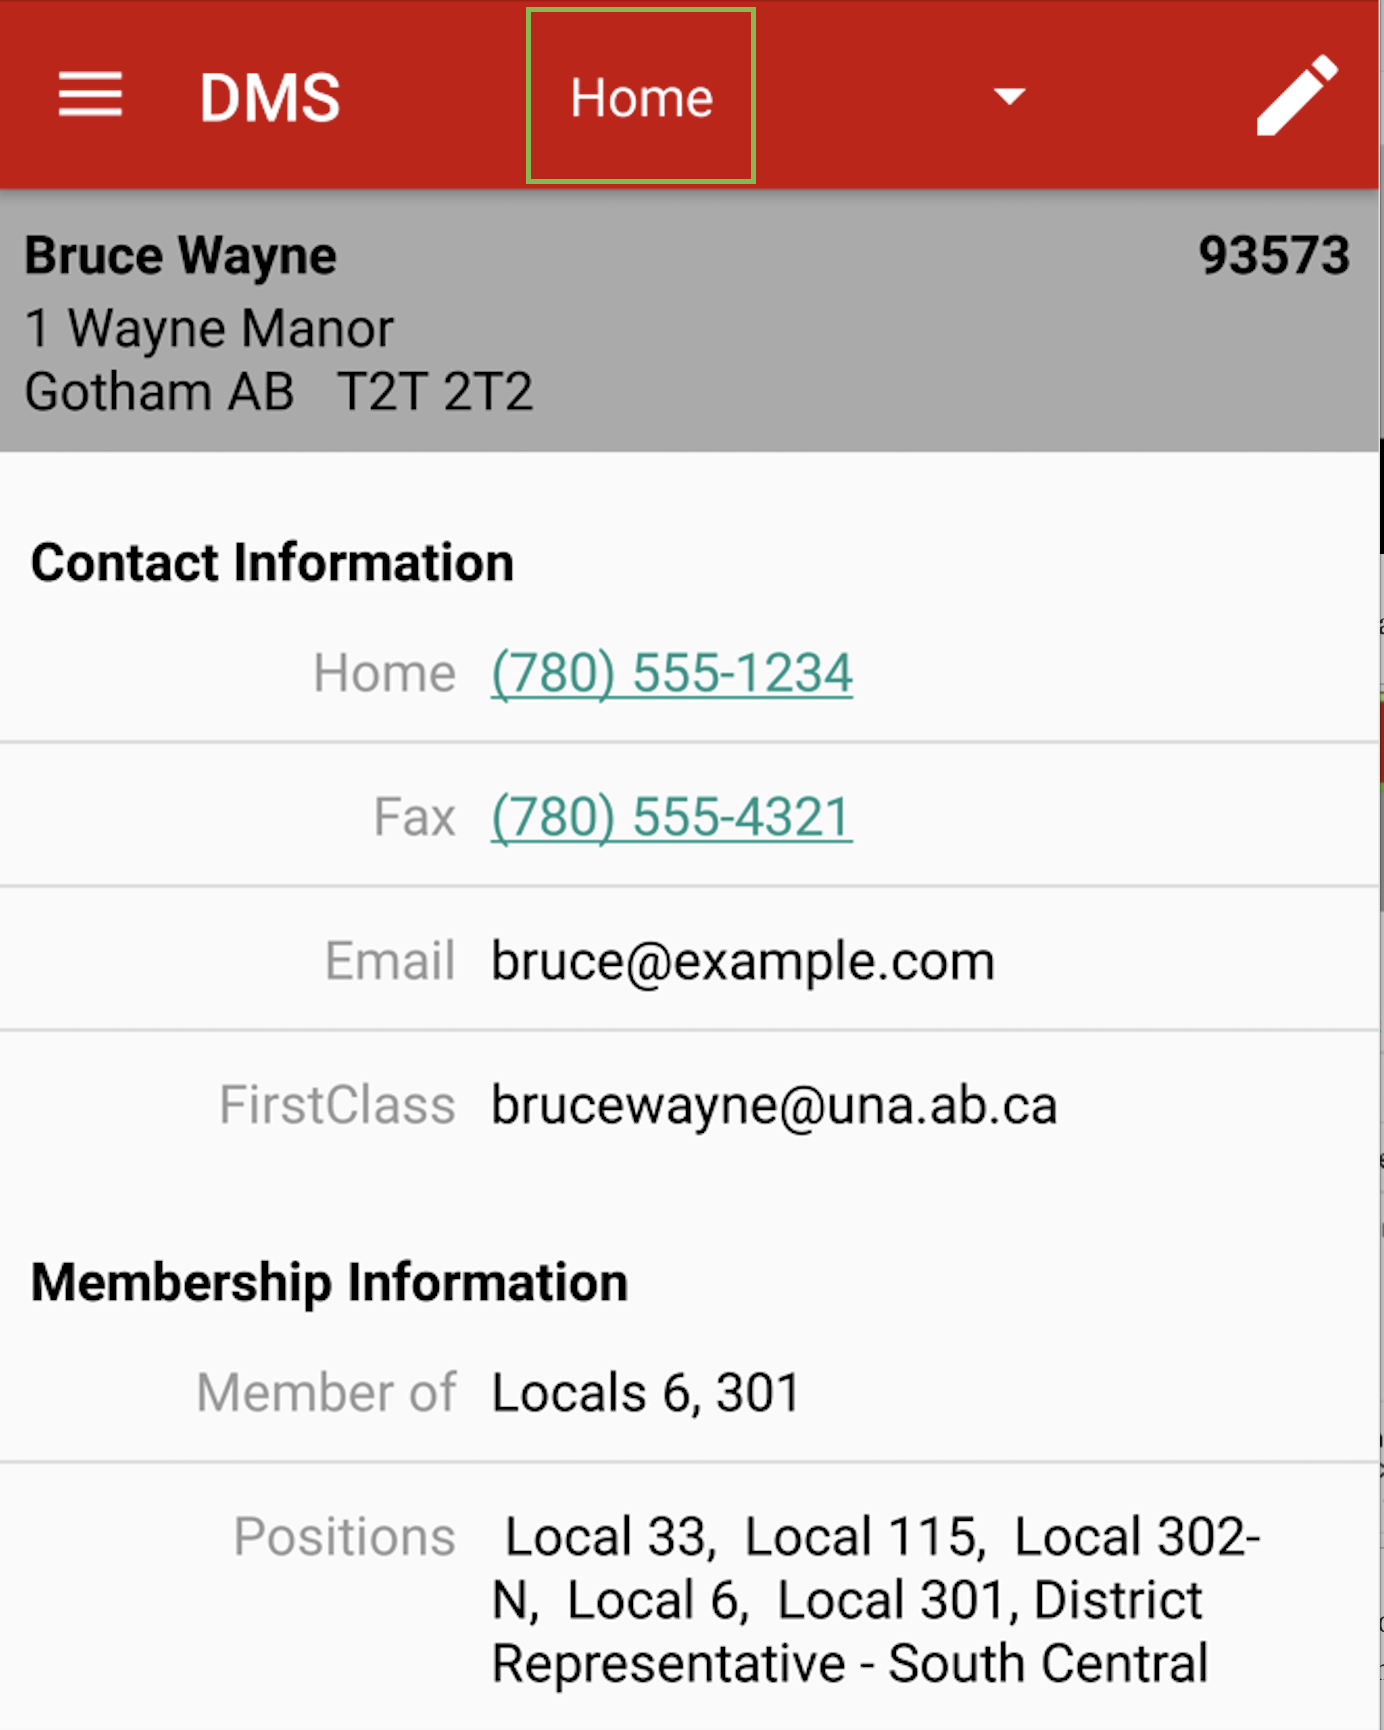
A Home Screen will open. Tap Home to open the navigation menu.
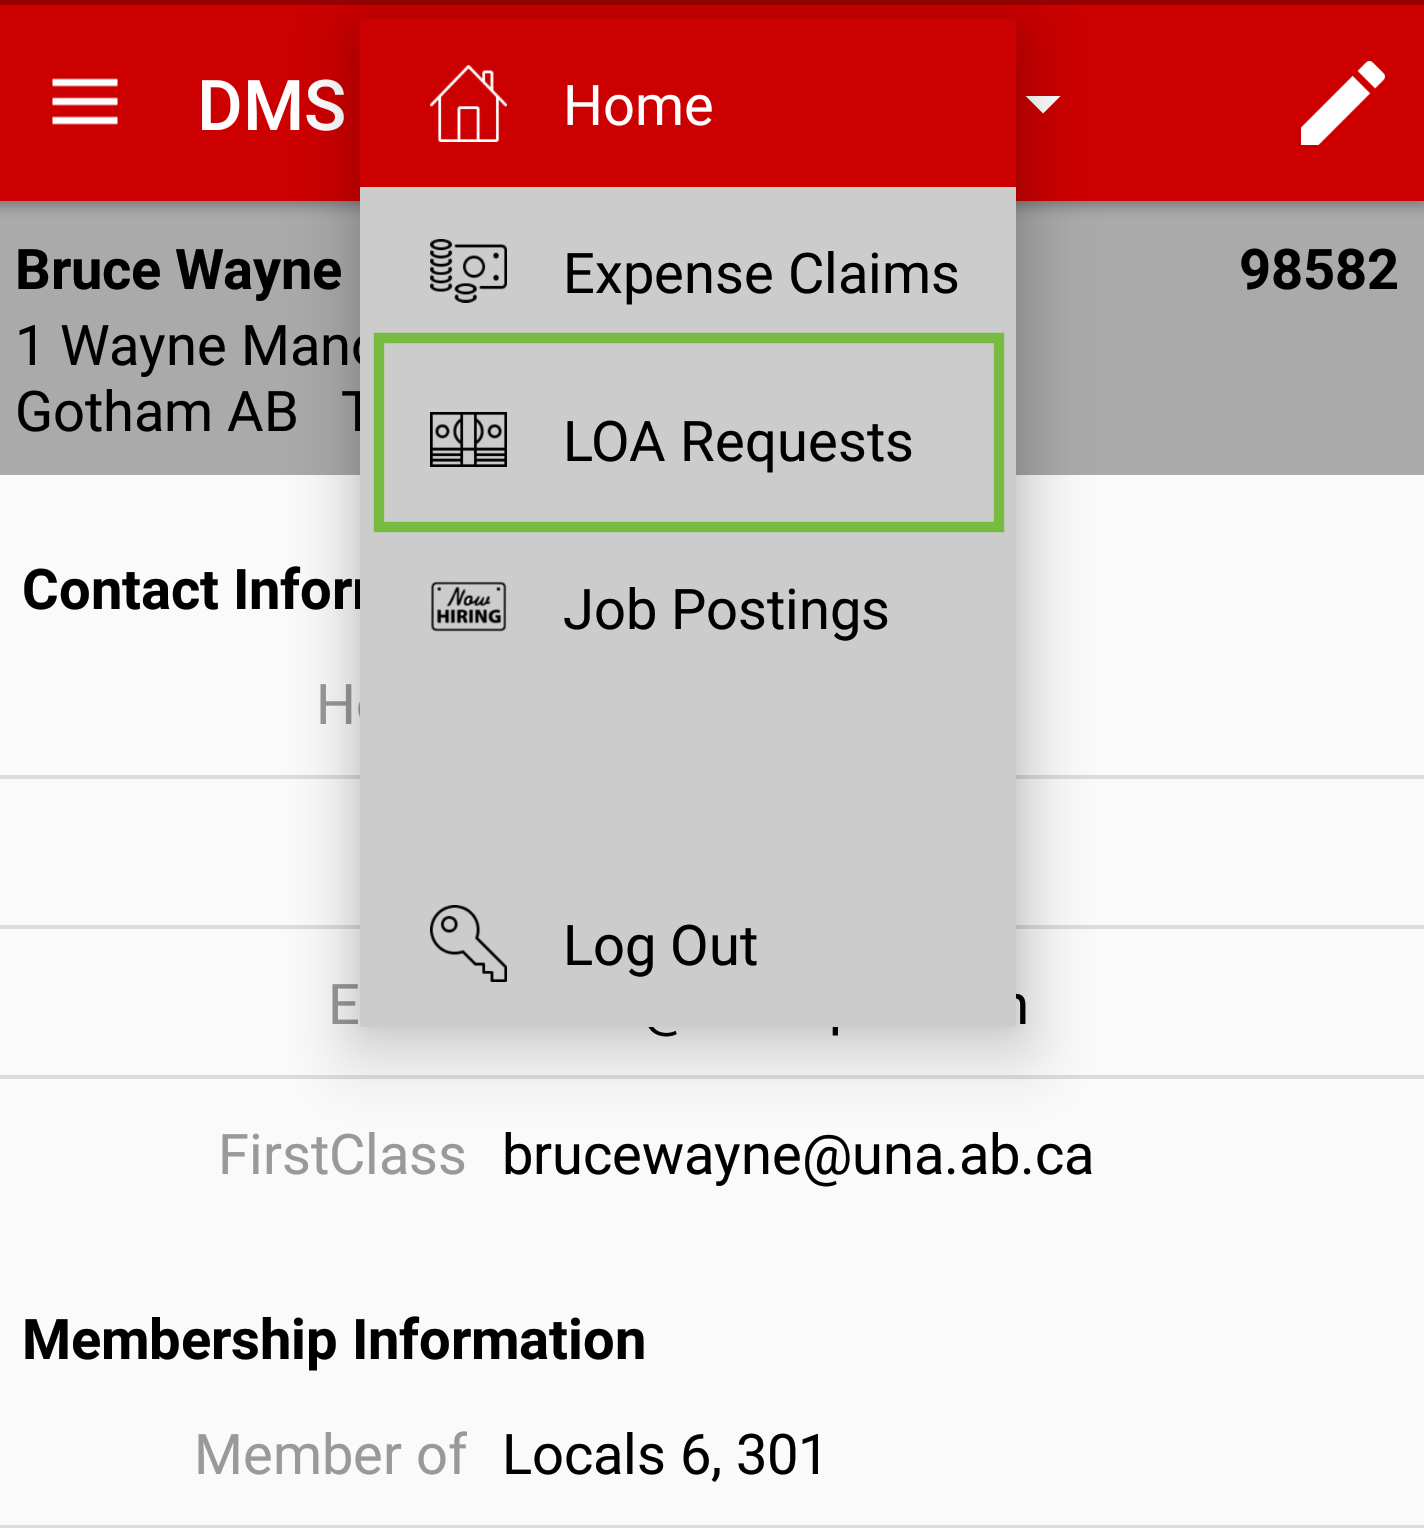
Once the Navigation Menu opens, tap LOA Requests (depending on the UNA positions you hold the screen may look slightly different).
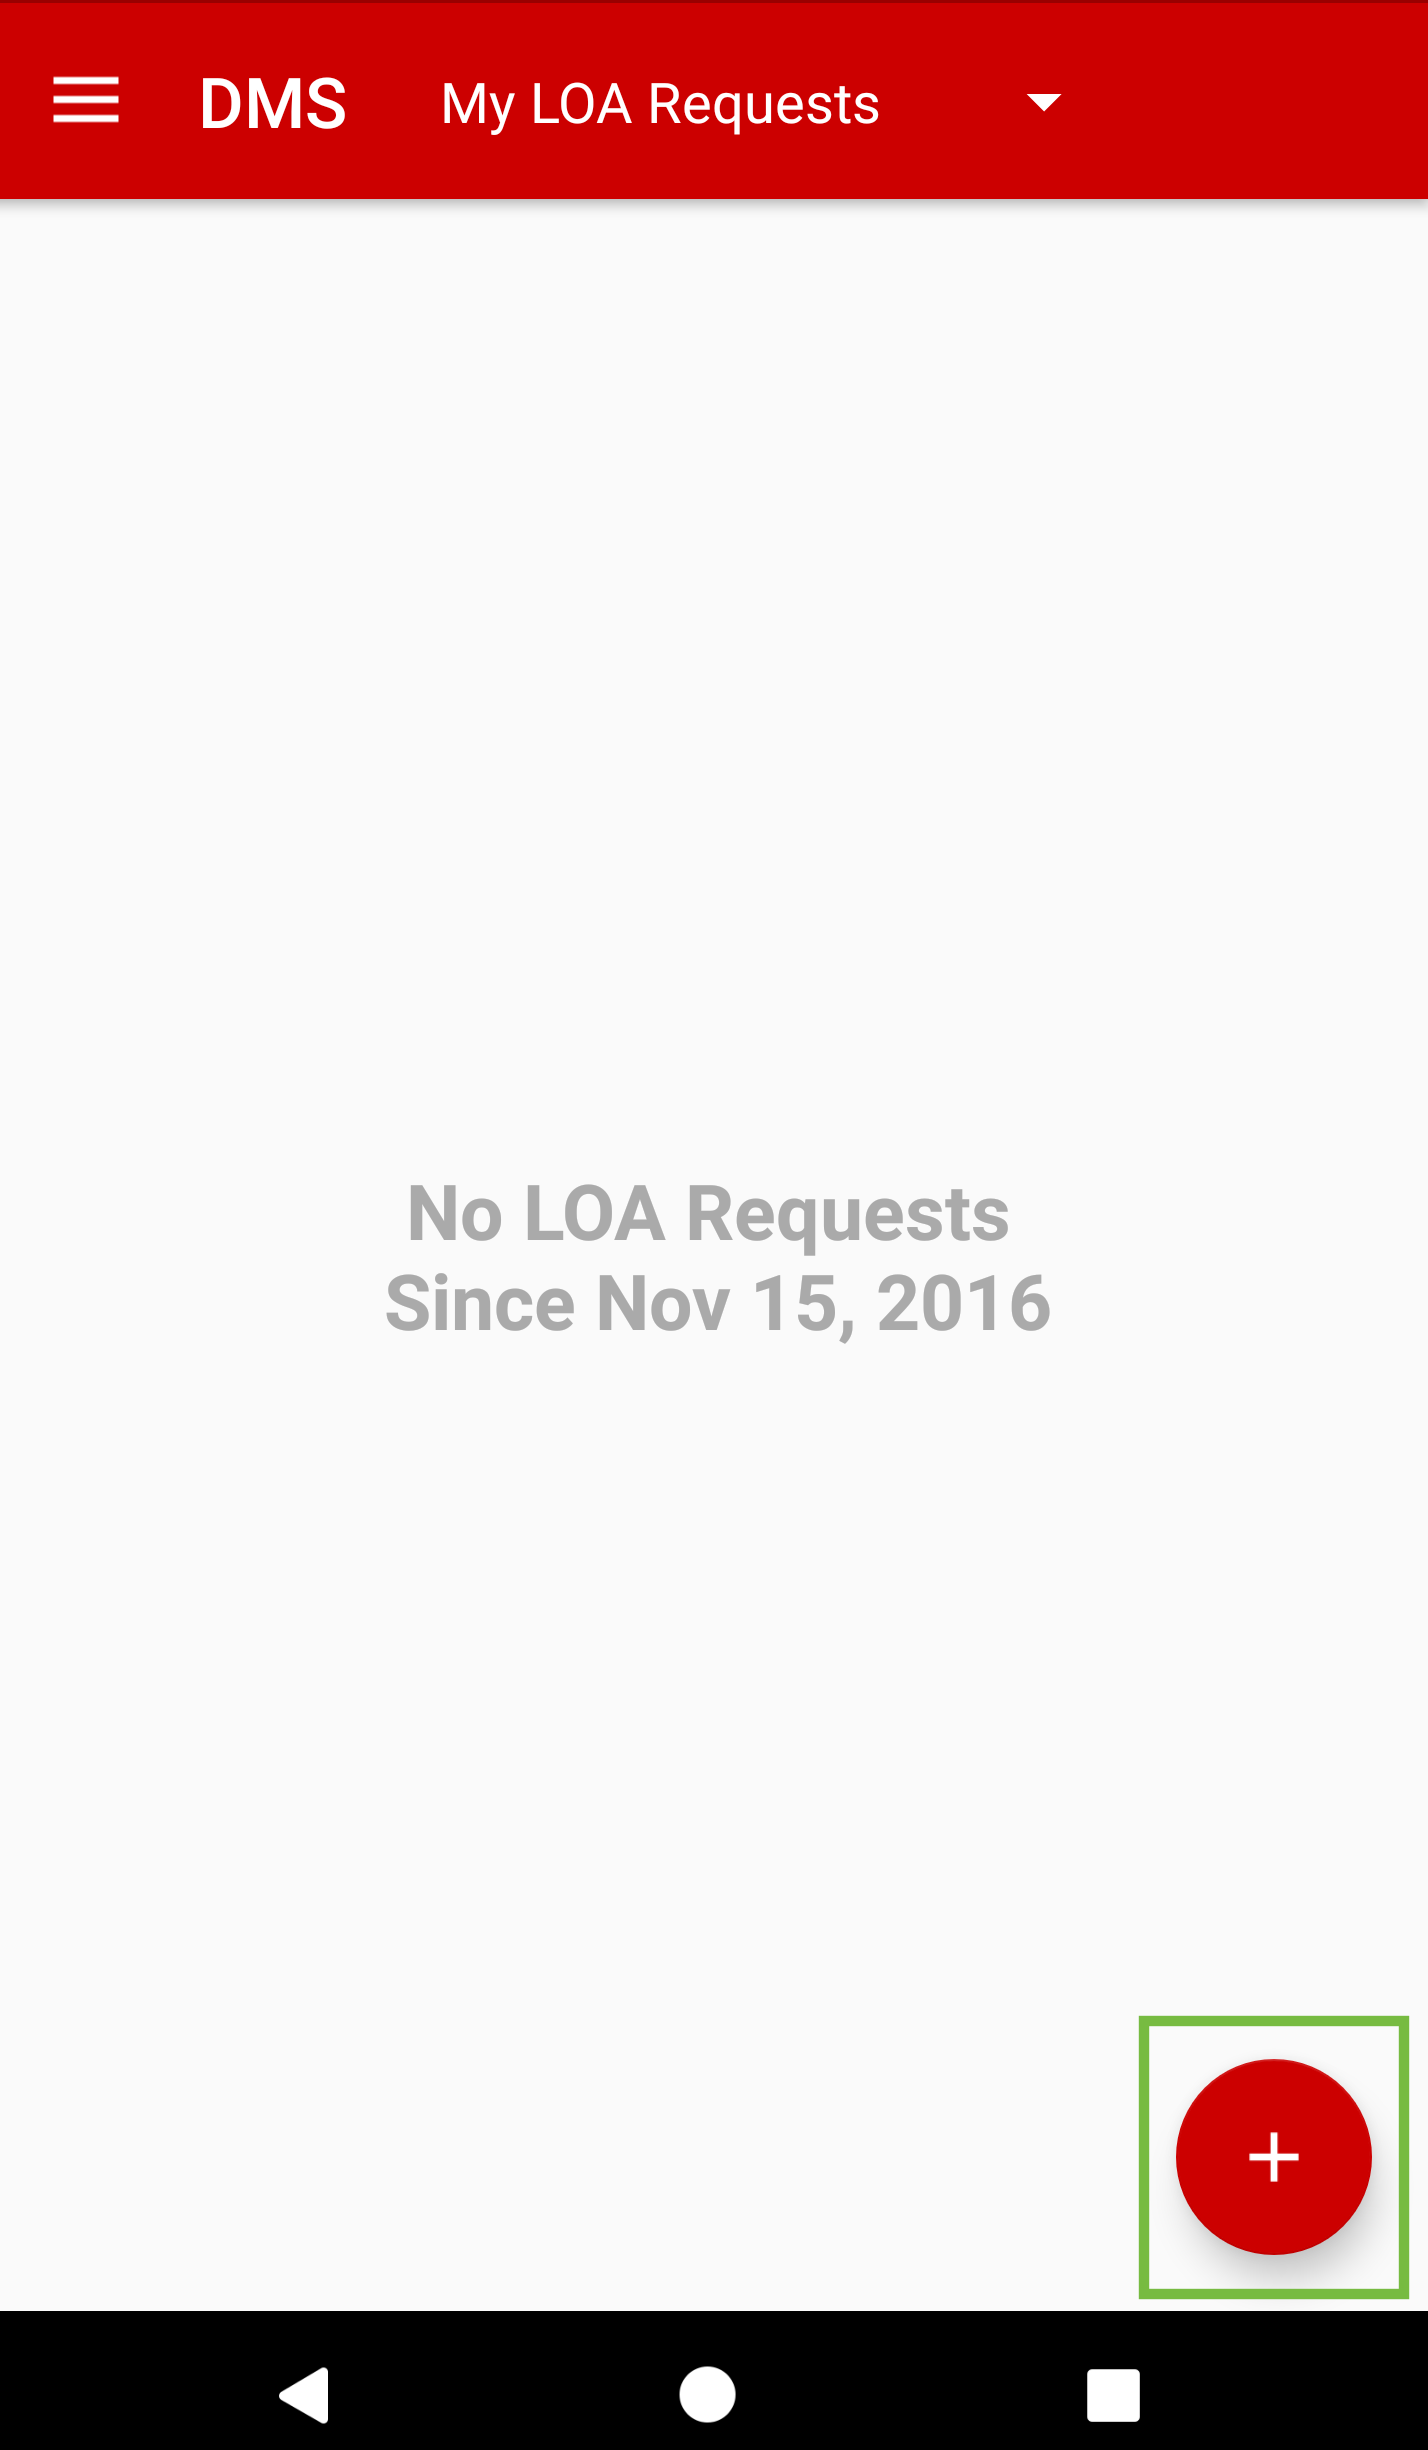
My LOA Requests screen will open and display a list of LOA Requests if there have been any in the last 3 months. Tap on Plus Sign in bottom right hand corner, to start a request.
The New LOA Request screen will open. Tap on Reason for request.
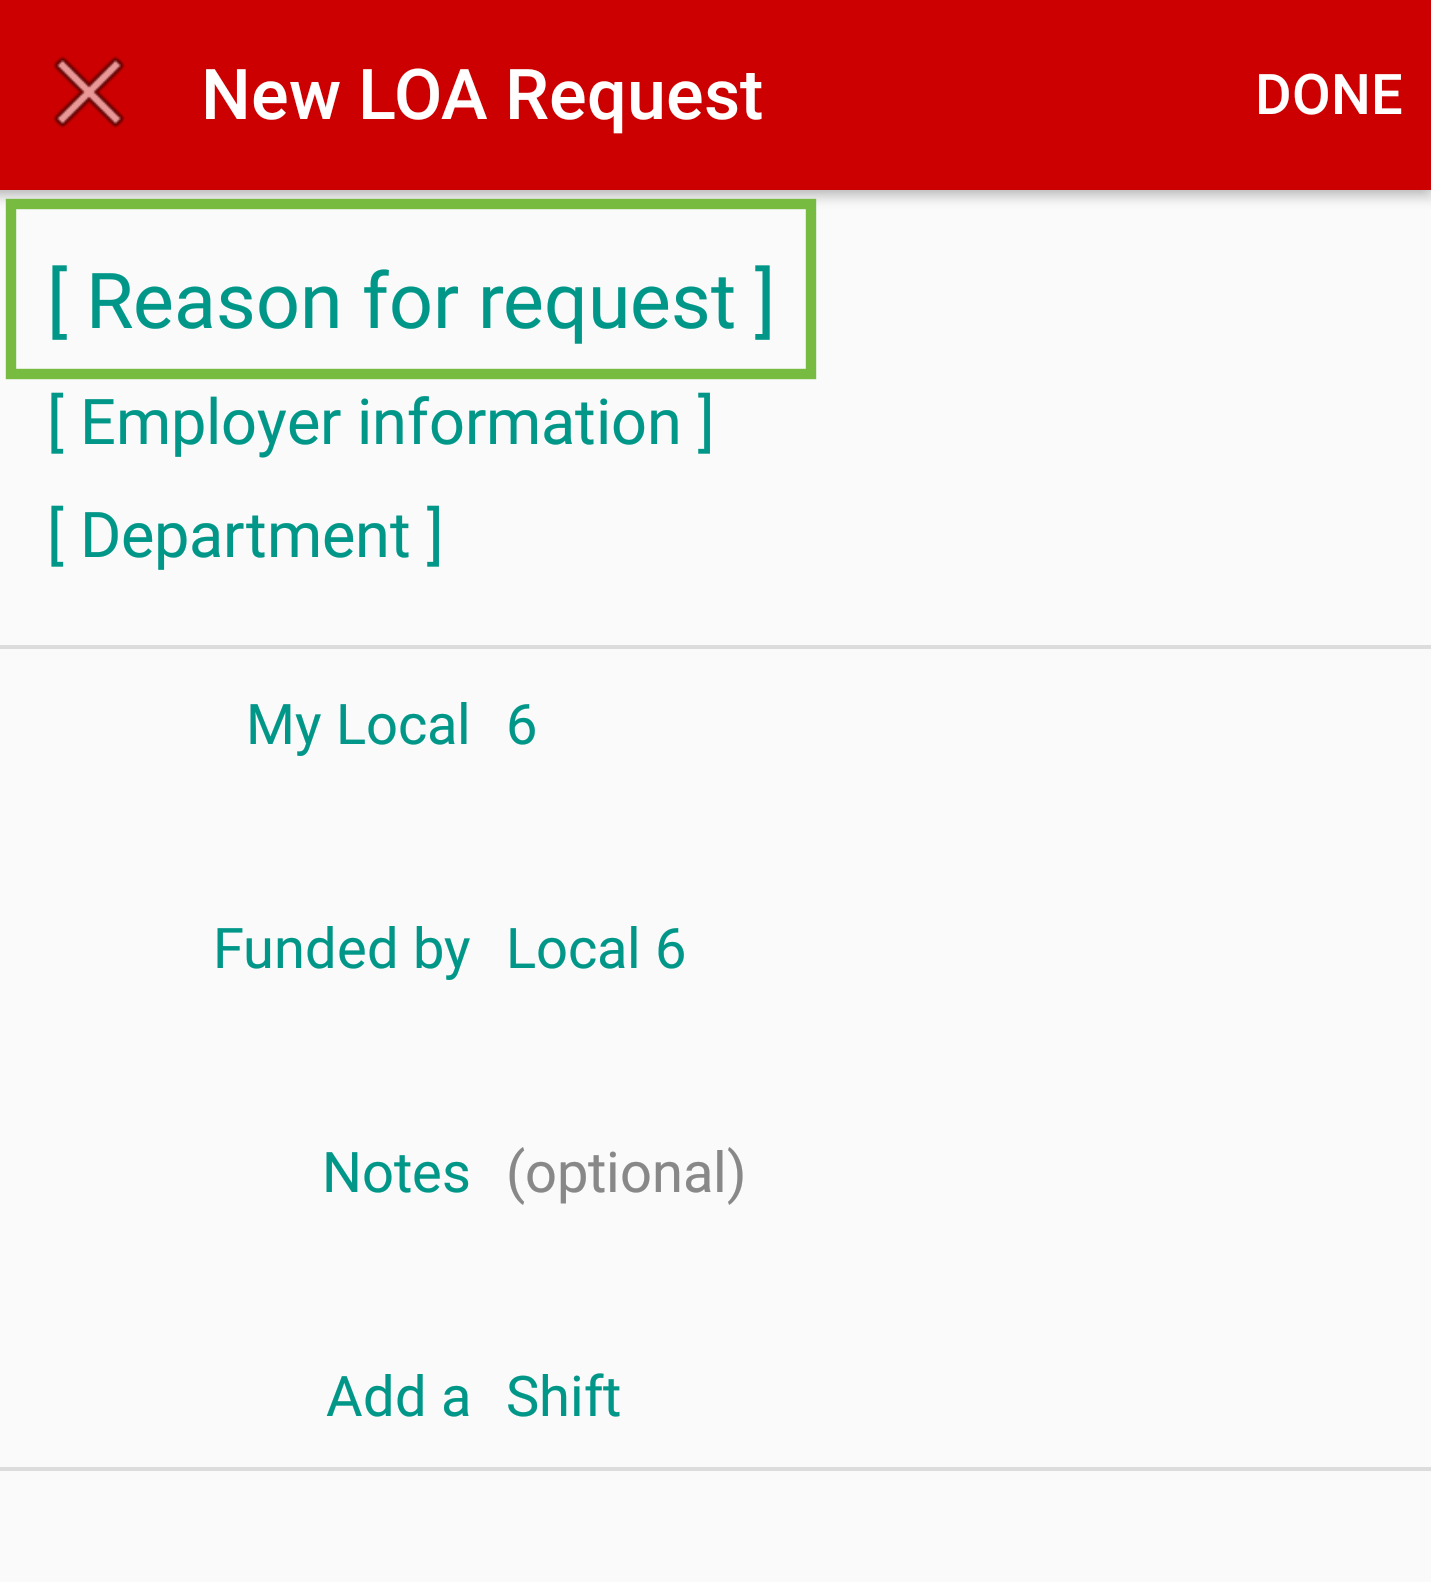
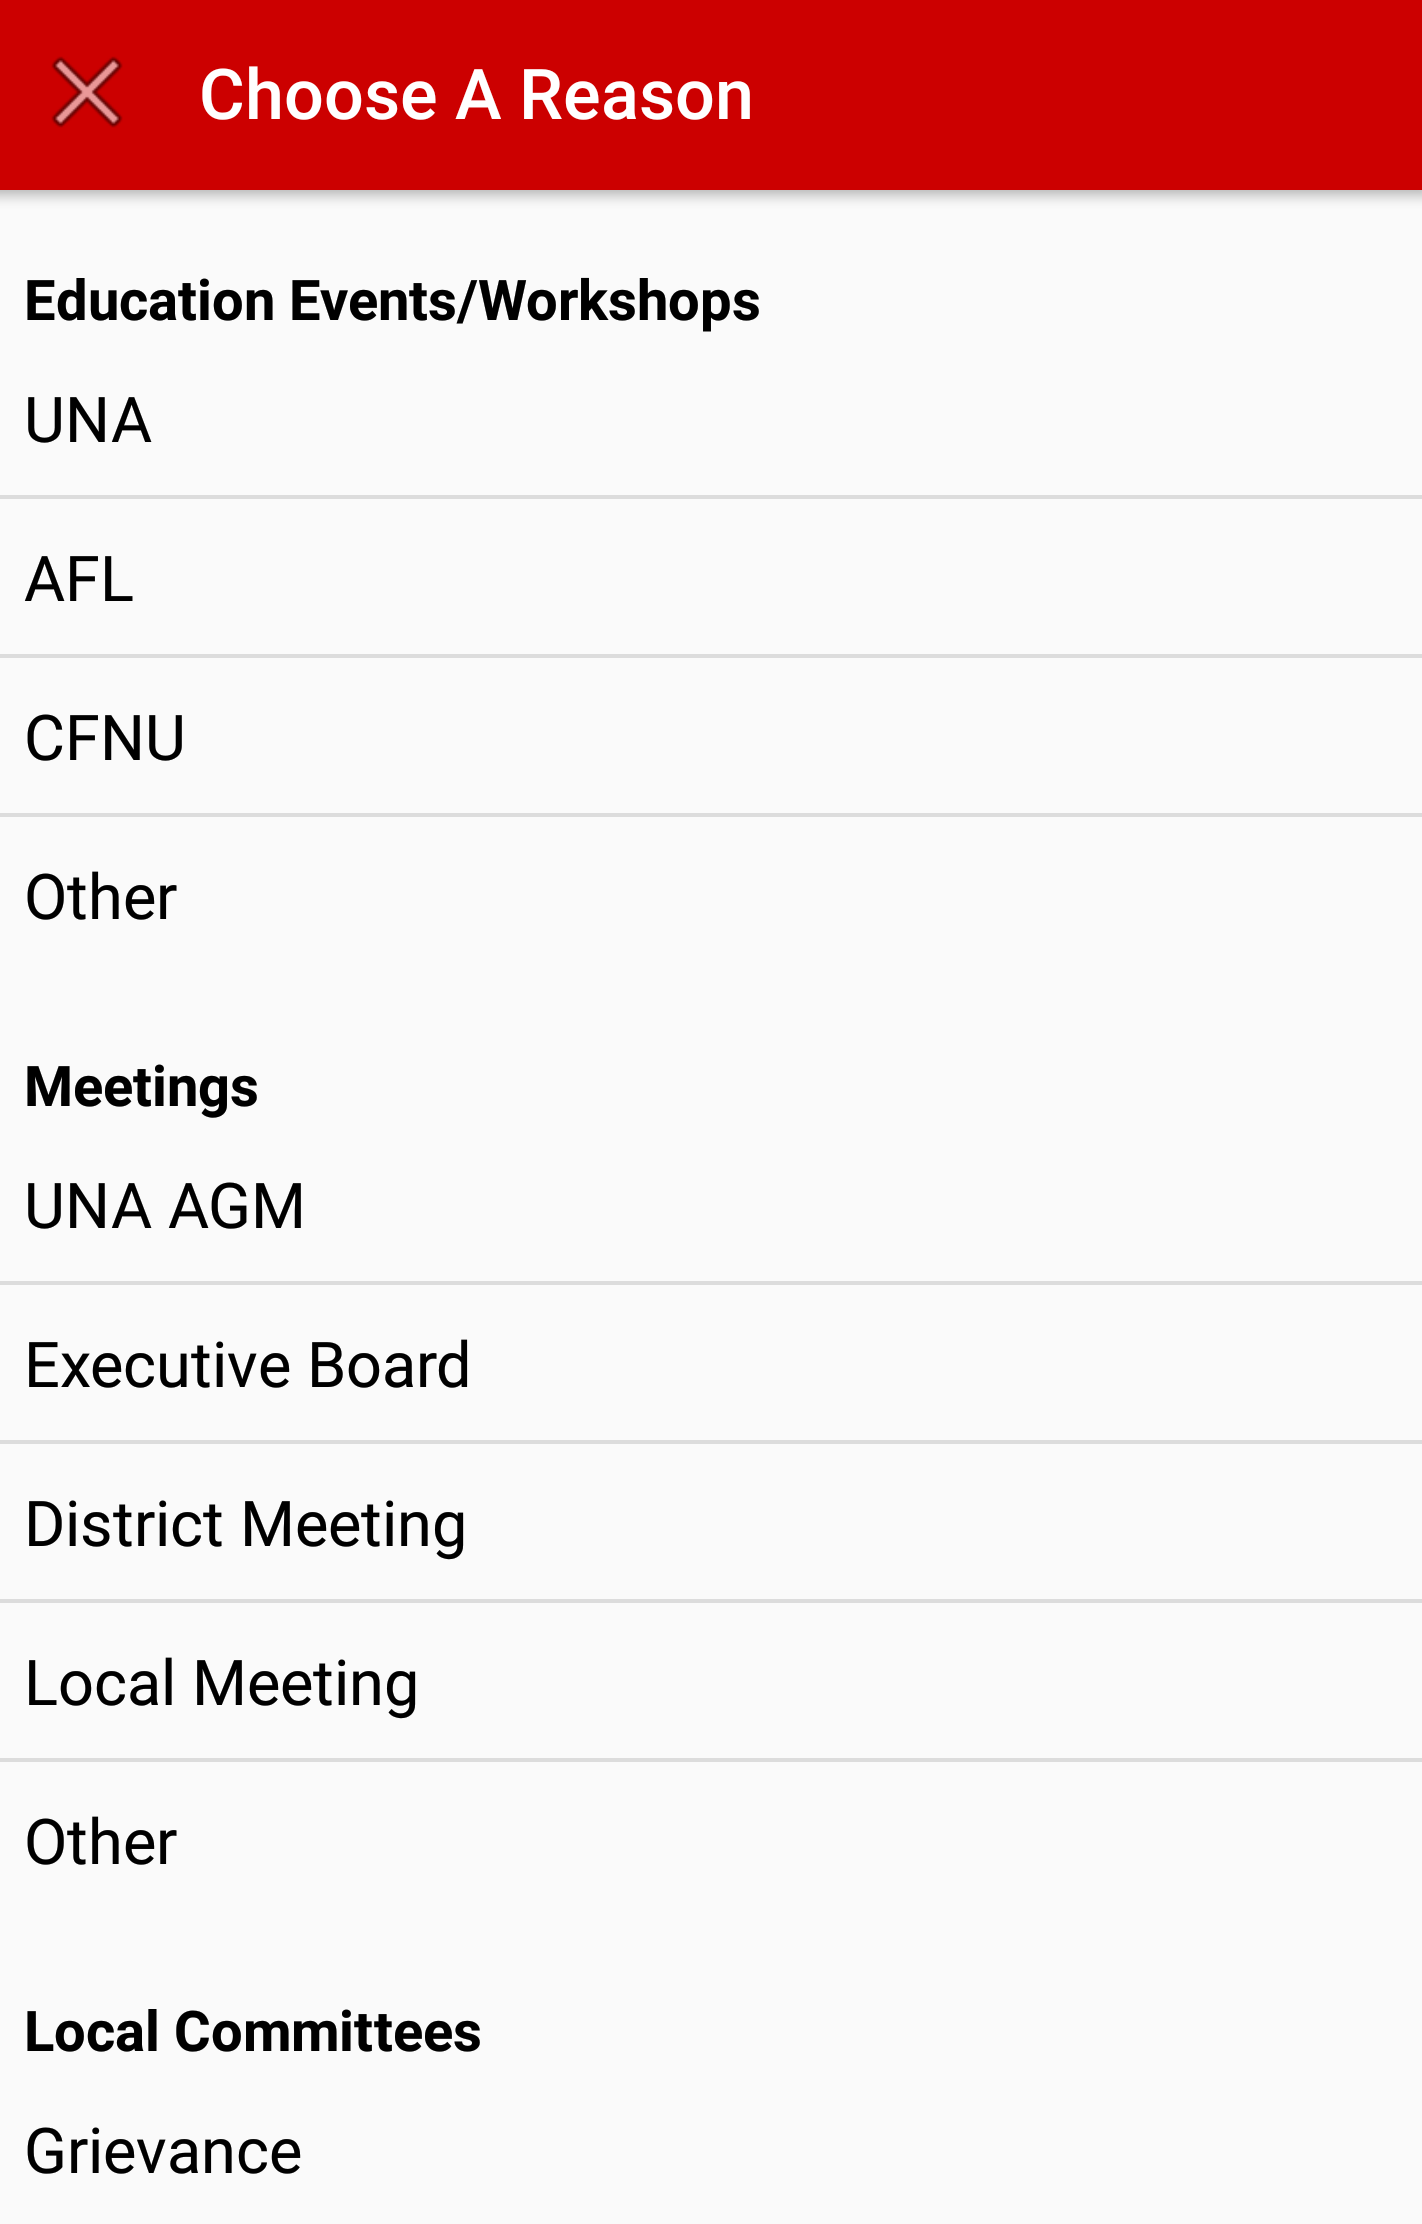
Select an option from the menu. If the correct option is not included, tap Other and type the correct information into the text field.
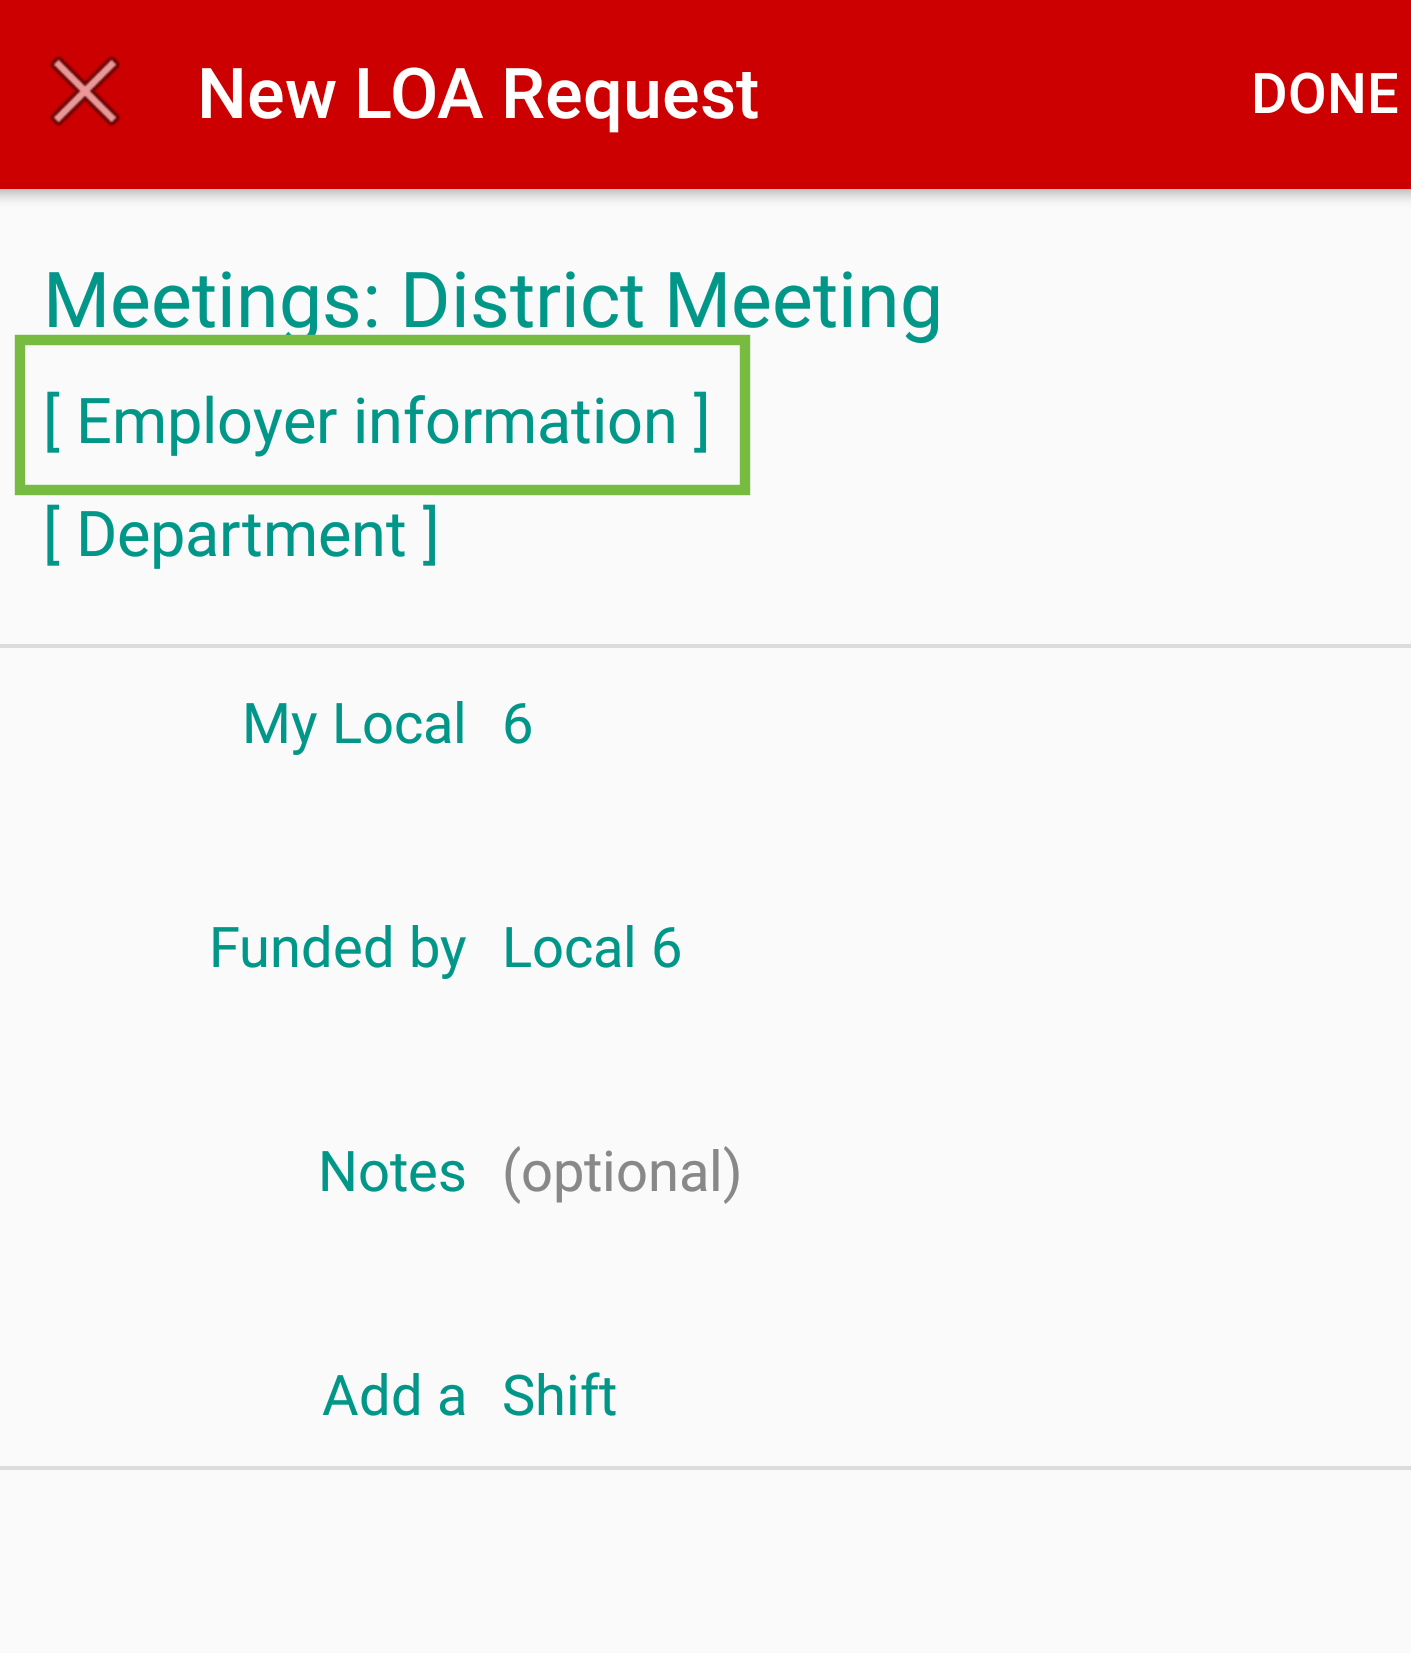
Next tap Employer information.
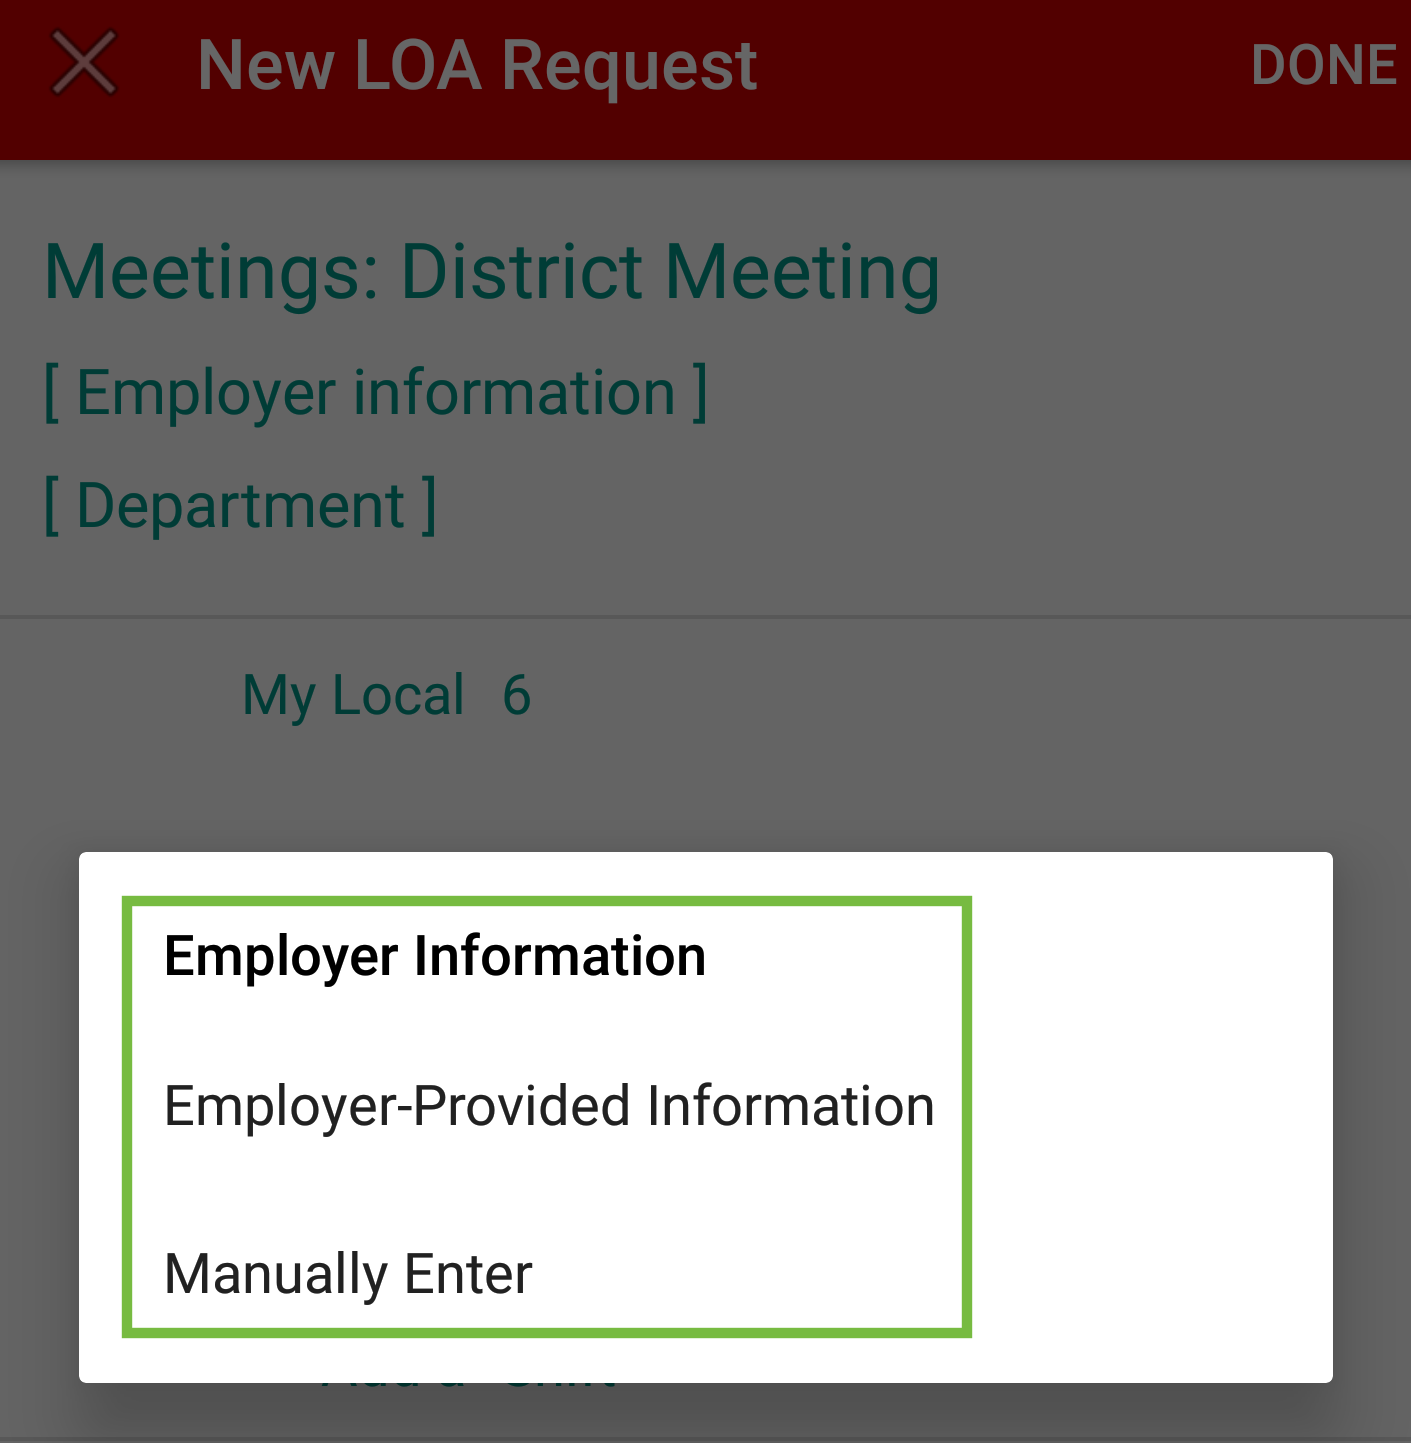
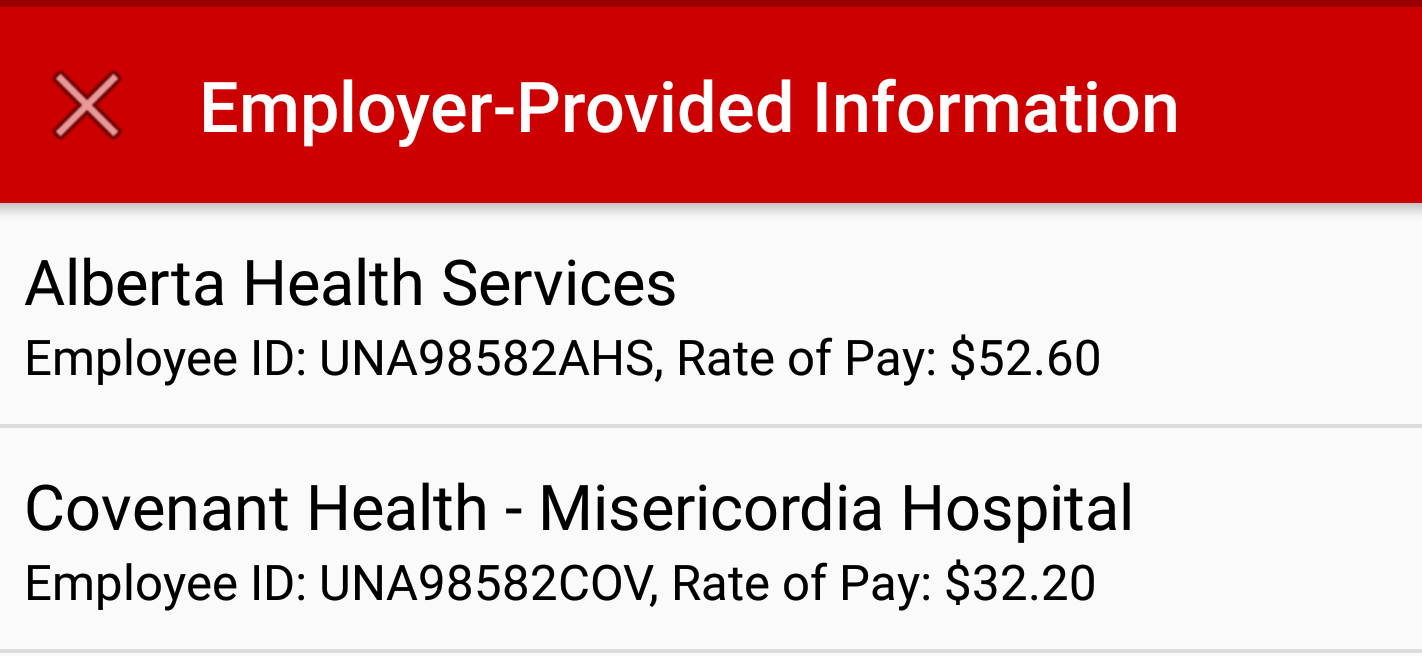
Two options for Employer information will appear. Employer-Provided Information or Manually Enter. If the electronic information is not available in the database , system will automatically default to Manually Enter.
Employer Provided Information tap on the information that pertains to the LOA. If the electronic information is not available in the data base, automatically default to Manually Enter.
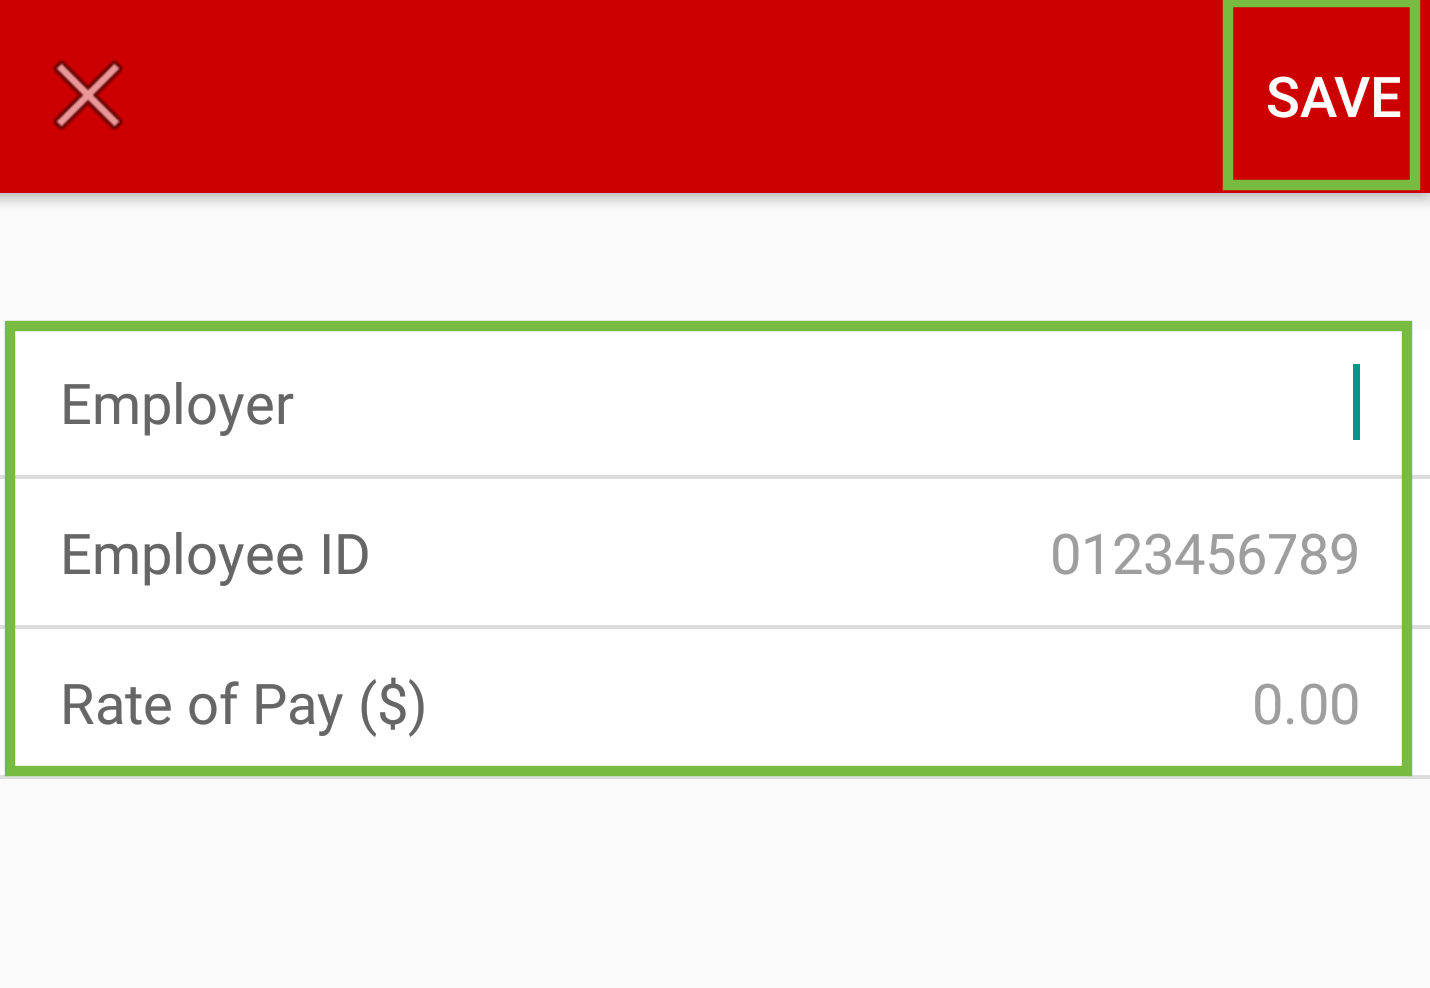
Manually Enter – Complete the Employer, Employee ID and Rate of Pay. Once completed tap Save in top right hand corner.
Next tap Department.
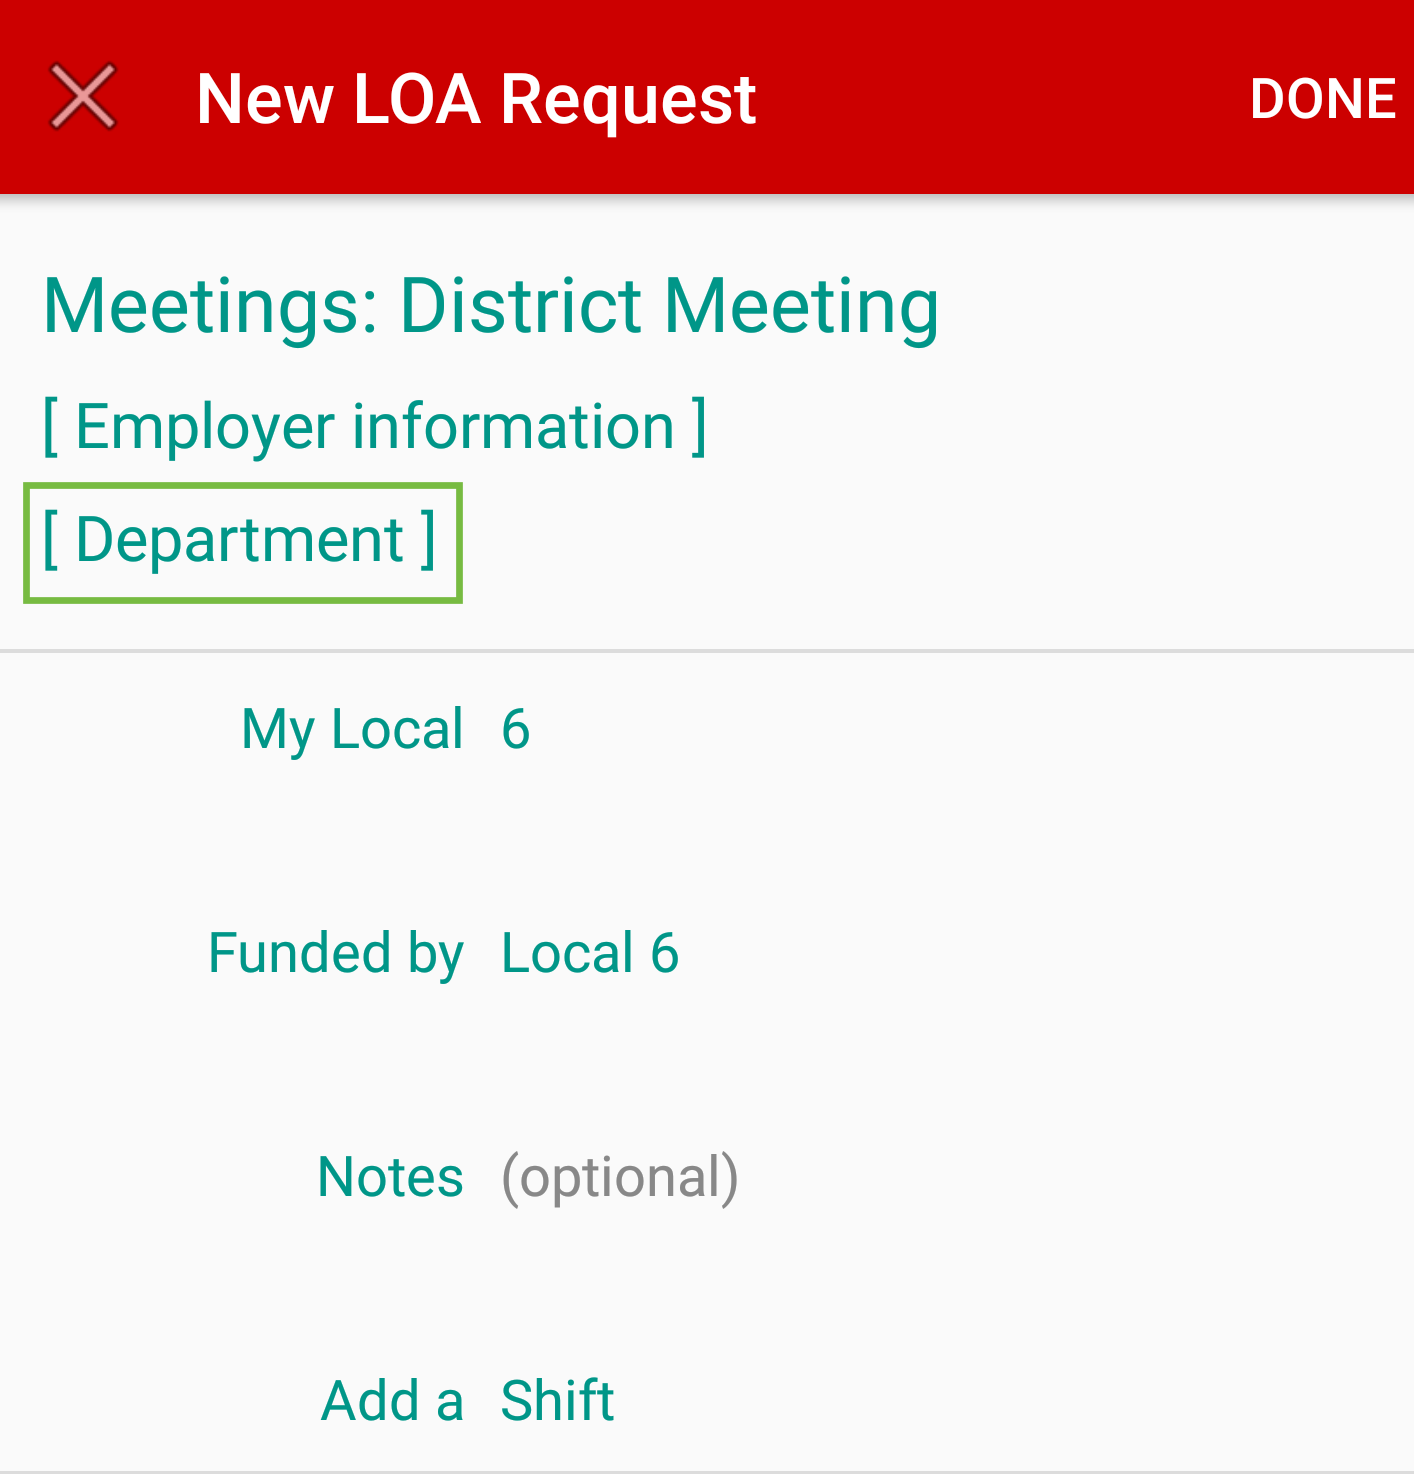
Manually enter the department in the Department field and tap Save in the top right hand corner.

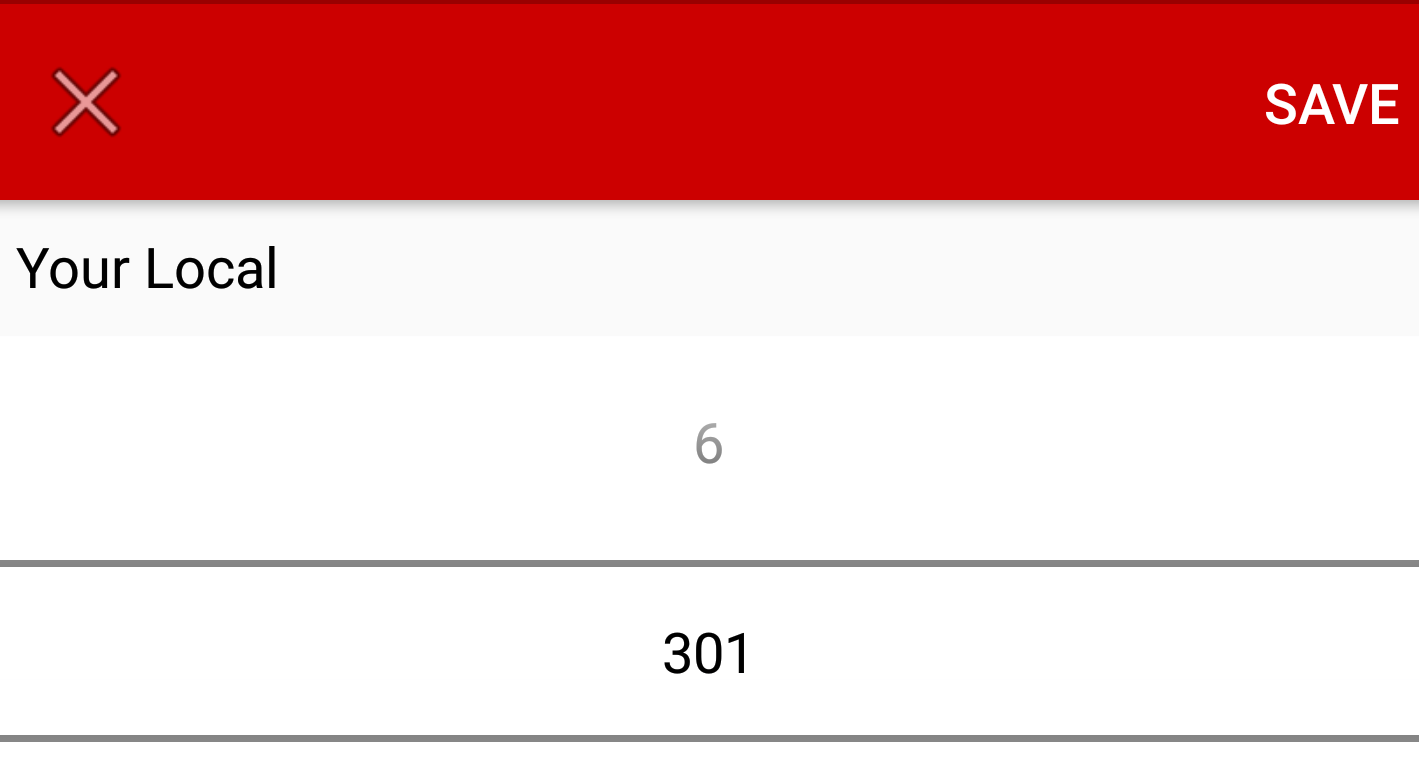
To select My Local, tap the line and the number of the Local will appear. A list will appear if the member belongs to more than one Local. The member can select the Locals which they belong to.

Tap Save once the Local has been chosen.
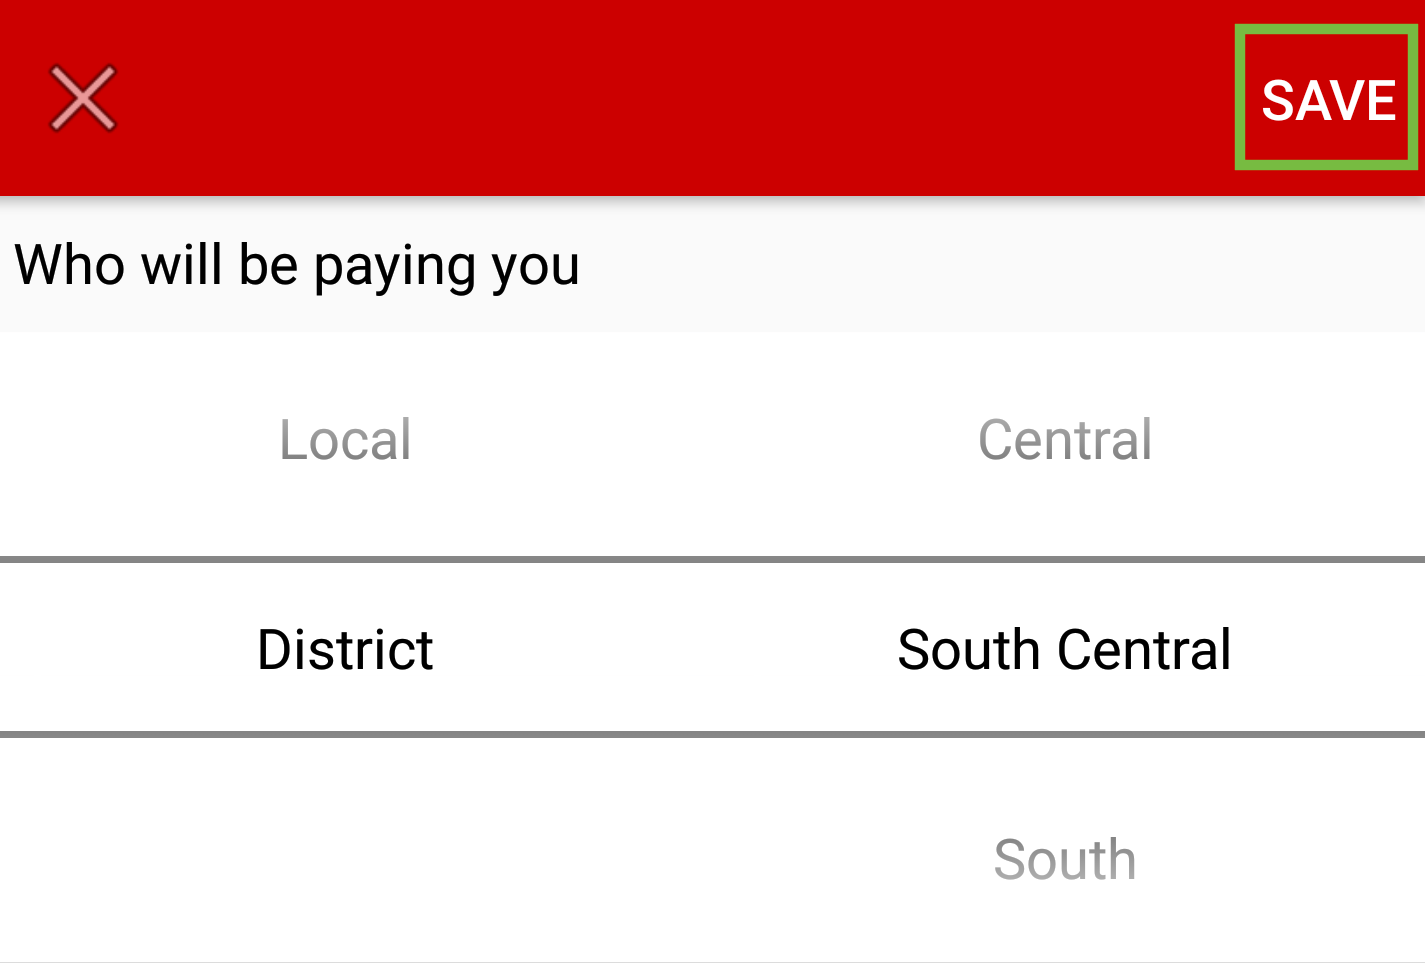
To choose the Funded by, tap the line.

The option for Provincial, Local or District are available by scrolling and selecting the correct one. Then tap Save.
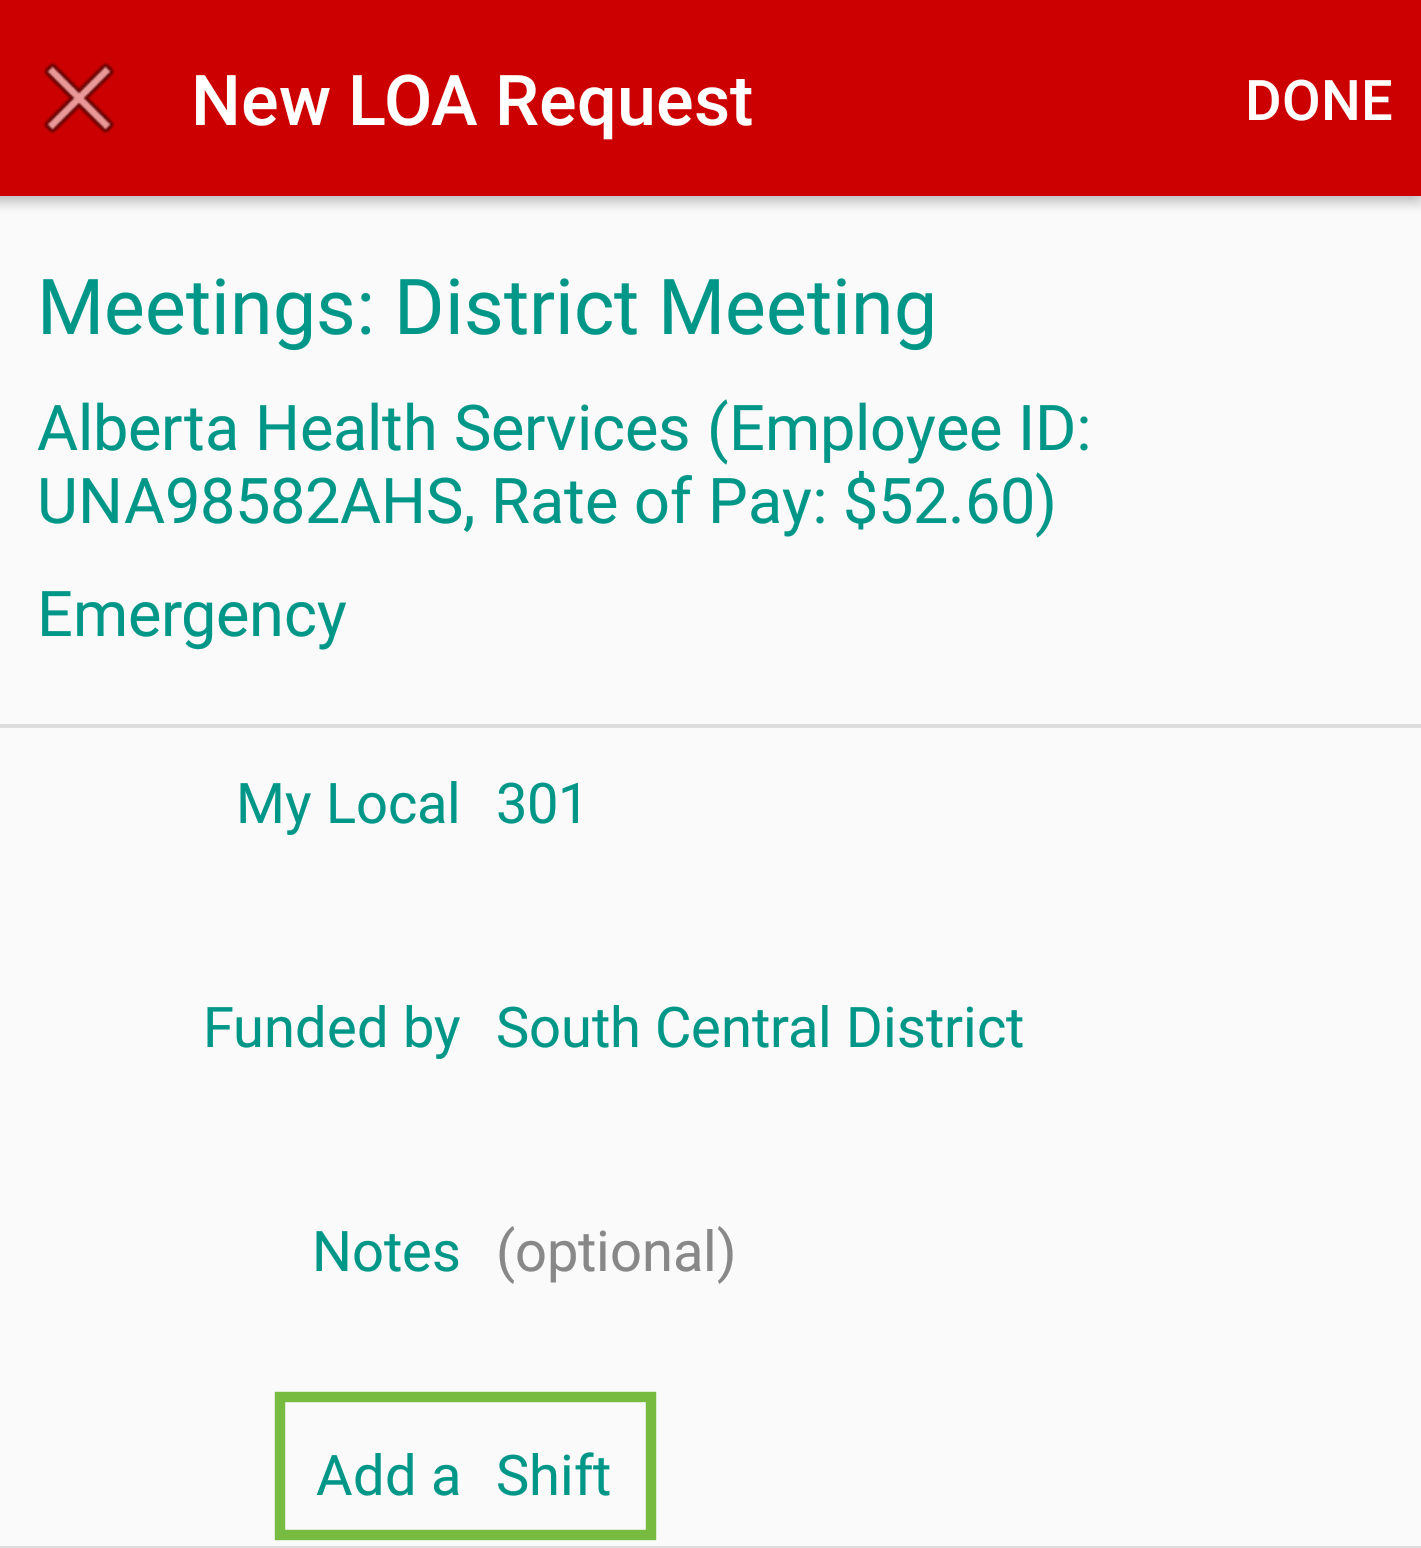
The Notes line is accessed by a tap on line and only needs to be completed if applicable. Manually enter text for the LOA.

Tap Add a Shift to enter LOA information.
Complete the information for the Shift To Requesting Off. Tap Add.
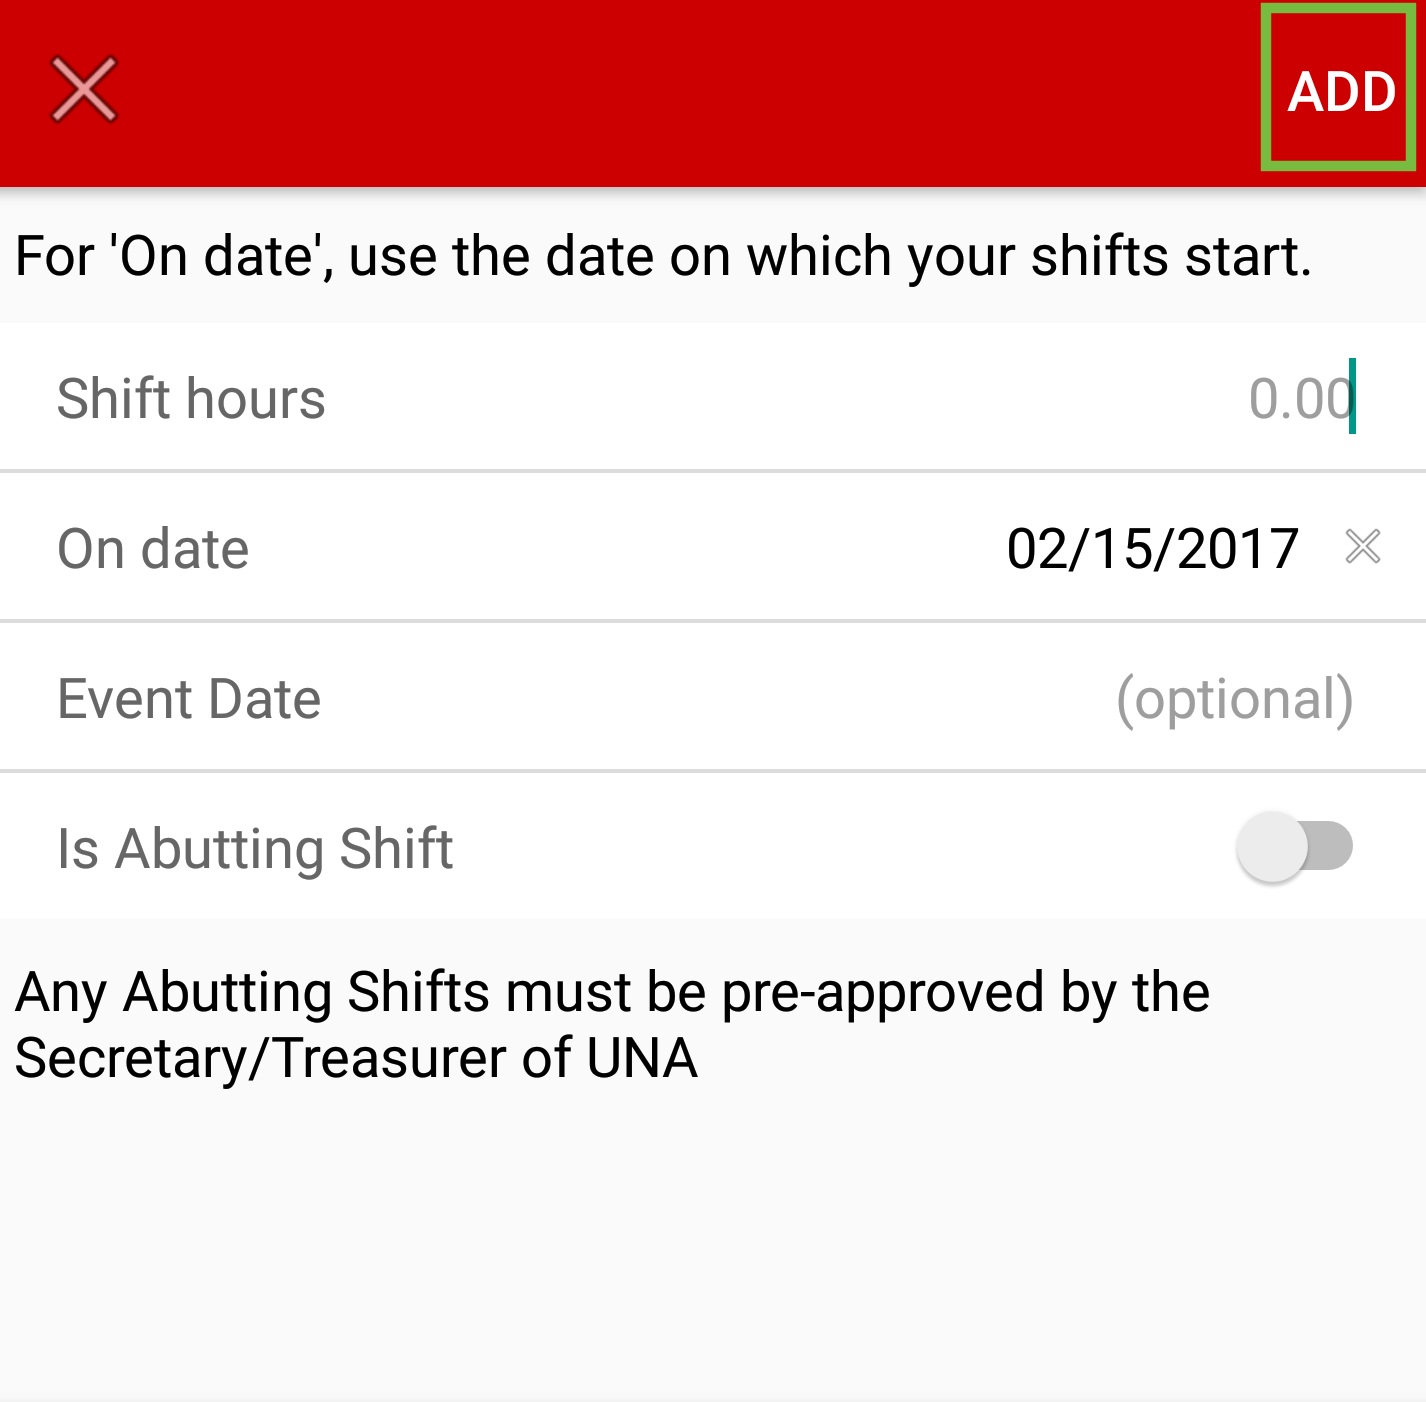
**Any Abutting Shift must be pre-approved by UNA. **
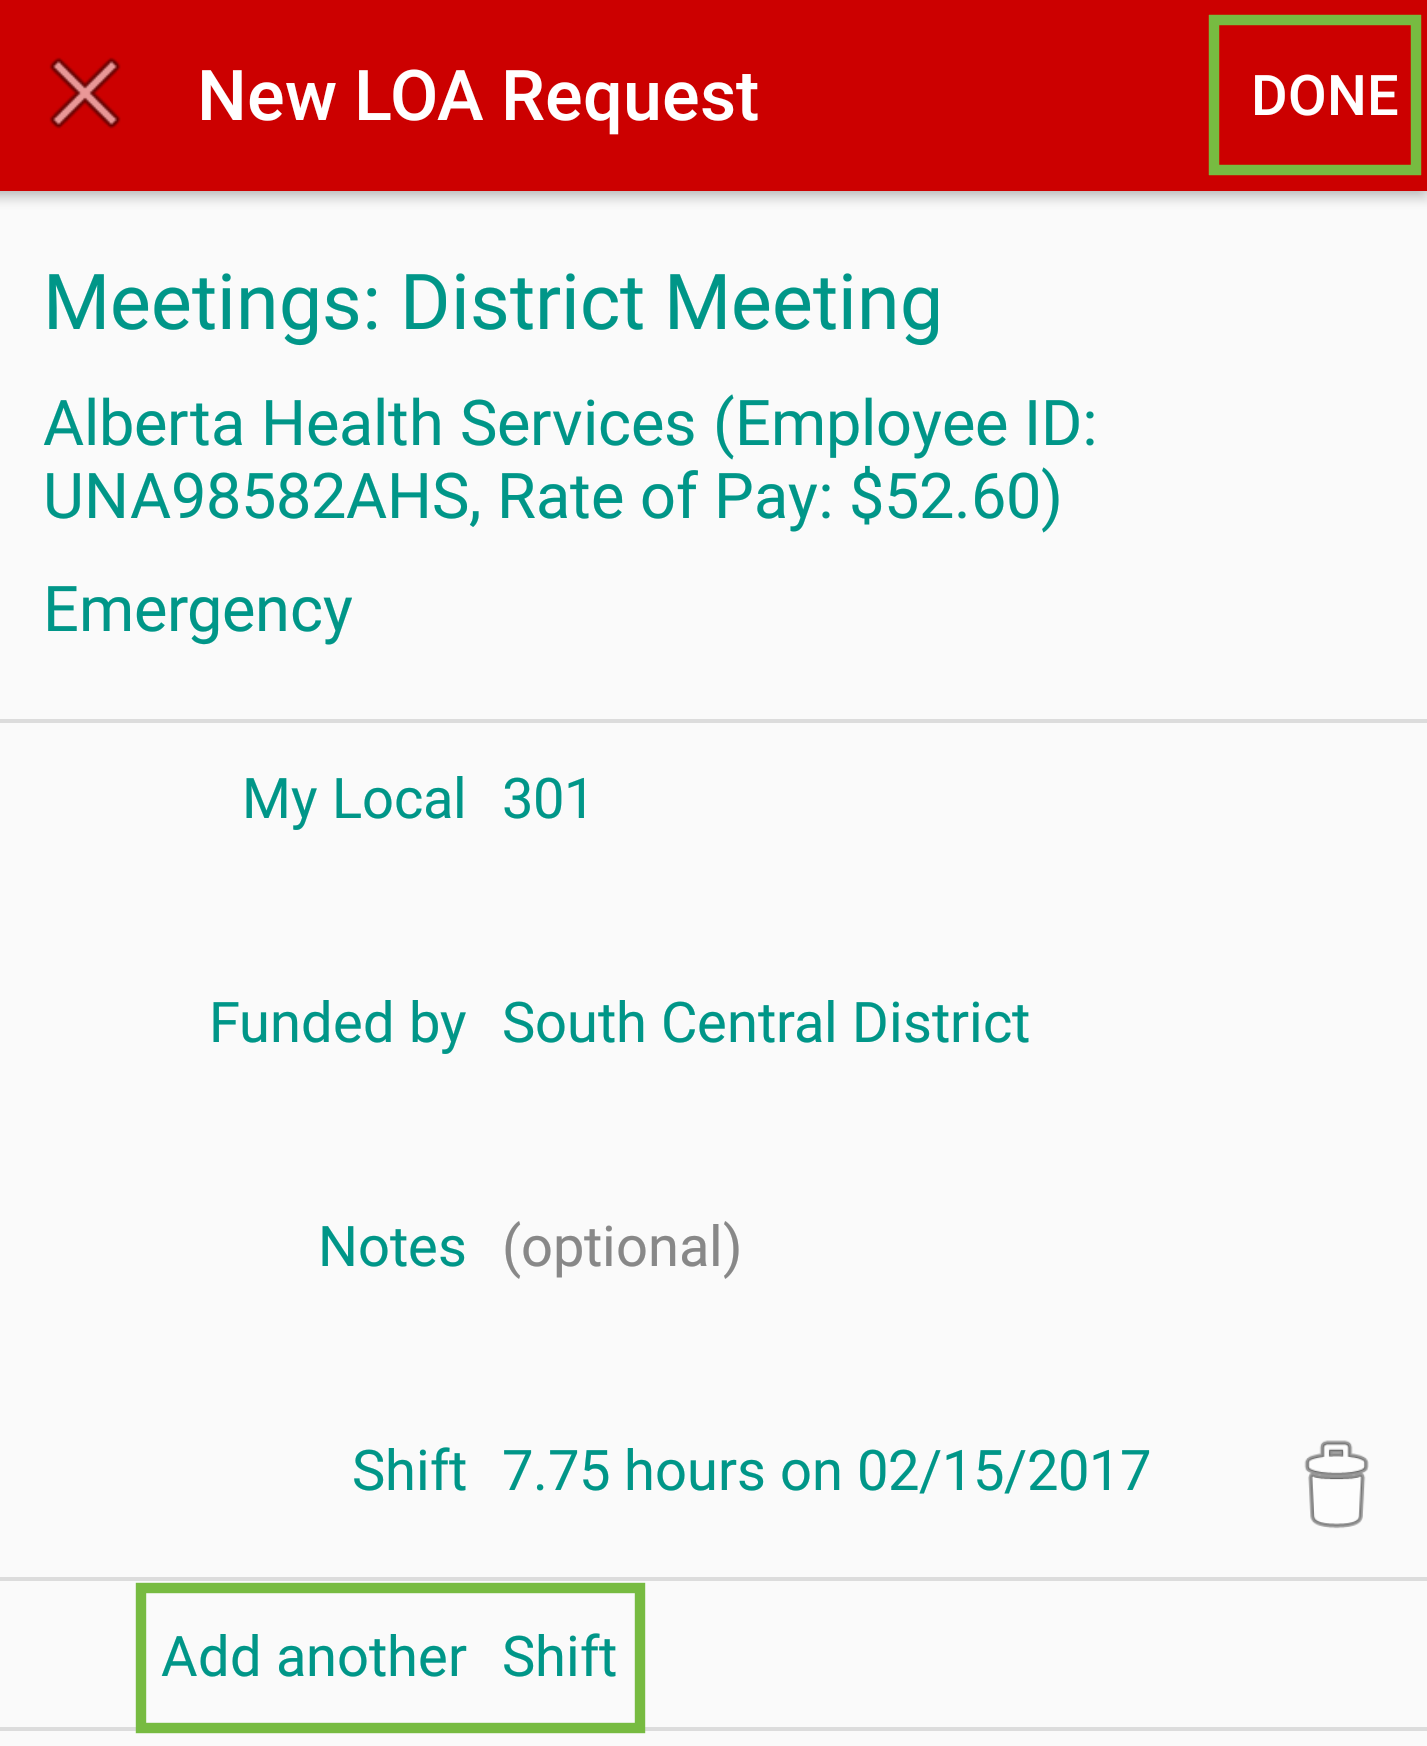
If another shift is required for the LOA tap Add another Shift. If not tap Done.
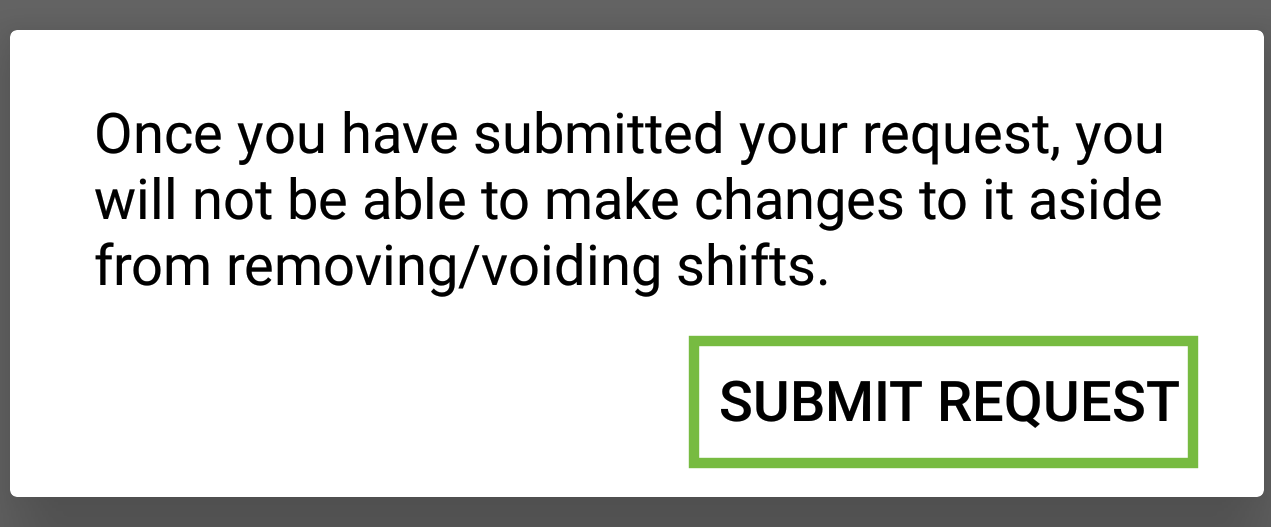
Tap Submit Request.
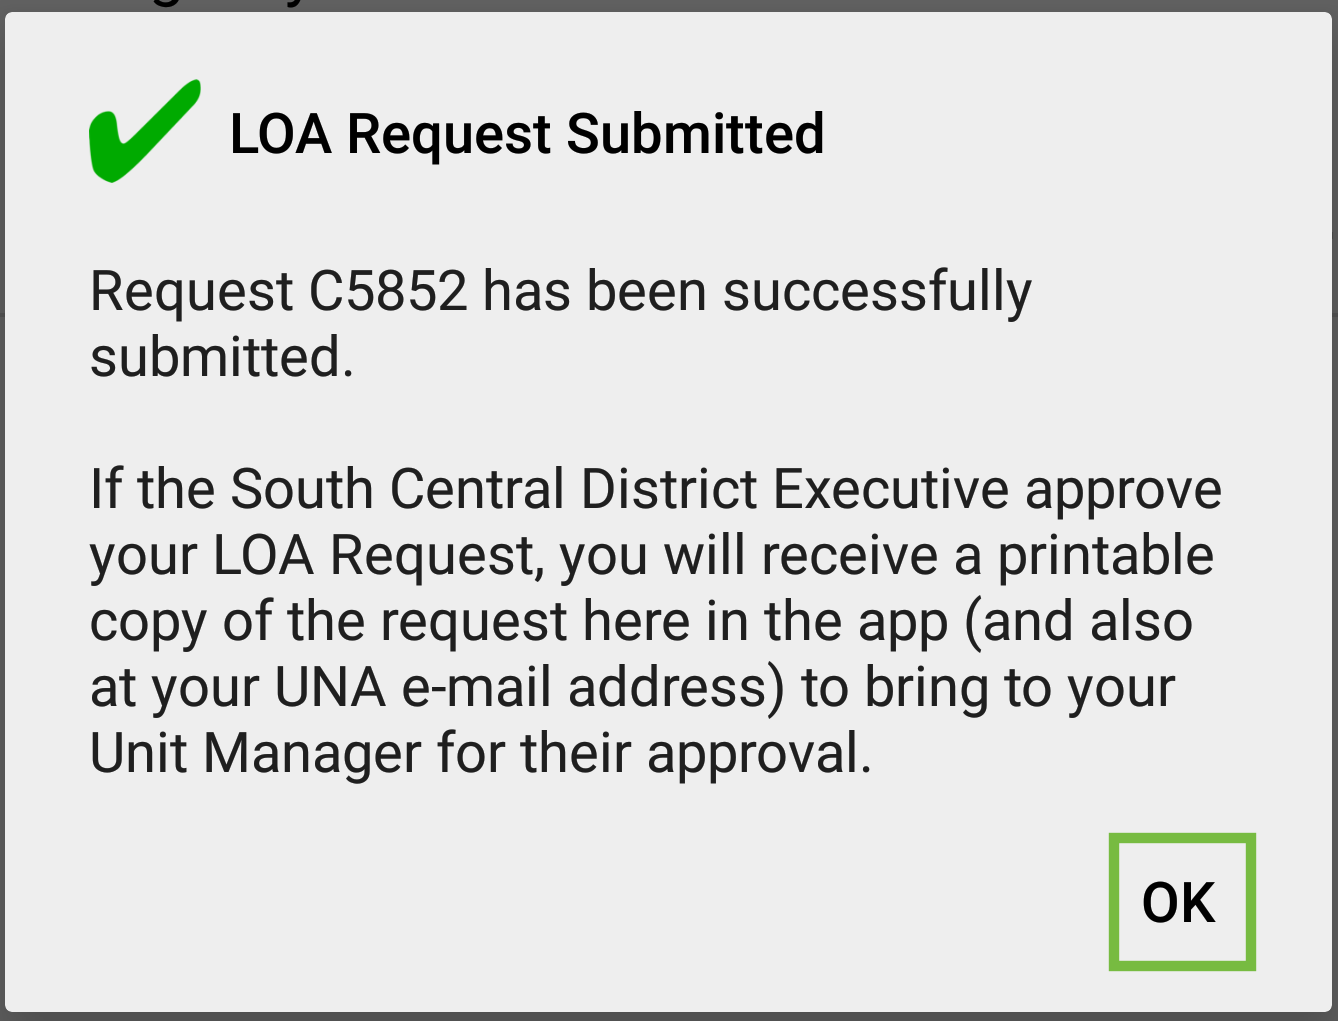
Once submitted, a message confirming the LOA Request Submitted will appear. Tap OK.
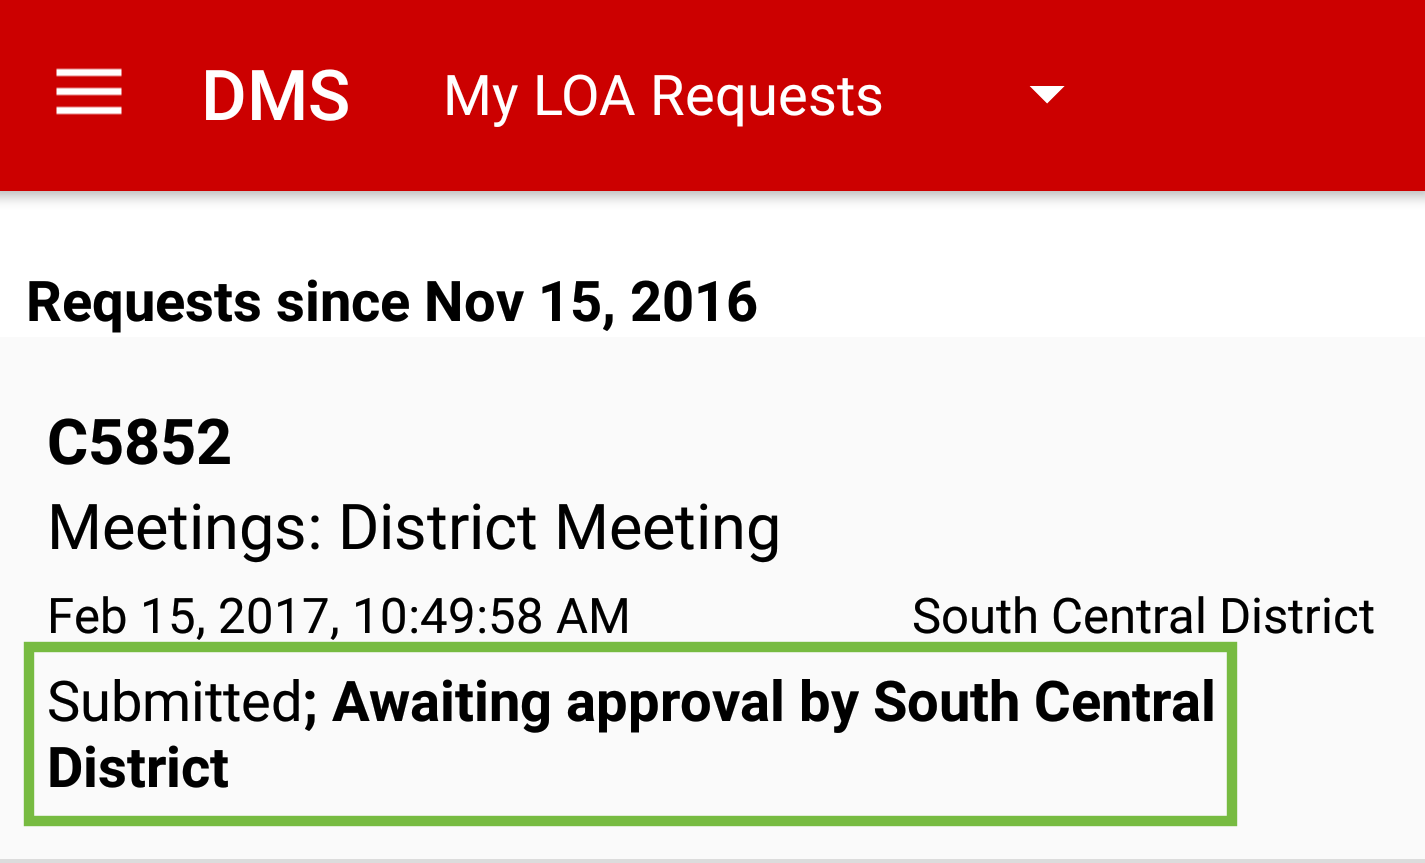
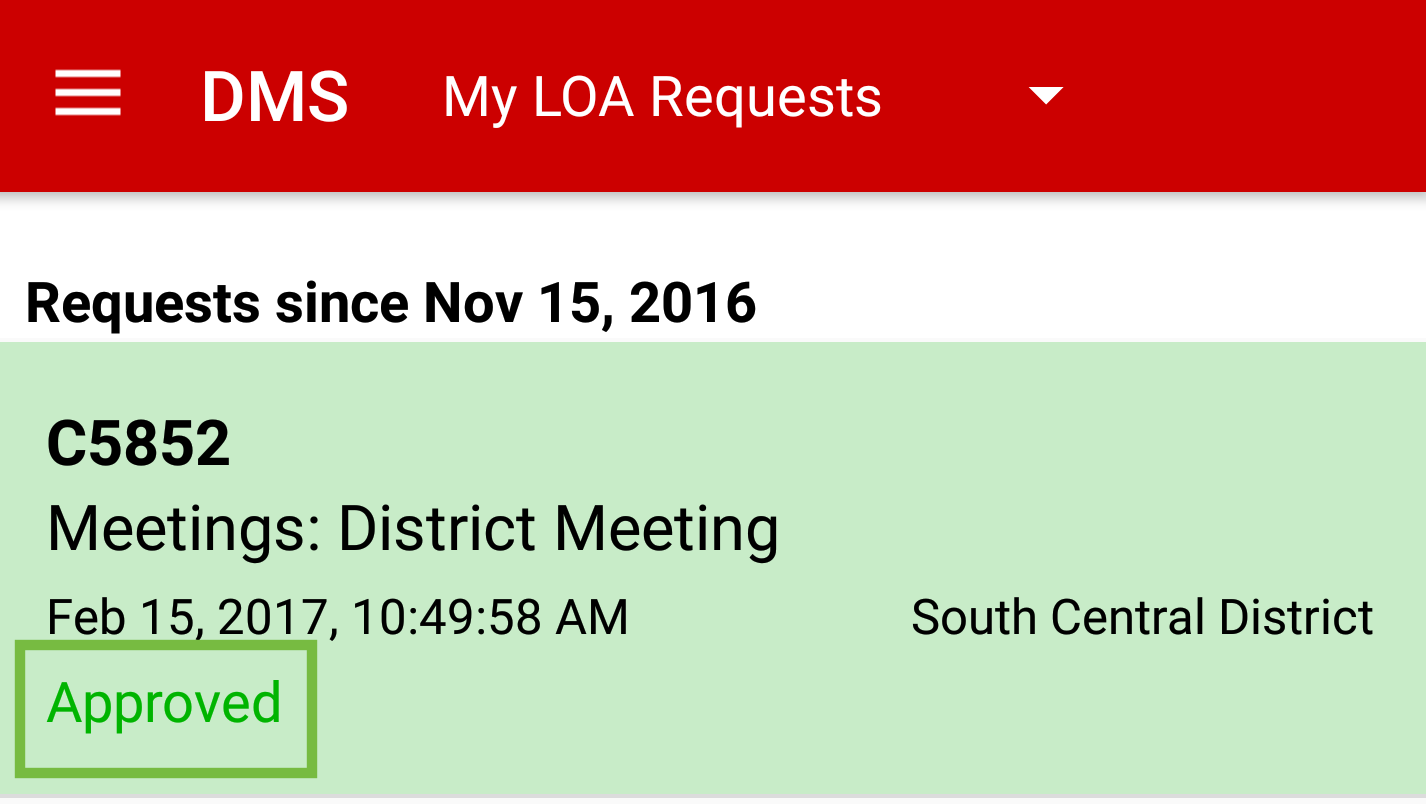
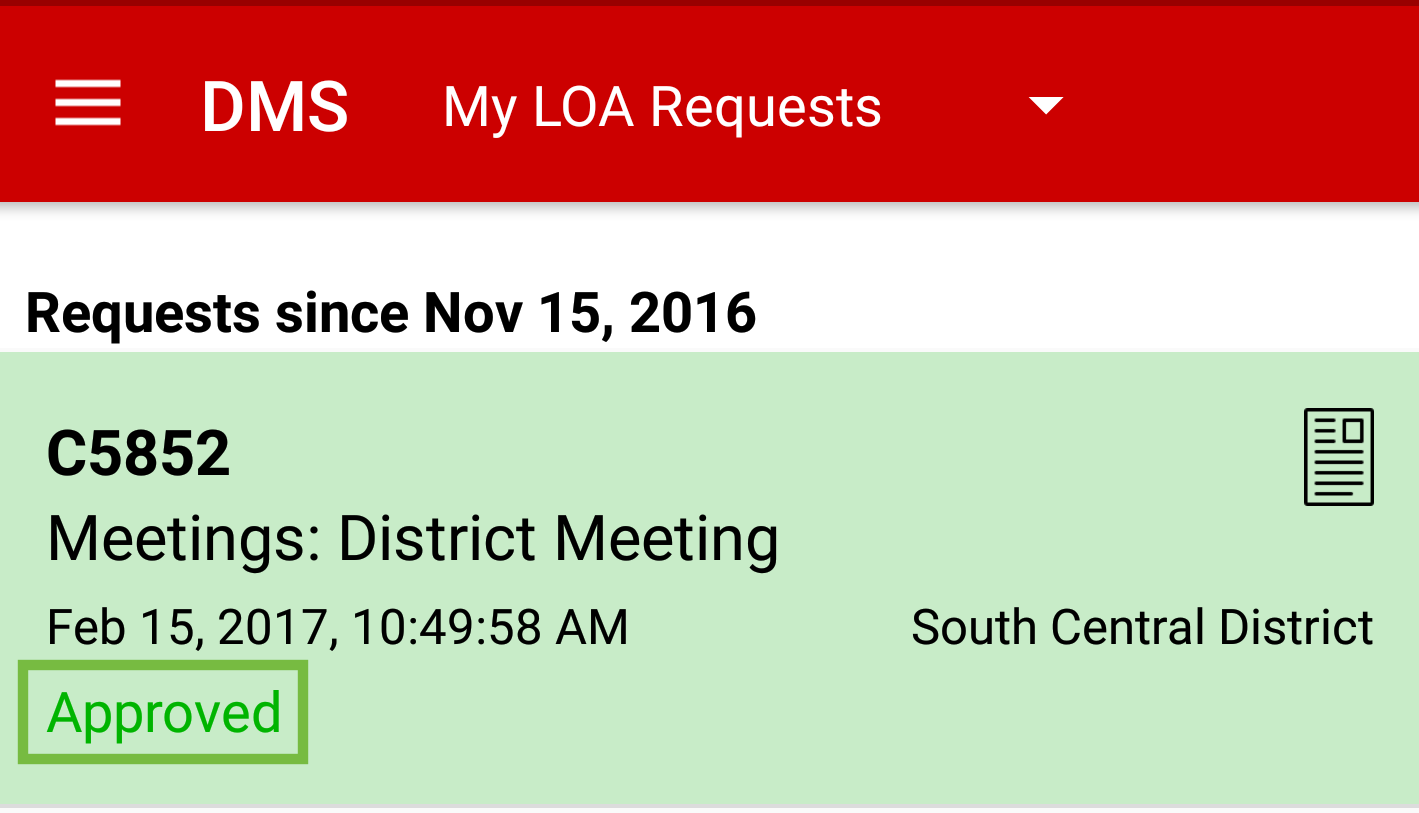
On the My LOA Requests screen, all LOAs will be shown with their status.
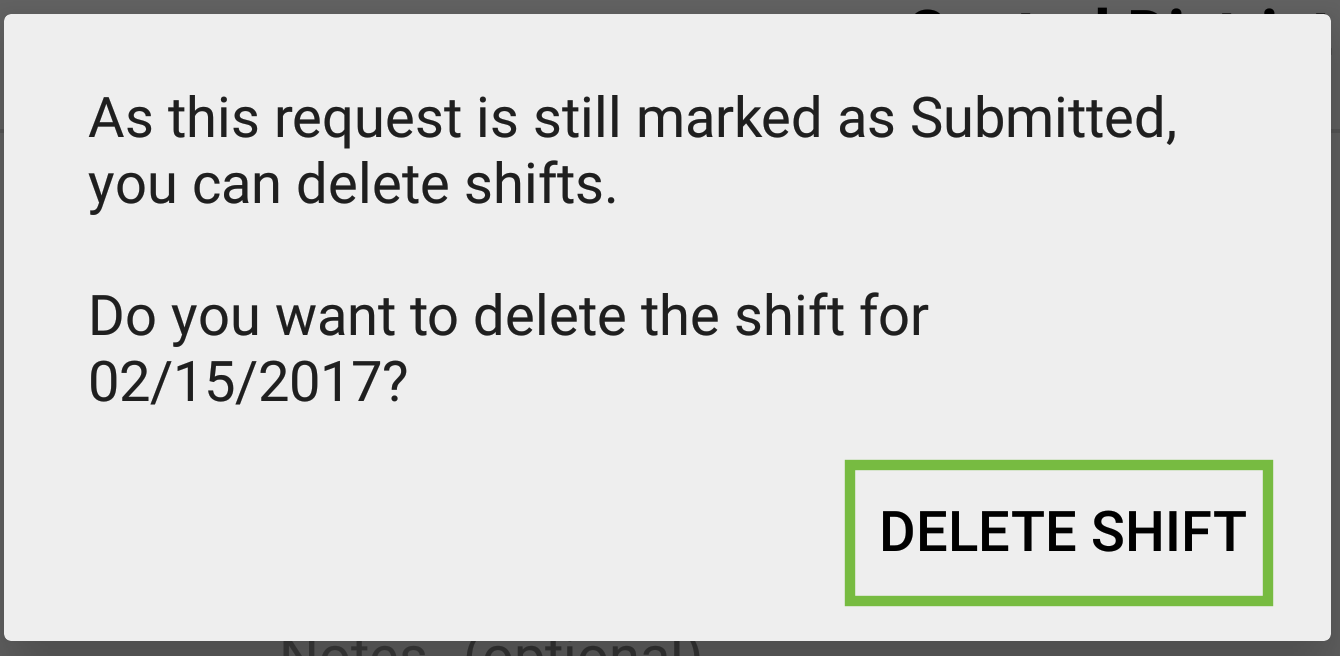
Tap LOA Request to Edit and Delete Shift to remove shift from the form.
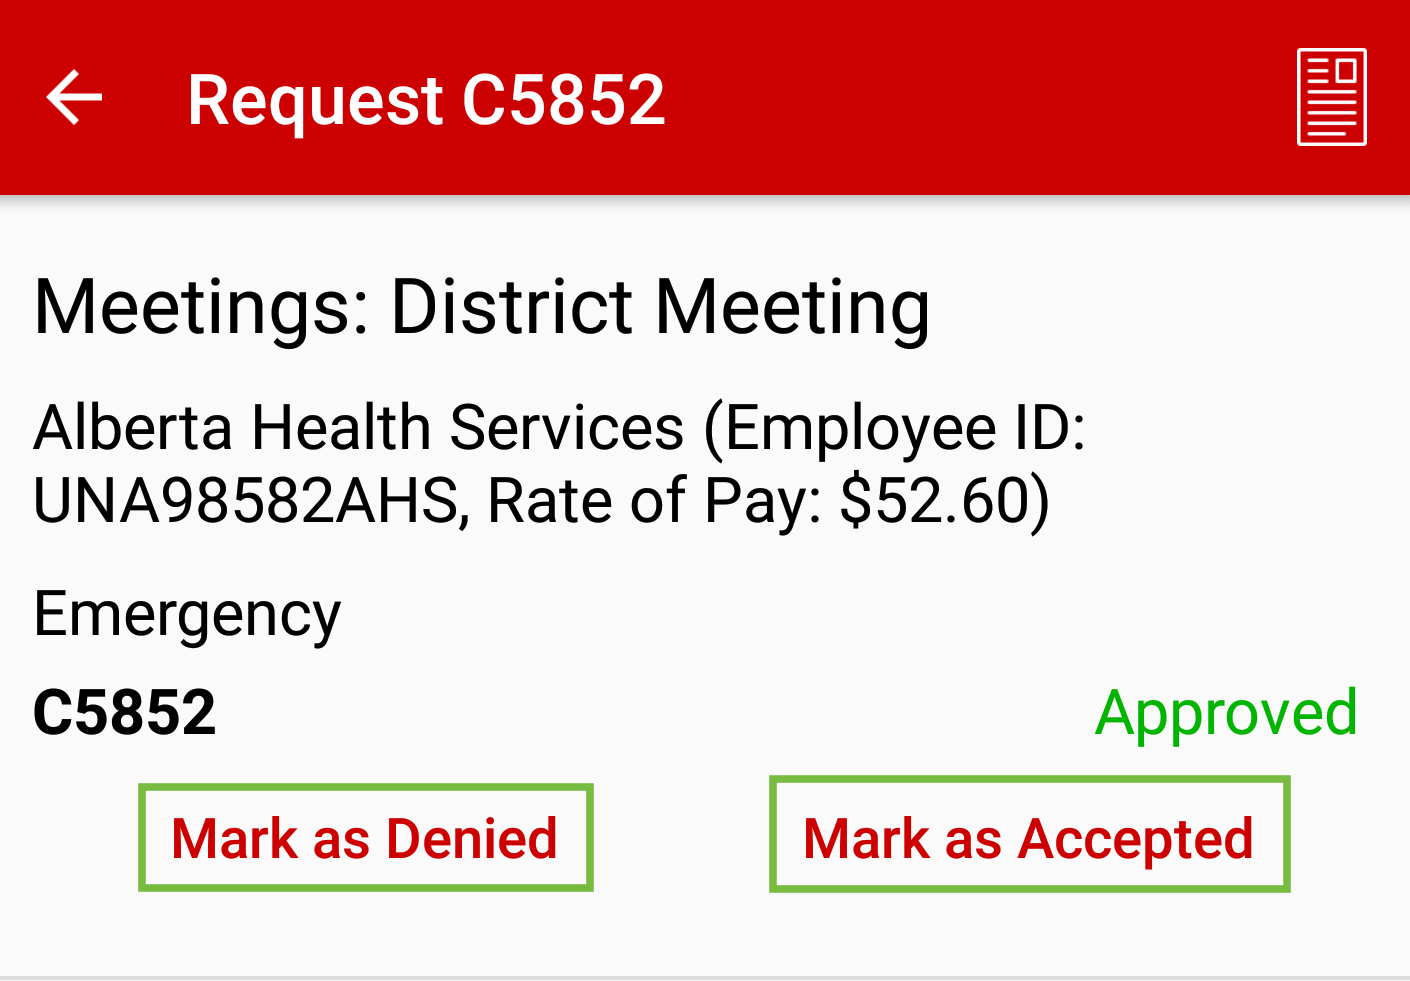
When the funder approves the LOA the status will update to Approved.
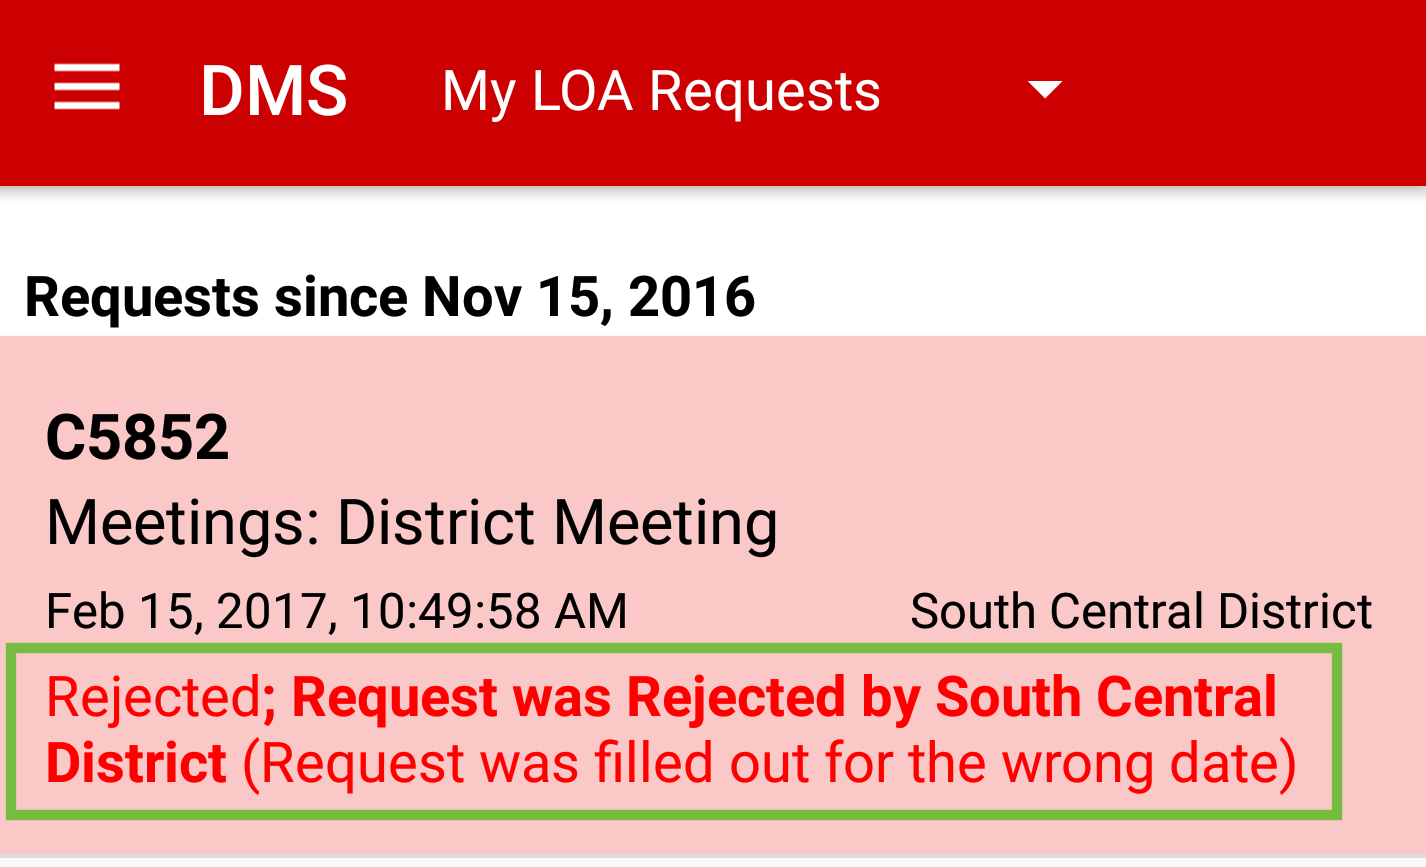
If the LOA Request has been rejected the submission will be highlighted in red and will include a reason for the rejection.
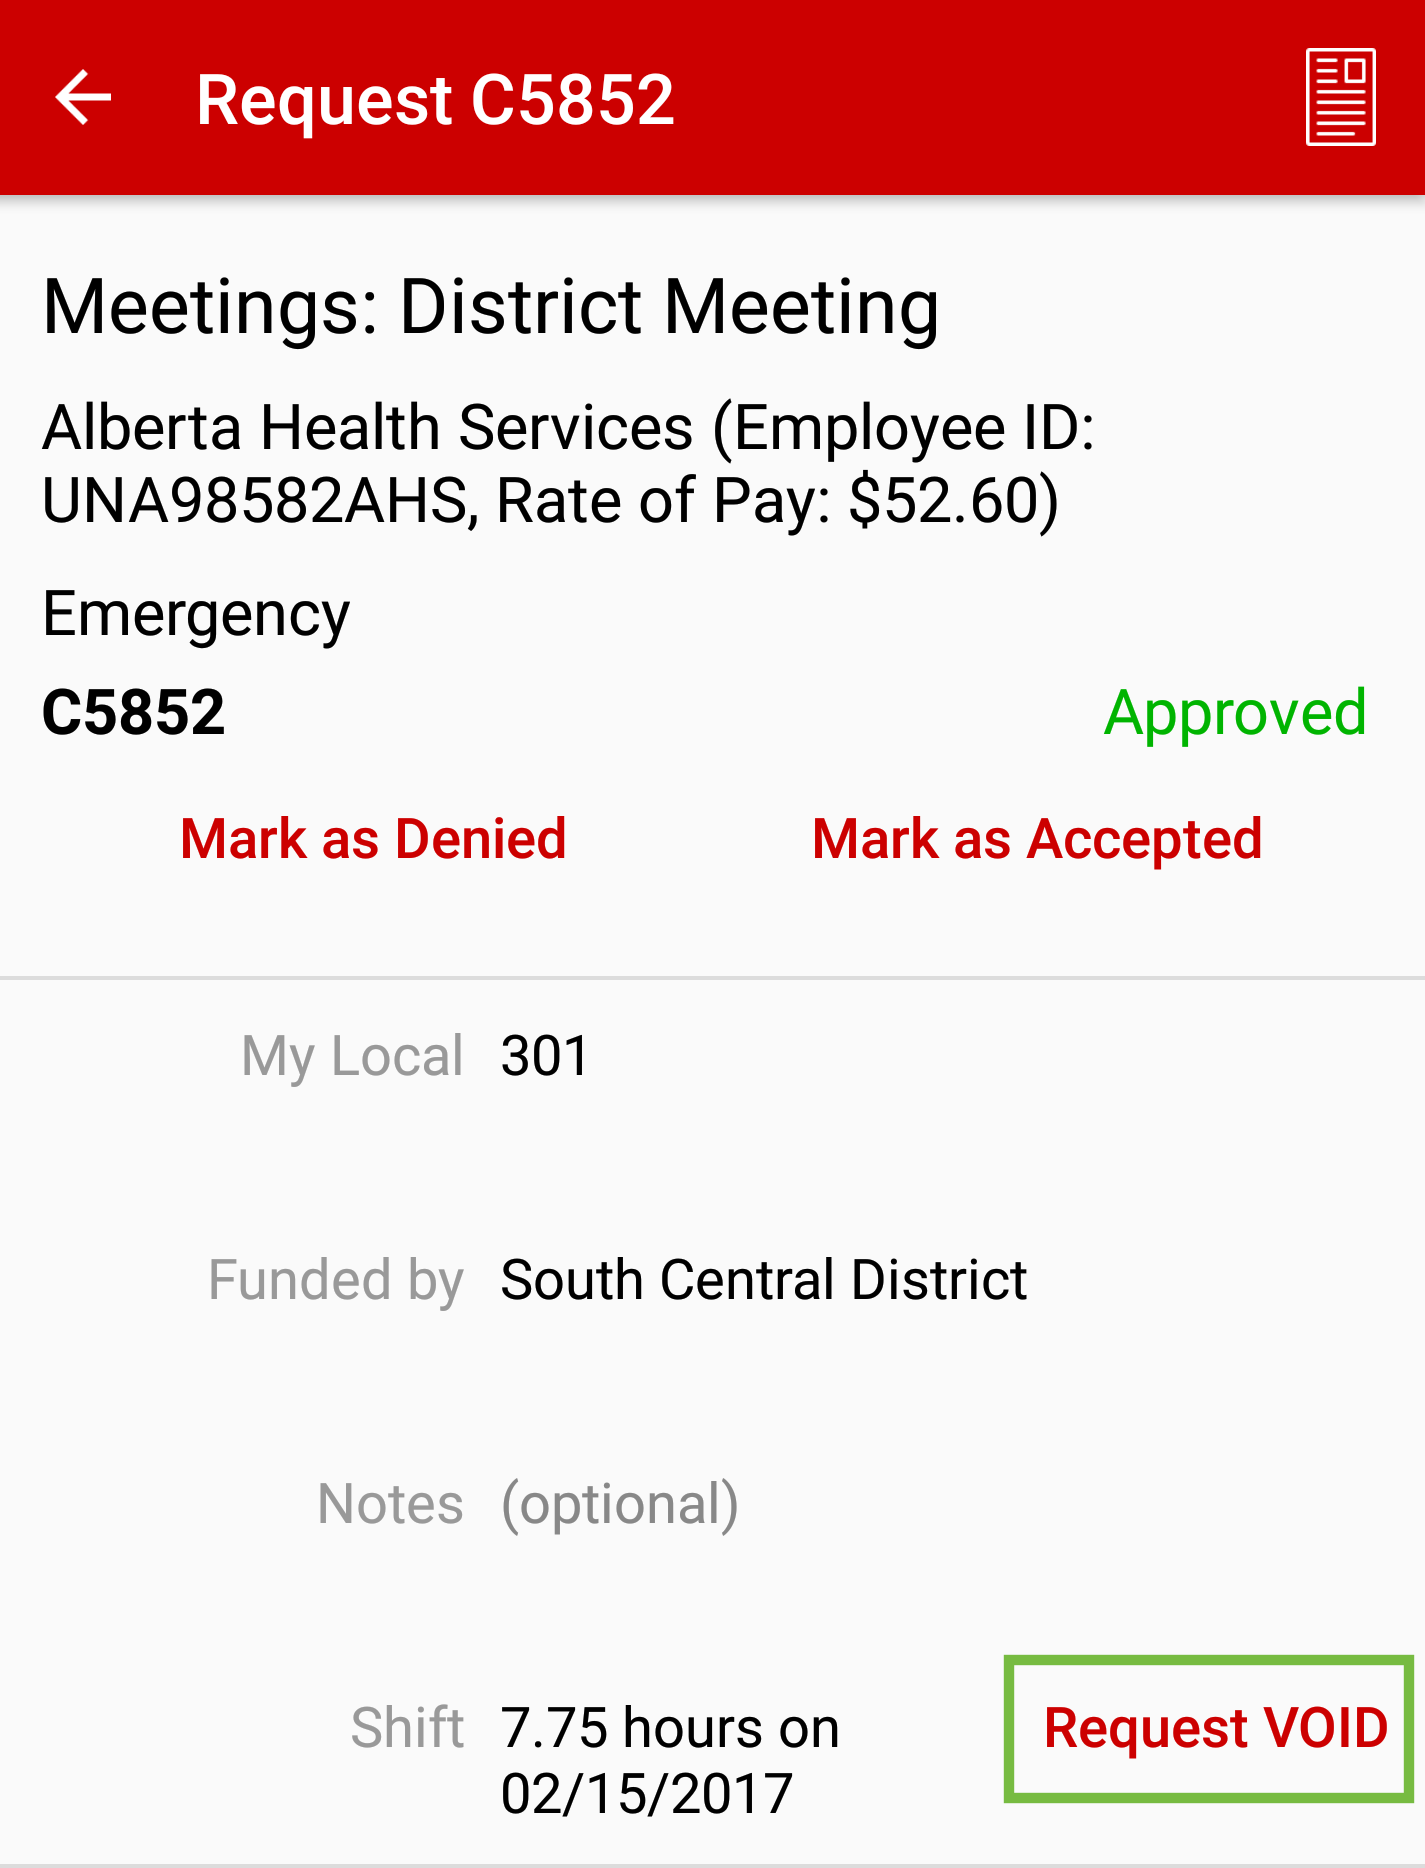
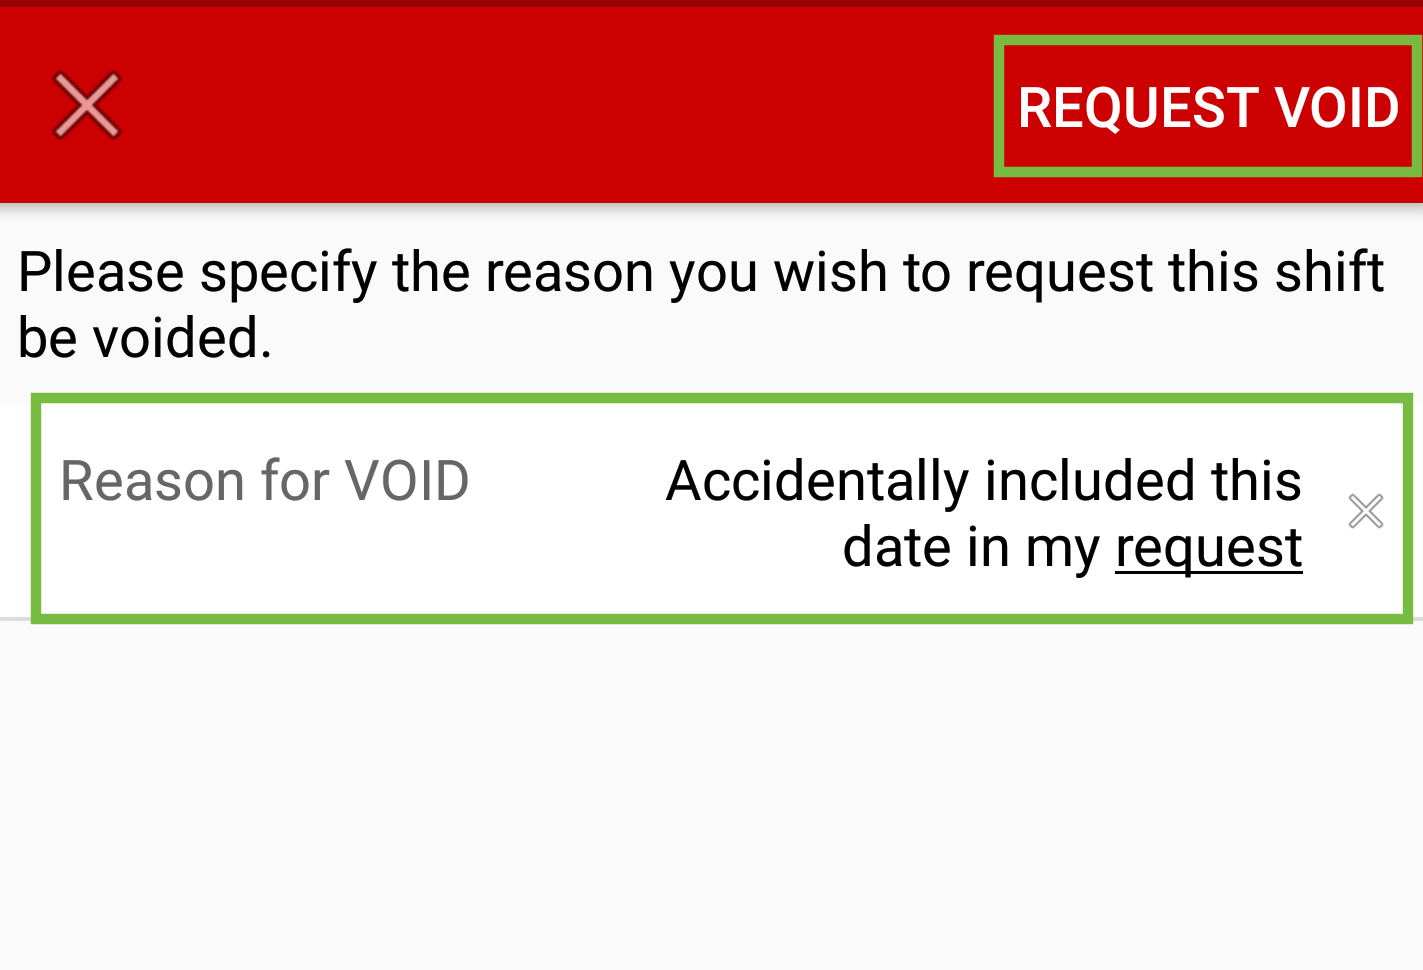
Tap Request Void to remove a request.
Tap Request VOID.
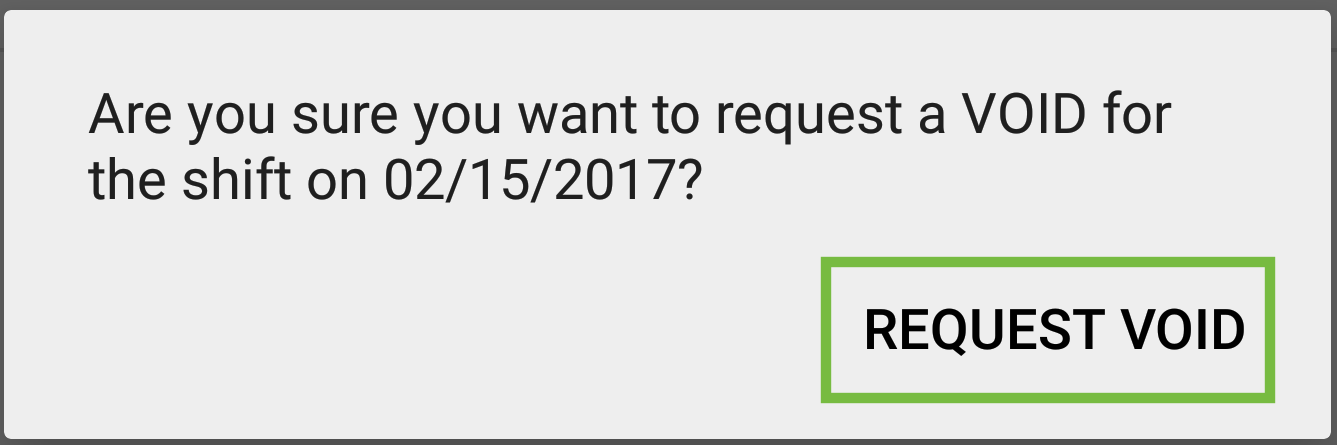
Enter a Reason for VOID. Tap on Request VOID.
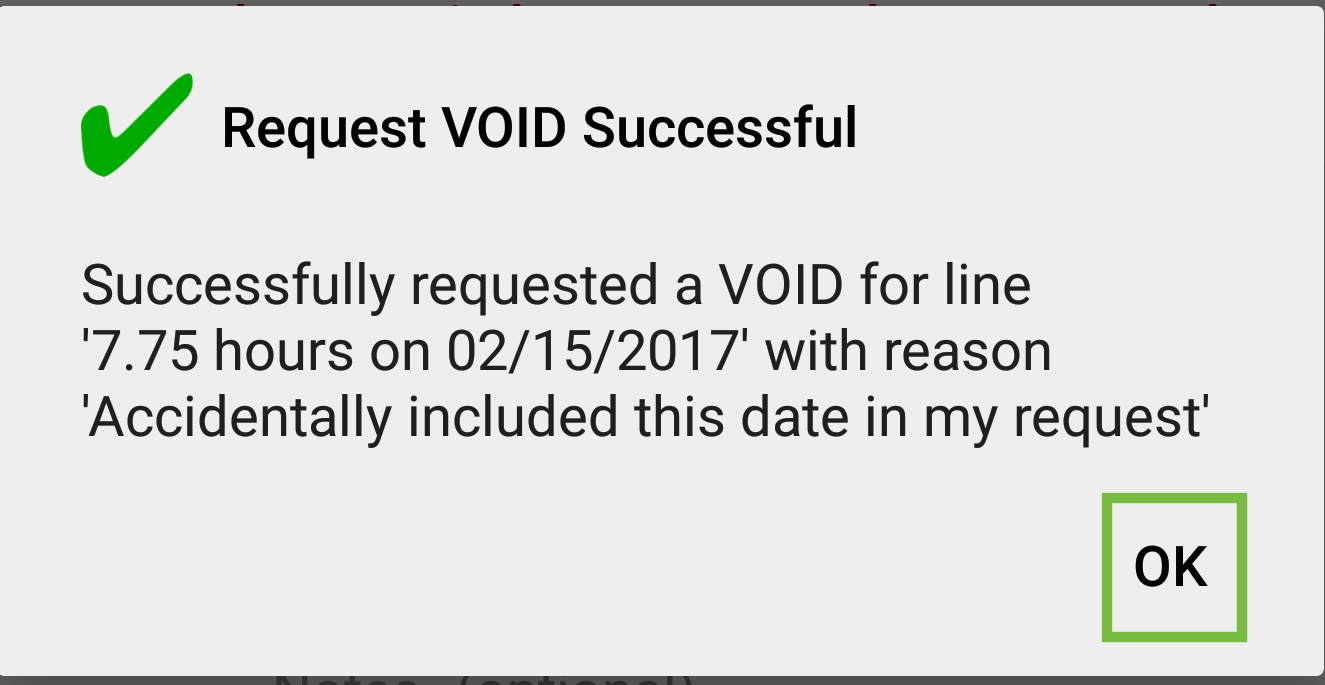
When successfully submitted, a Request VOID Successful message will appear. Tap OK.
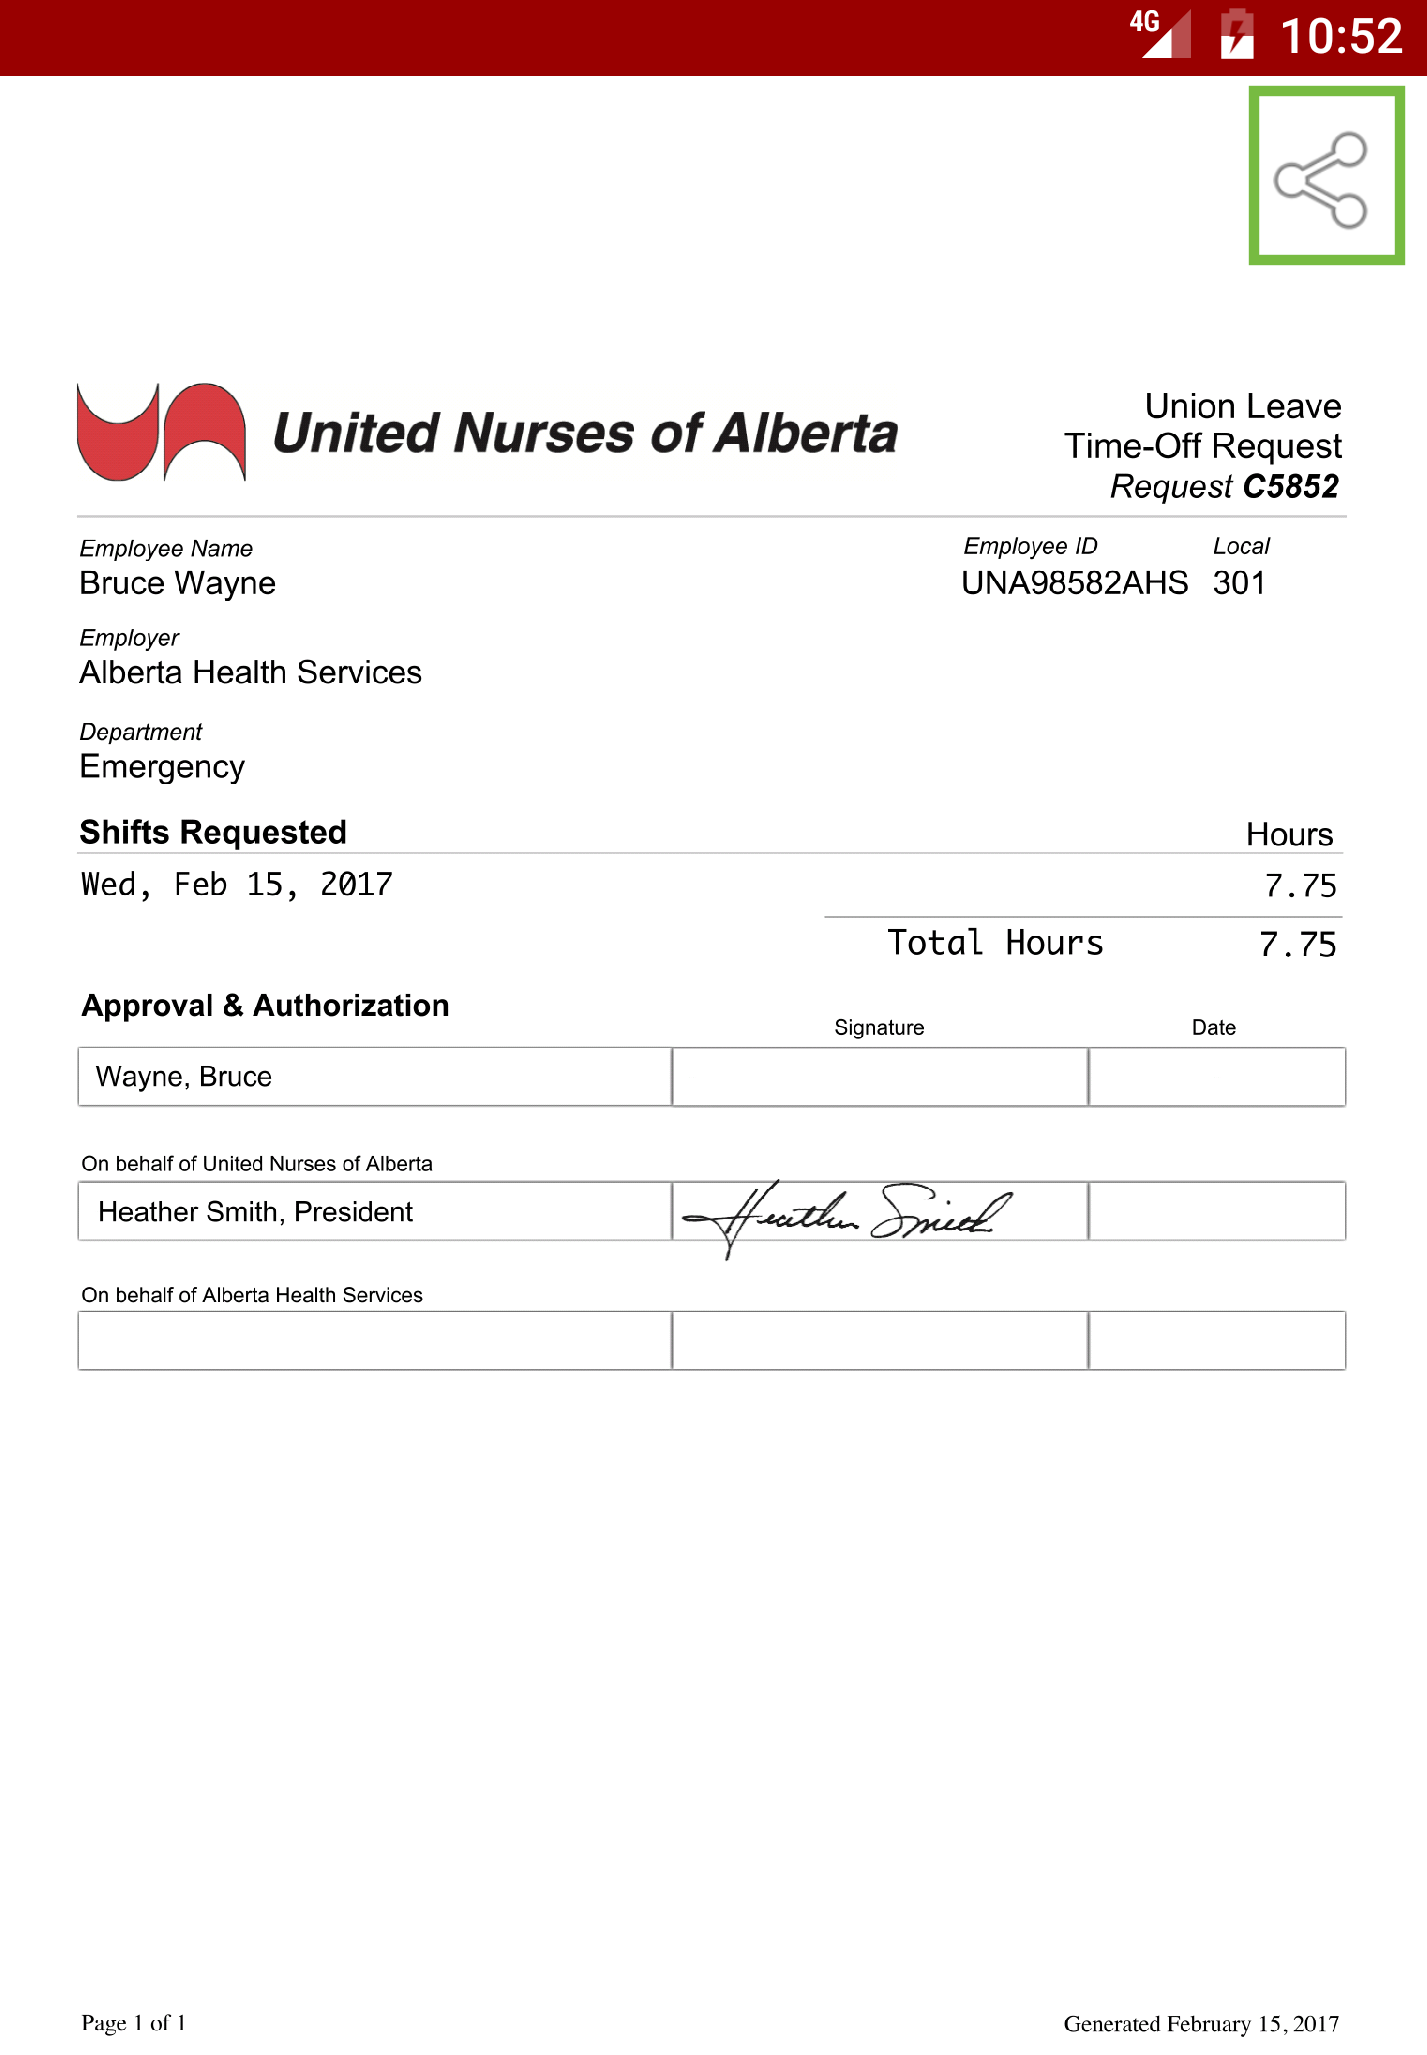
When the LOA request has been Approved, an icon will appear which will link to a document that should be printed and provided to the manager for approval.
The Document can be printed, texted and or emailed to the manager for approval. Tap Share/Action icon in the top right corner for options.
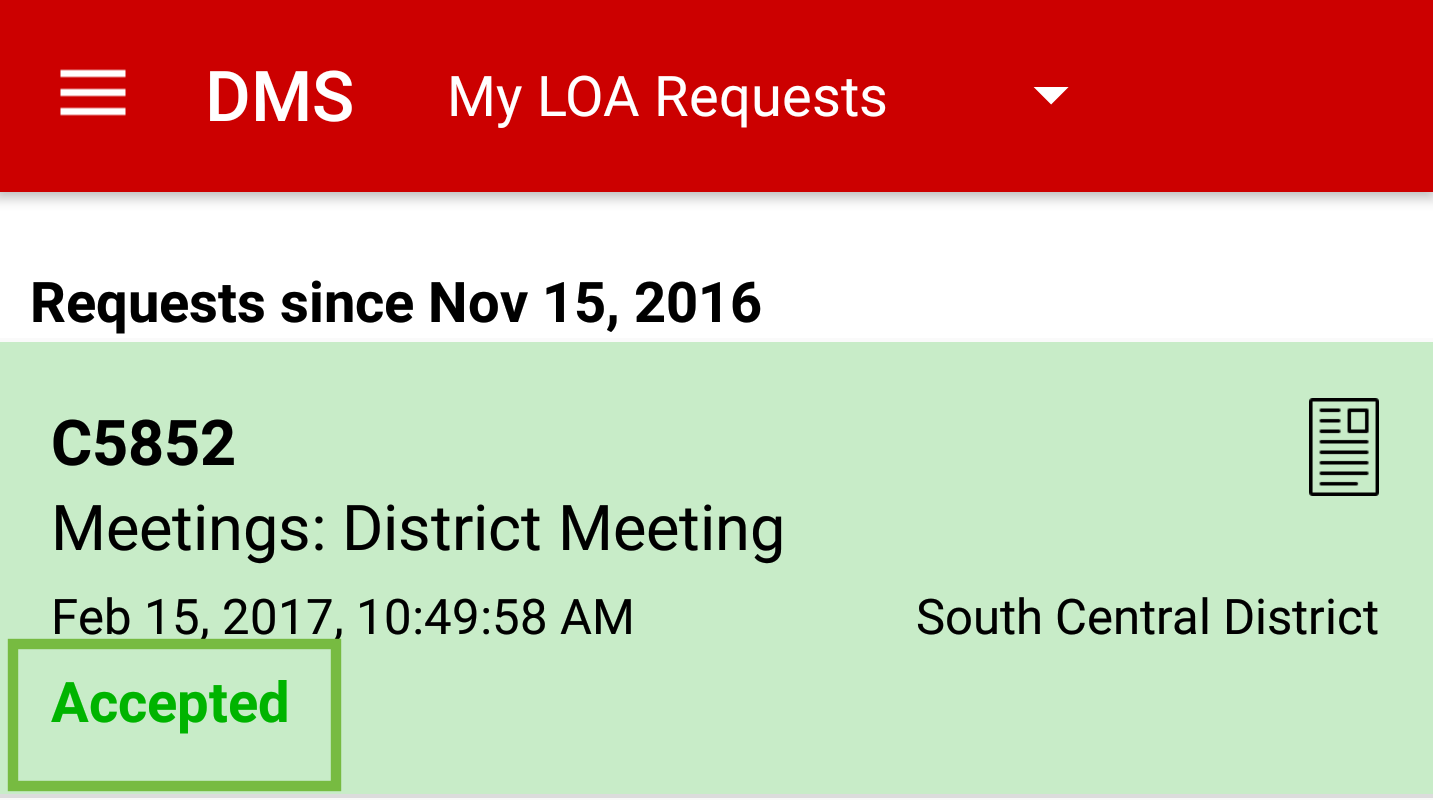
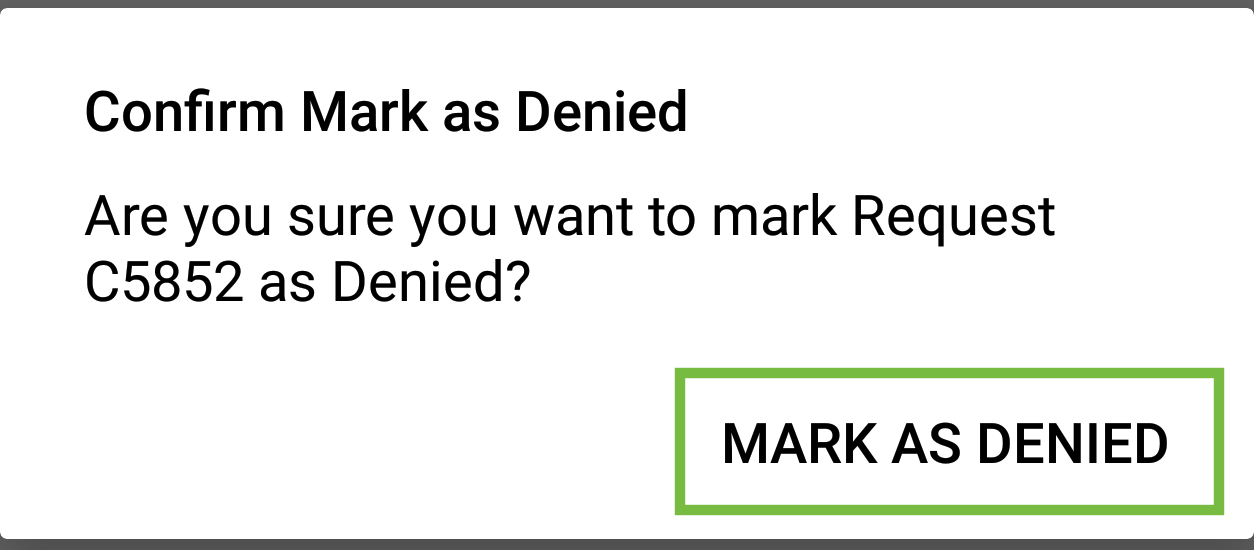
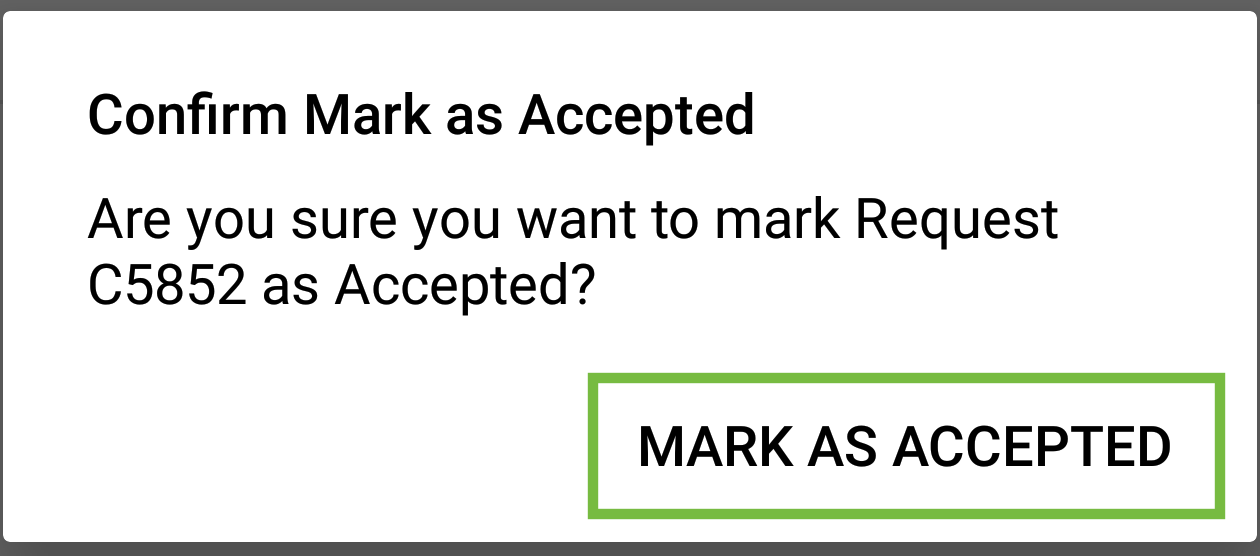
Once the manager has approved the LOA, locate the LOA request and tap Mark as Denied or Mark as Accepted.
A confirmation screen will appear. Tap MARK AS DENIED or MARK AS ACCEPTED.
If accepted, Request Marked as Accepted will appear on the LOA request, tap OK.
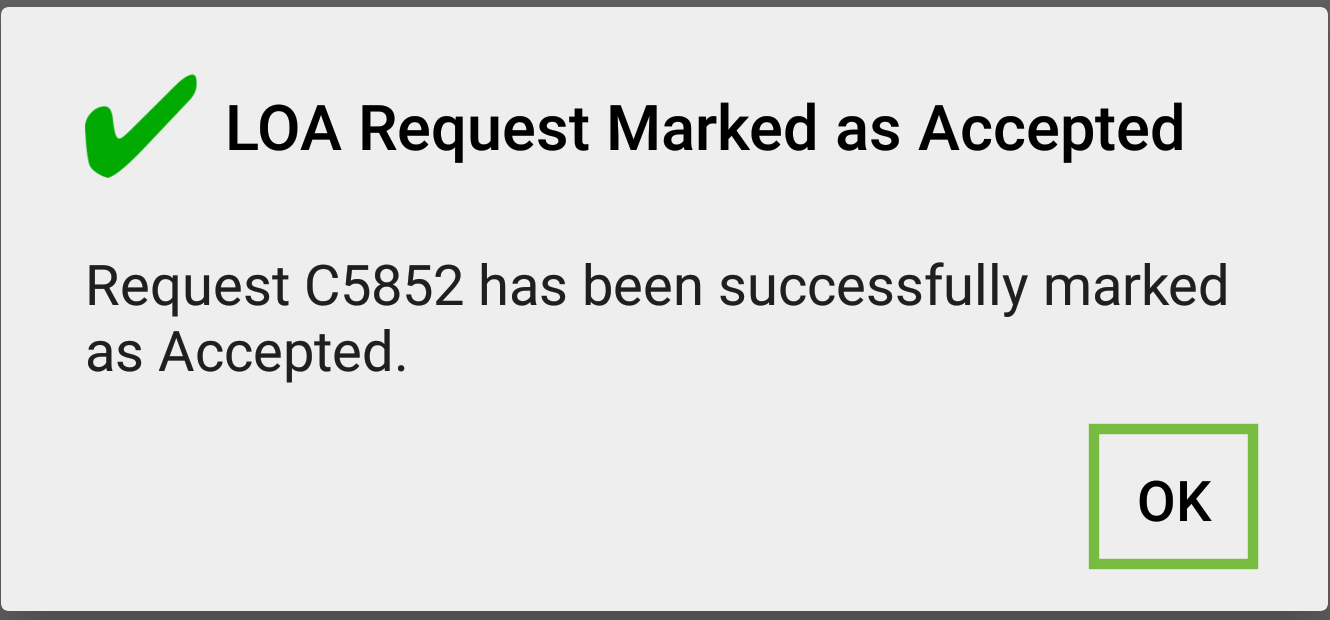
My LOA Requests screen will appear and the request will show as Accepted.