EI Trust Fund claims are available to all members that are/were in a local that has EI Trust Fund. If you have an UNA account log into DMS Web.
Approving and Rejecting Claims
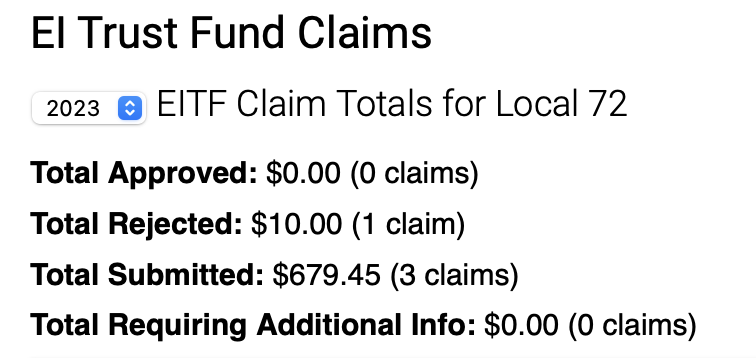
From your Home screen click on EITF Claims.

Here, you will be able to find your Annual Claim Totals, and can use the drop down tool to choose the year.
The Total Requiring Additional Info is a new feature, which will allow you to see the specific amounts of the Rejected claims that have only been rejected due to lack of information, such as an attached receipt.
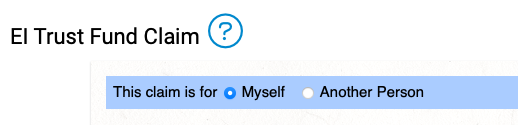
My EI Trust Fund Claims page will open click on New Claim.

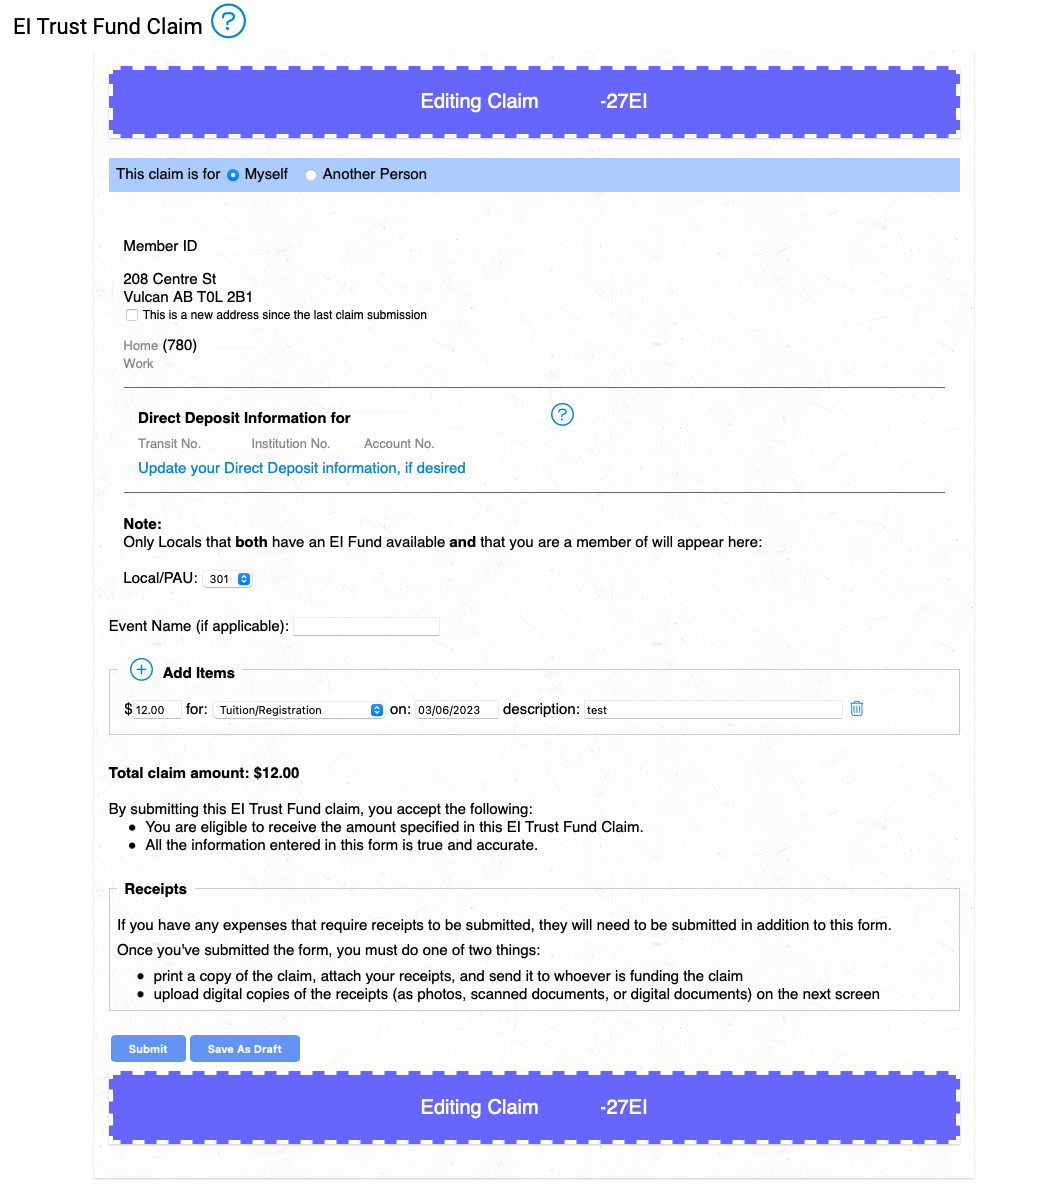
Here, you can choose whether the claim is for yourself, or if you are submitting for another person
To see the step by step submission guideline, please follow the Member Guide
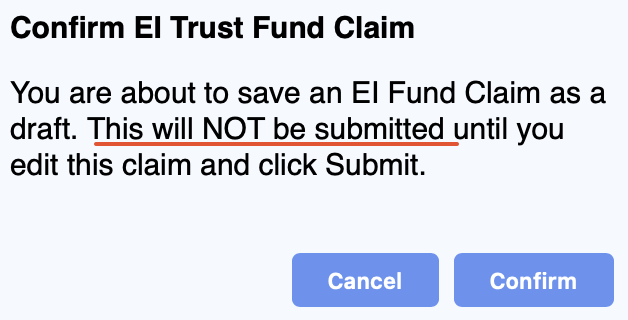
There is also an option now to Save as Draft:

If you choose to Save As Draft, you will get a notice that it has not been submitted.
- Please note: If you are submitting for another person, you cannot Save as Draft
You can then find it in your EITF Claims – its status will appear as Unsubmitted:

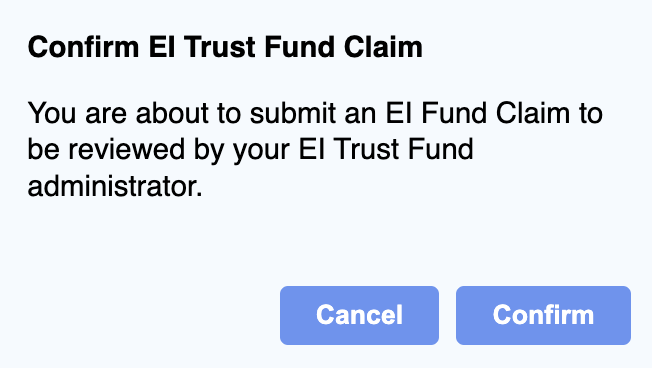
When you are ready to submit your draft or your current EITF, the Confirm EI Trust Fund Claim screen will appear click on Confirm.
Back at the My EI Trust Fund Claims under Recent Claims you will see those submitted if you click on the Pencil you can edit the claim. You can also Filter these results (by either using the buttons, or by searching a specific word such as the Event Name):

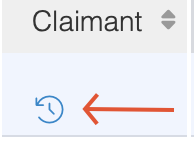
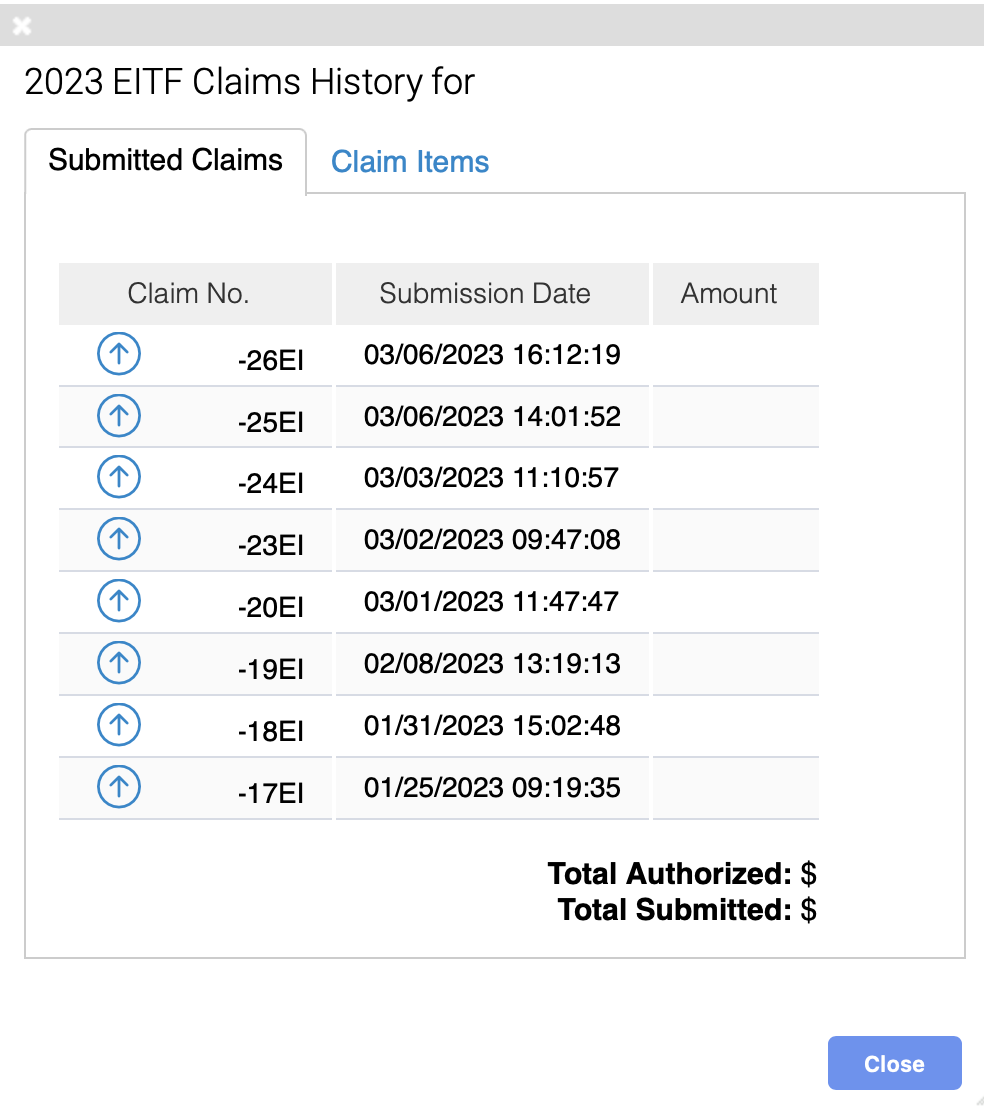
The little Clock icon will allow you to see your EI Trust fund claims (or claim items) claim history in current year
You are also able to send a remind to the Claimant using the Bell icon. This will only work for submitted claims.
![]()

When editing a claim the screen will indicate you are Editing Claim XXX. Once edit is complete click on Submit.
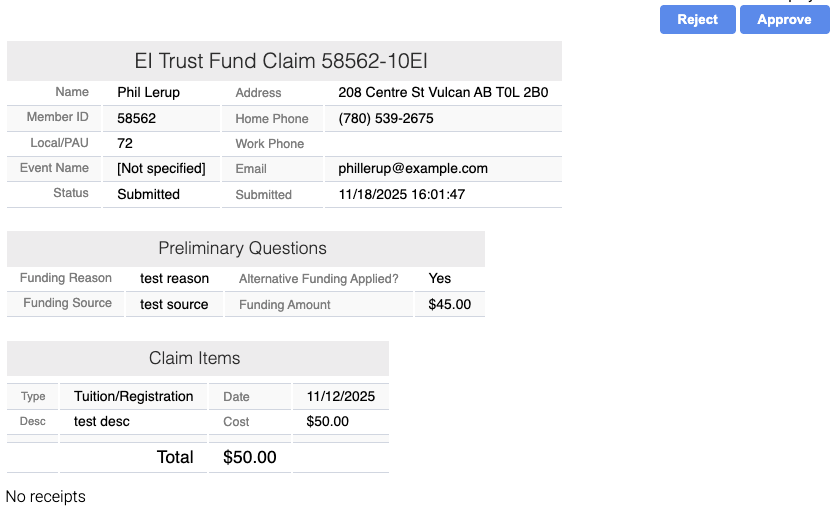
Approving and Rejecting Claims
Approving Claims:
- Self-Approvals; however, you will be met with a warning:

- Partial approvals. After the first Approval button, you can choose to approve a partial amount. Please note: you will not see the original amount after approving the partial.

- Some Locals require a second approval.

After it is approved by the Local, Finance will also need to approve it.
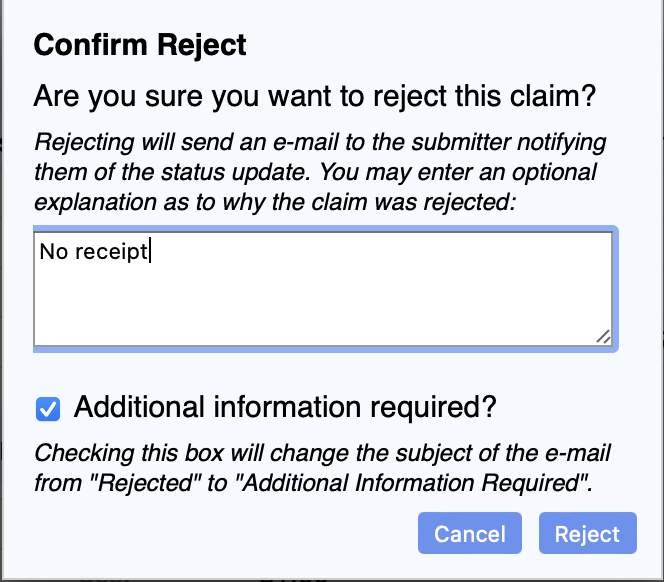
Rejecting Claims:
When Rejecting Claims, you can add an explanation for cause of the rejection. In addition, you can choose to require additional information. This will then change the subject of the e-mail to the Claimant from Rejected to Additional Information Required.
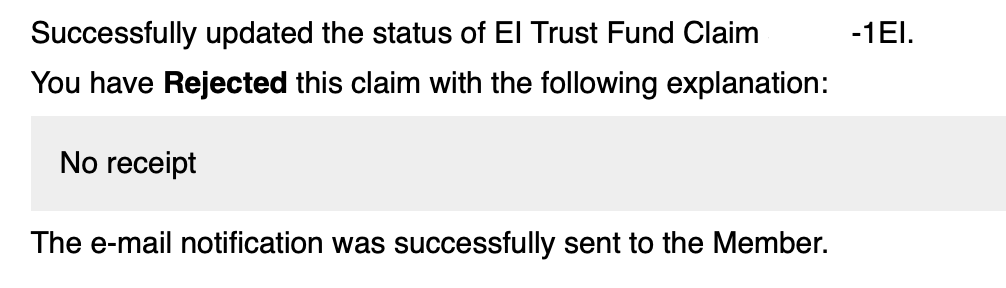
The Claimant will then be able to edit the Claim to re-submit. As a reminder, if a Claim is Rejected – do not create a new one! Resubmit the Claim.
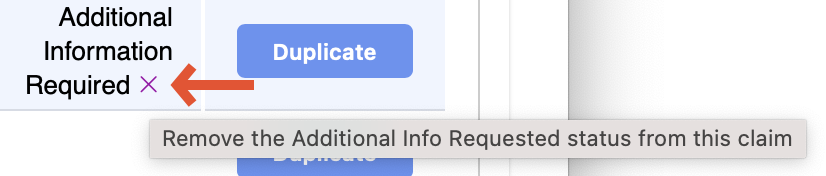
You are able to clear the status of ‘Additional Information Required’ by hitting the x. This will then put the total back from Total Requiring Additional Info into the Total Rejected.
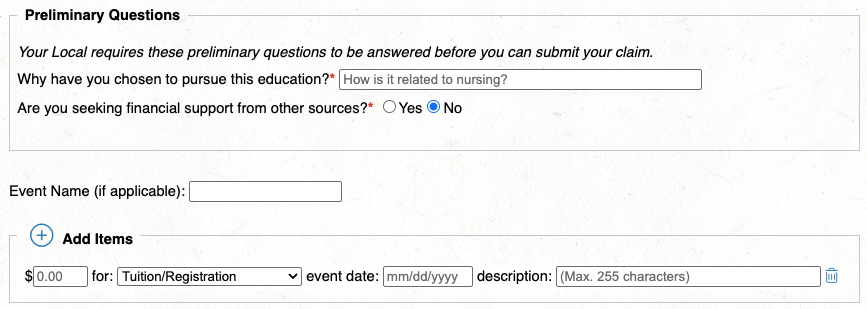
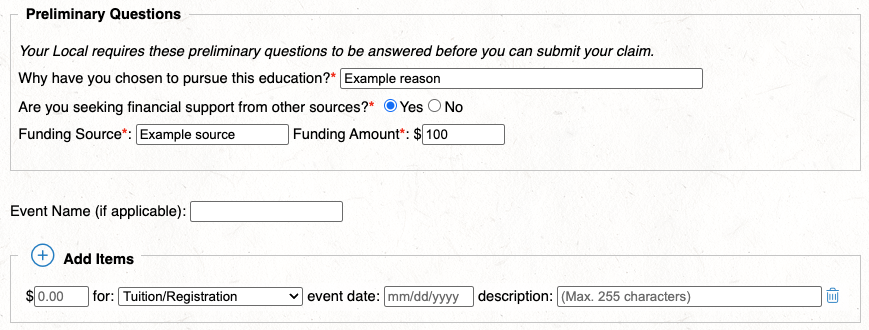
Preliminary Questions Regarding Alternative Funding
Please note: If you’d like your Local to have these Preliminary Questions, please reach out to systems@una.ca to have this enabled.
With No Alternative Funding:
With Alternative Funding:
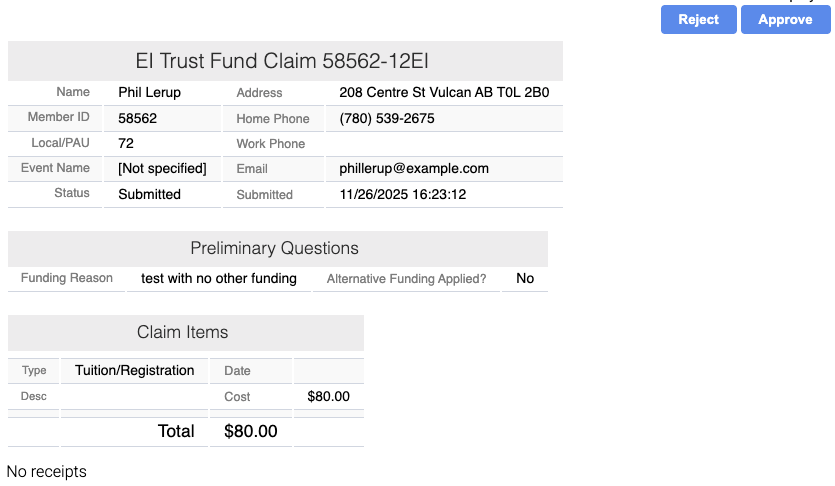
On the Approval side, it will show as another header.
No Alternative Funding:
With Alternative Funding: