Data Management System (DMS) Web – Members
Please avoid the use of the Back Button on your browser to navigate while using this system. This can create a situation in which your forms are submitted twice, or not submitted at all.
To create a New LOA request, click on the LOA tab.
In the My LOA Requests screen, click on the Plus sign by New LOA request.

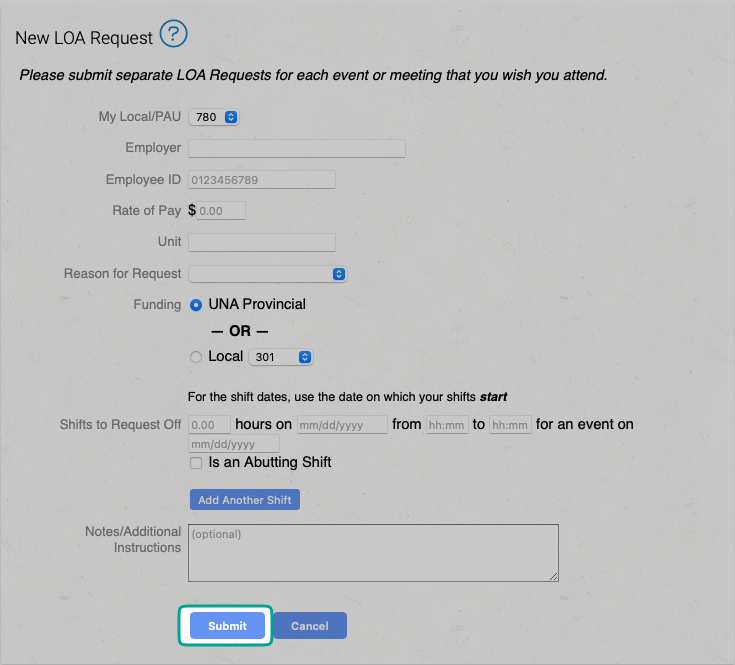
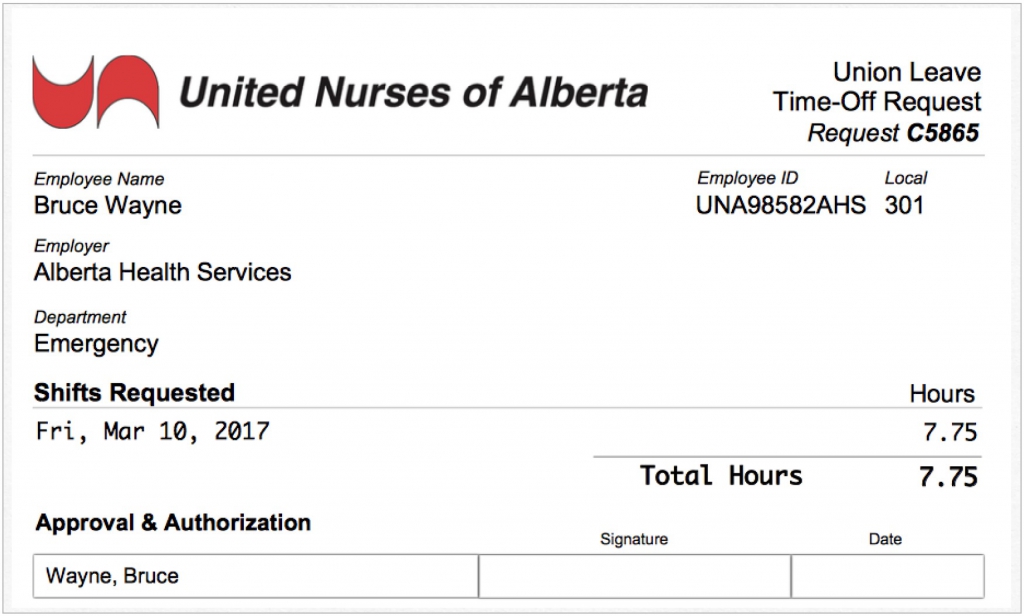
A New LOA Request screen will open. Complete the fields.
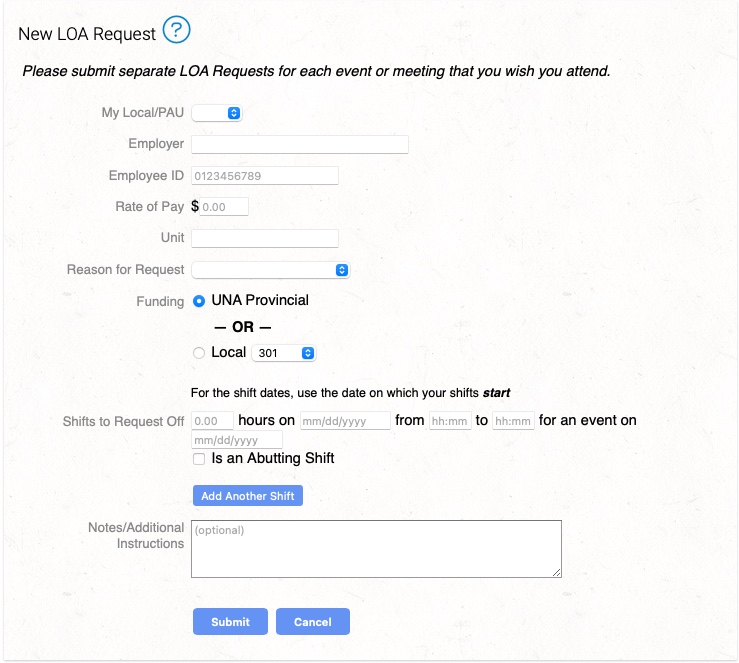
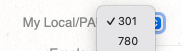
The My Local field will default to the local to which you belong. If you belong to more than one local, use the drop-down menu to choose the local the LOA Request is for.
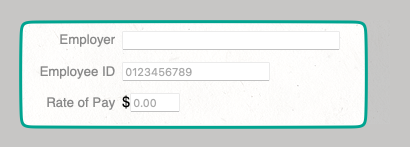
The Employer field will default to your employer. If you have more than one employer, use the drop-down menu to find the employer to which your request is being made.

If electronic information is not available to UNA, you will need to manually enter the information for Employer, Employee ID and Rate of Pay.
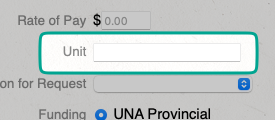
In the Unit field, manually enter in the unit.
In the Reason for Request field, use the drop-down menu to pick the event the LOA is required for.
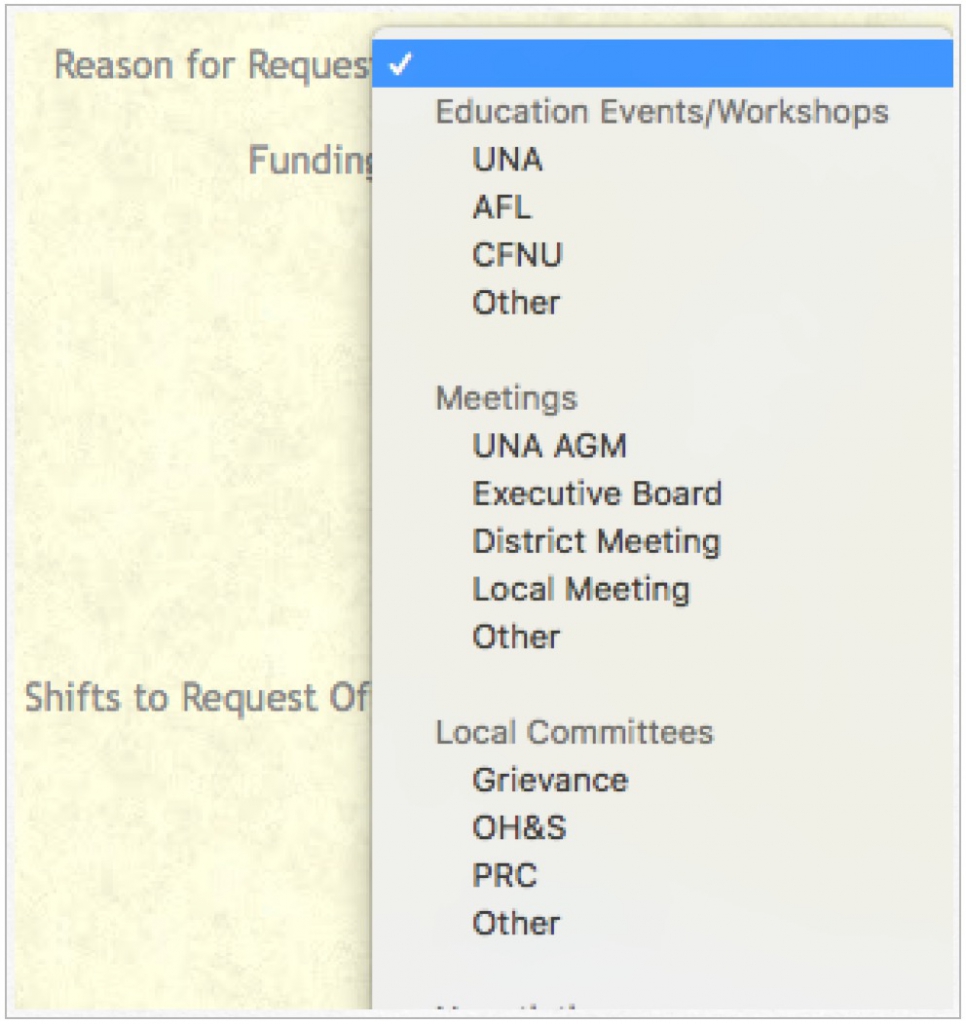
When Other is chosen for Reason for Request, another field, Please specify, will appear. Manually enter the event there.

In the Funding field, click on the appropriate button for the funding type.

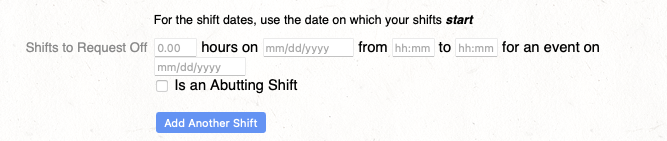
To identify the number shifts you are requesting, go to Shifts to Request Off. Fill in the form to show the number of hours you are requesting off, and the date on which they take place. If the request abuts another shift, click the box that reads This is an abutting shift. If you are requesting more than one shift, click the box that reads Add Another Shift and fill in the relevant information.
Notes/Additional Instructions is an optional field into which you can manually enter text regarding your request.
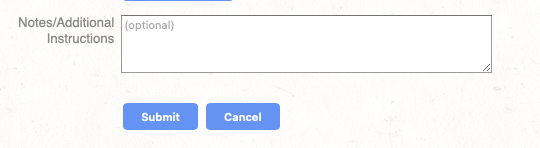
Once all the fields are completed, click on Submit.
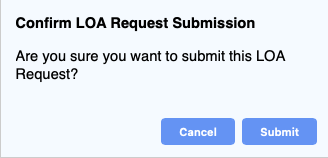
You will then be taken back to the New LOA Request screen. A window indicate the LOA Request was Successfully created.
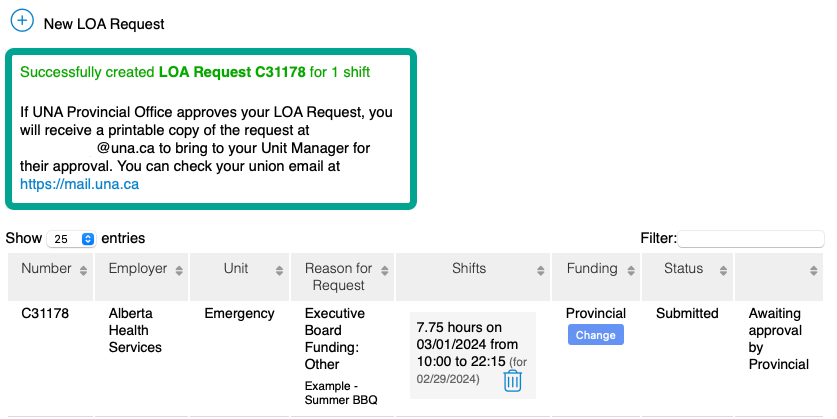
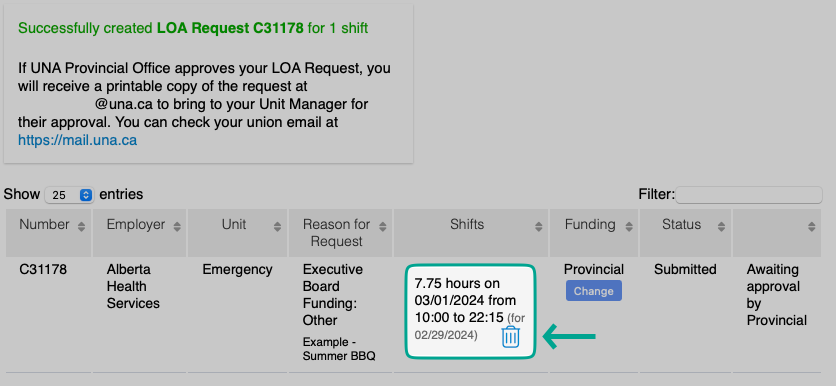
To Delete a shift request, click on the Garbage Can located in lower right hand corner of the Shifts column.
The Confirm Delete LOA Request Item screen will pop up. Click on Delete.

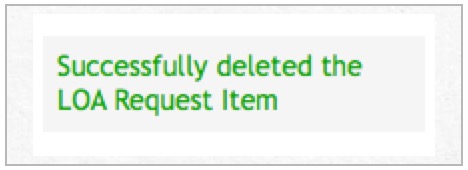
Once the shift has been deleted from the request, Successfully deleted the LOA Request Item will appear in the Shifts column.
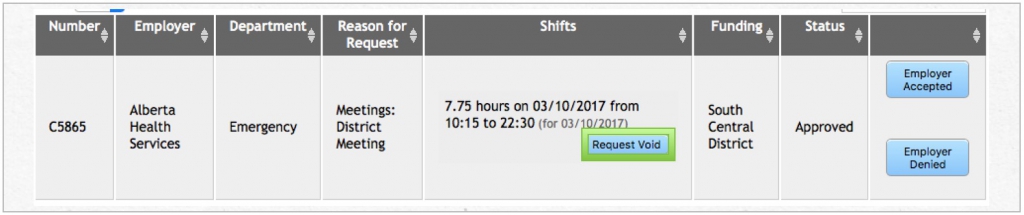
To void an LOA Request, click on Request Void the status of the Request must be Approved.
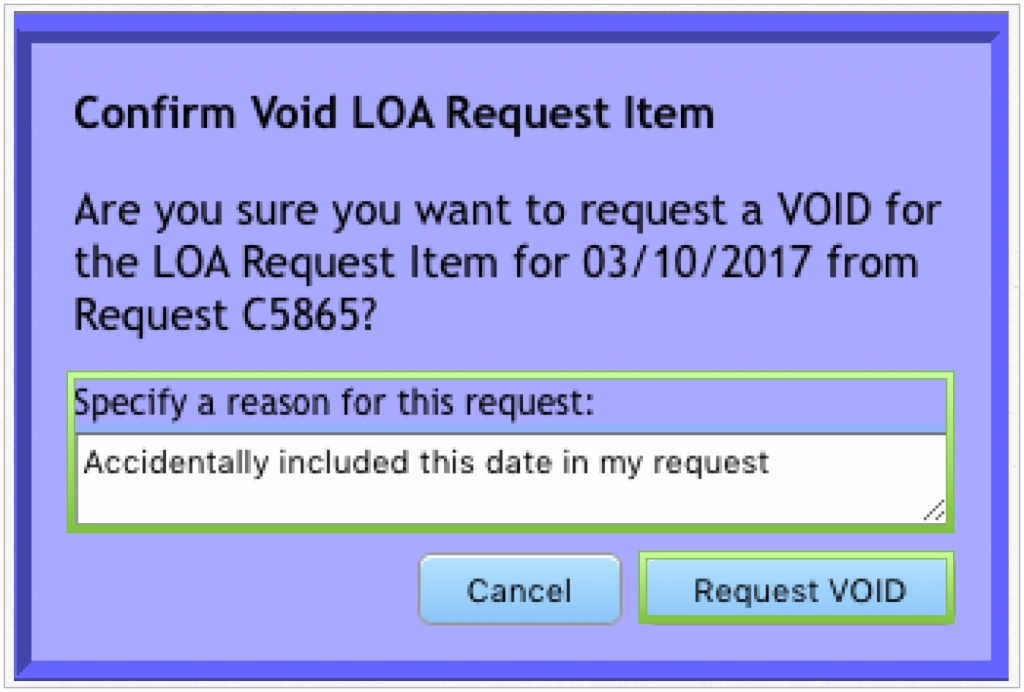
The Confirm Void LOA Request Item screen will pop up. Enter a reason for the request and then click on Request VOID.
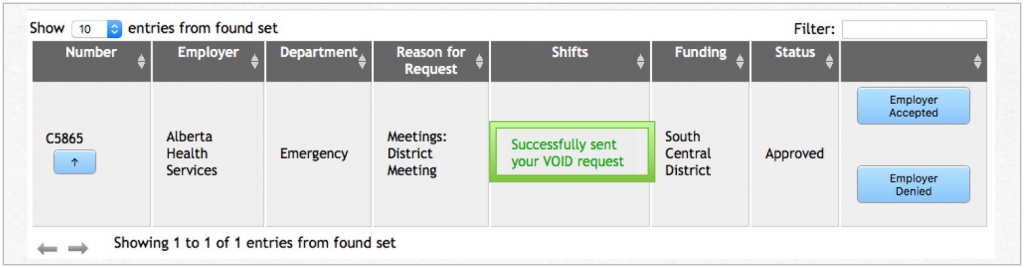
Successfully sent your VOID request will now appear in the Shifts column.
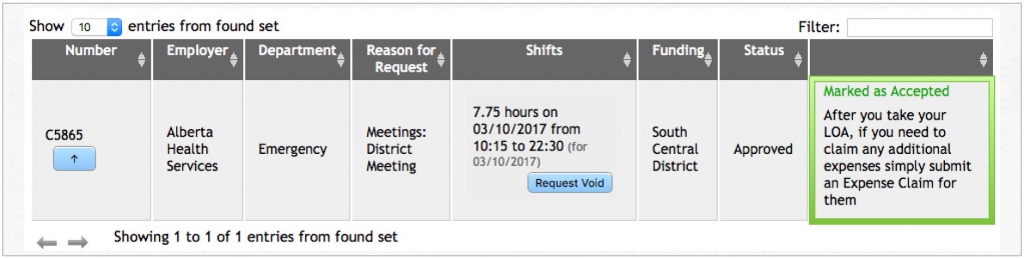
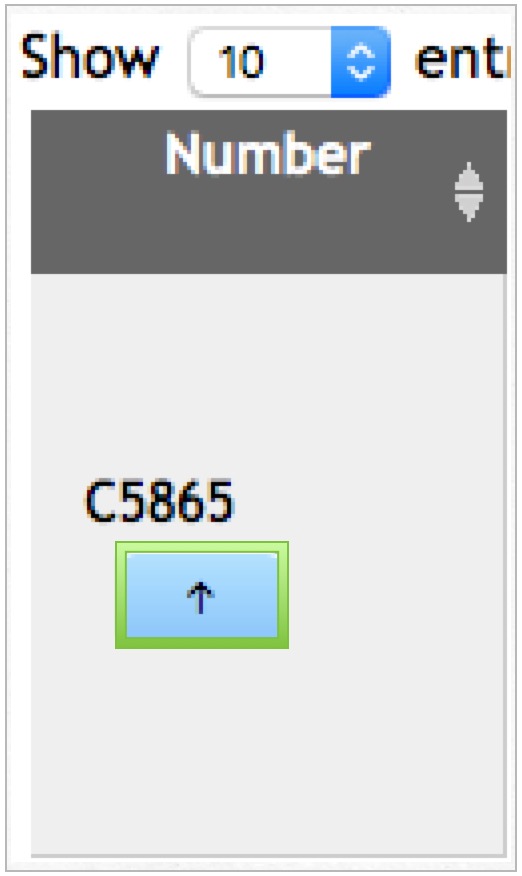
Once the LOA Request has been approved, click on the Blue Box with the Arrow Up to print the letter from UNA. Hand this letter into your manager for employer approval.
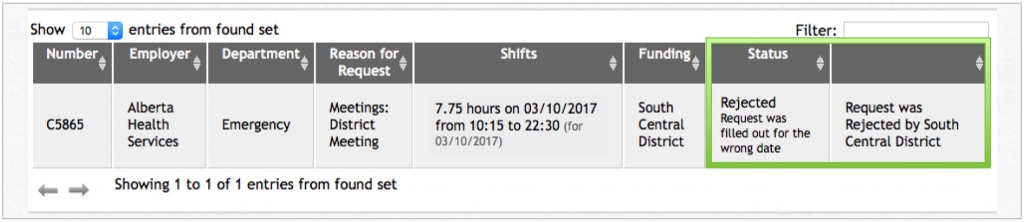
If the request has been rejected, the Status will appear as Rejected, with a reason. Who rejected the request will appear in the column next to Status.
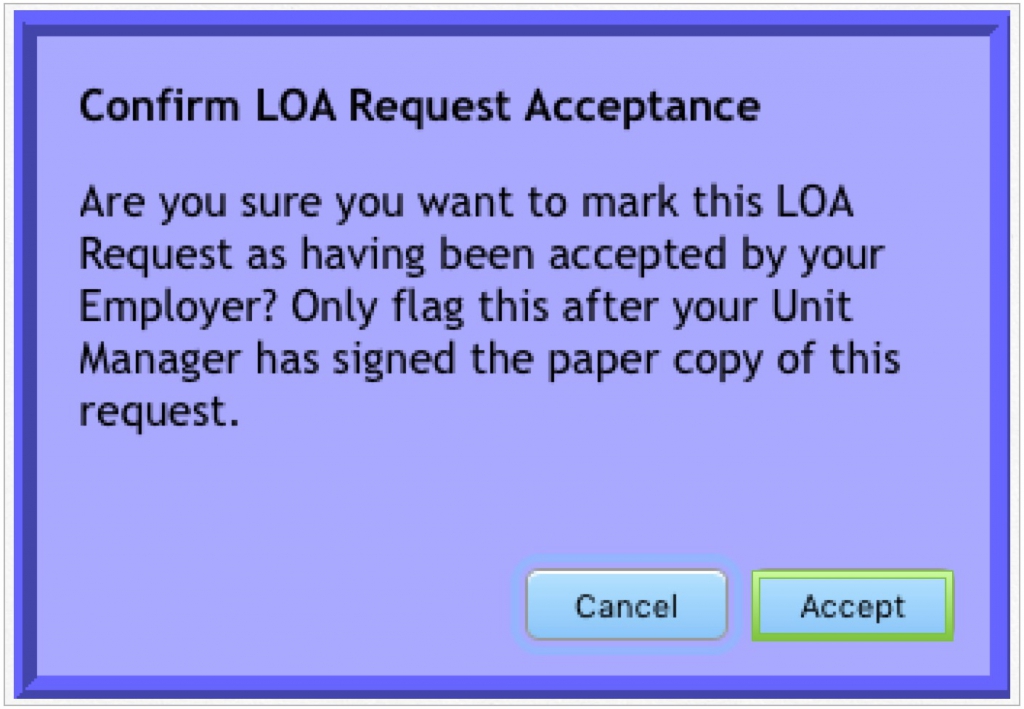
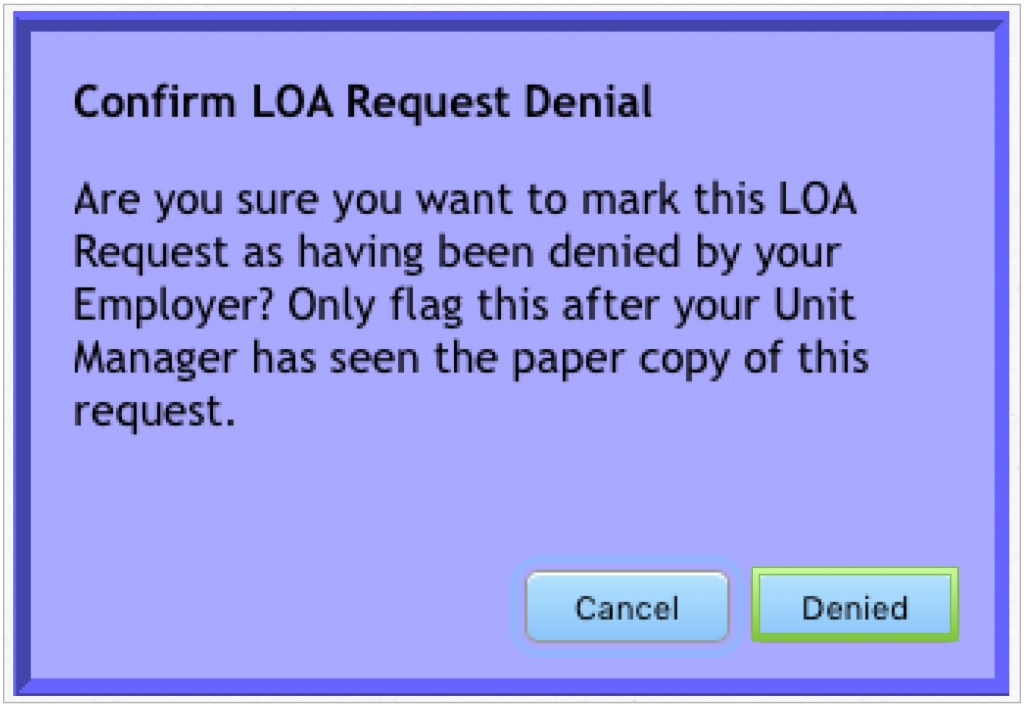
Once you have received Approval or Denial from your employer, go back into your LOA request and click on Employer Accepted or Employer Denied.
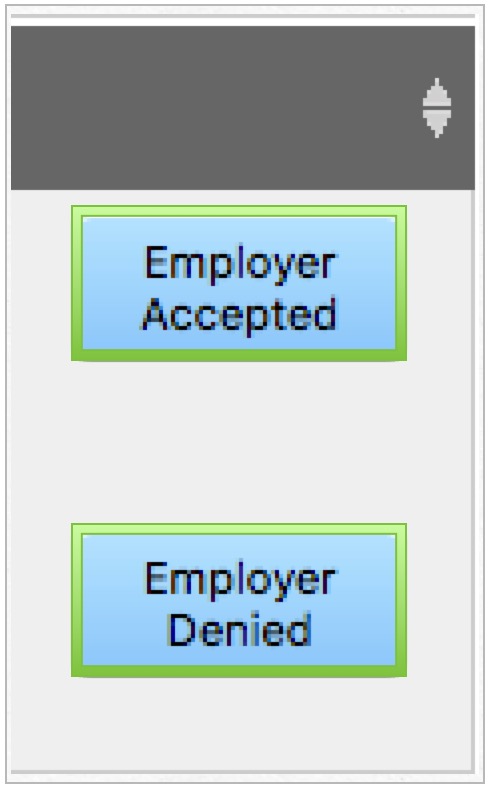
A pop-up will appear. Click on Accept or Denied to update status of LOA request.