Your UNANet account username and password is used to log into FirstClass, DMS Web and UNA apps.
If you use an Android, use the procedure outlined in this tutorial to sign into the UNA Data Management System (DMS) using the UNA App.
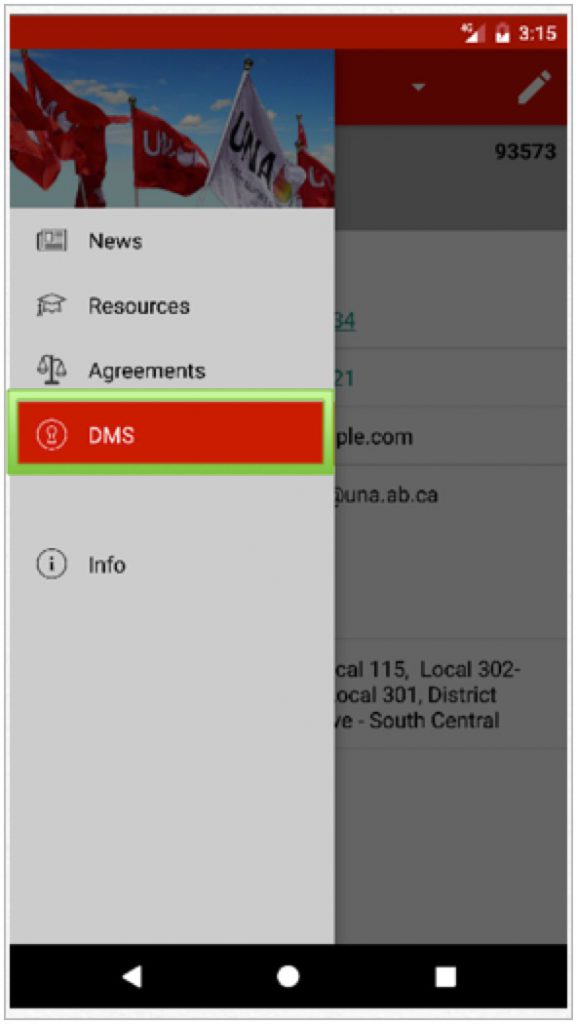
Tap on the menu button in the upper left corner to open the app’s menu. Tap on DMS. Login to DMS with your UNANet account.
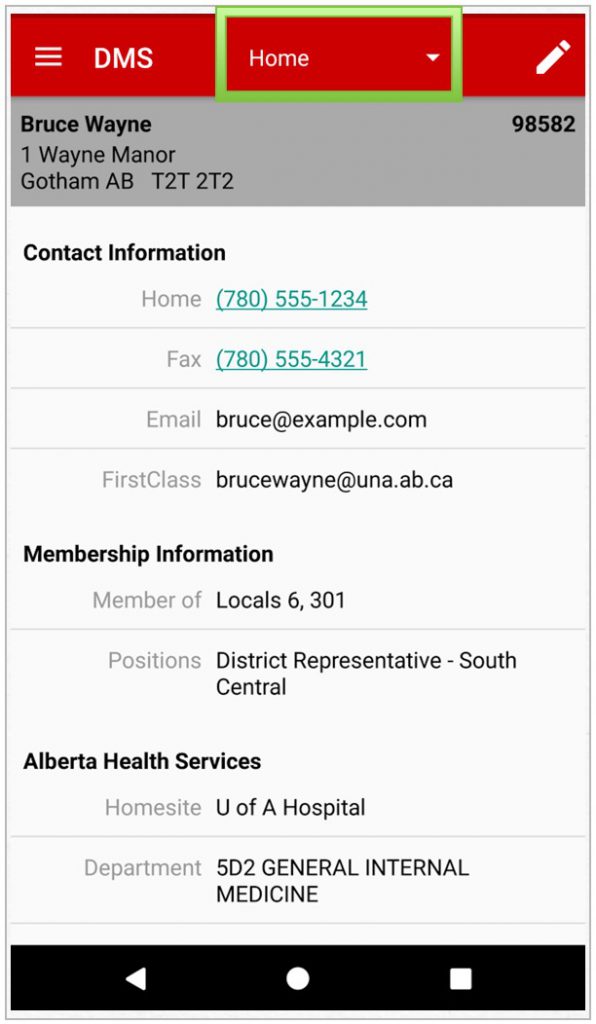
A Home Screen will open. Tap Home to open the navigation menu.
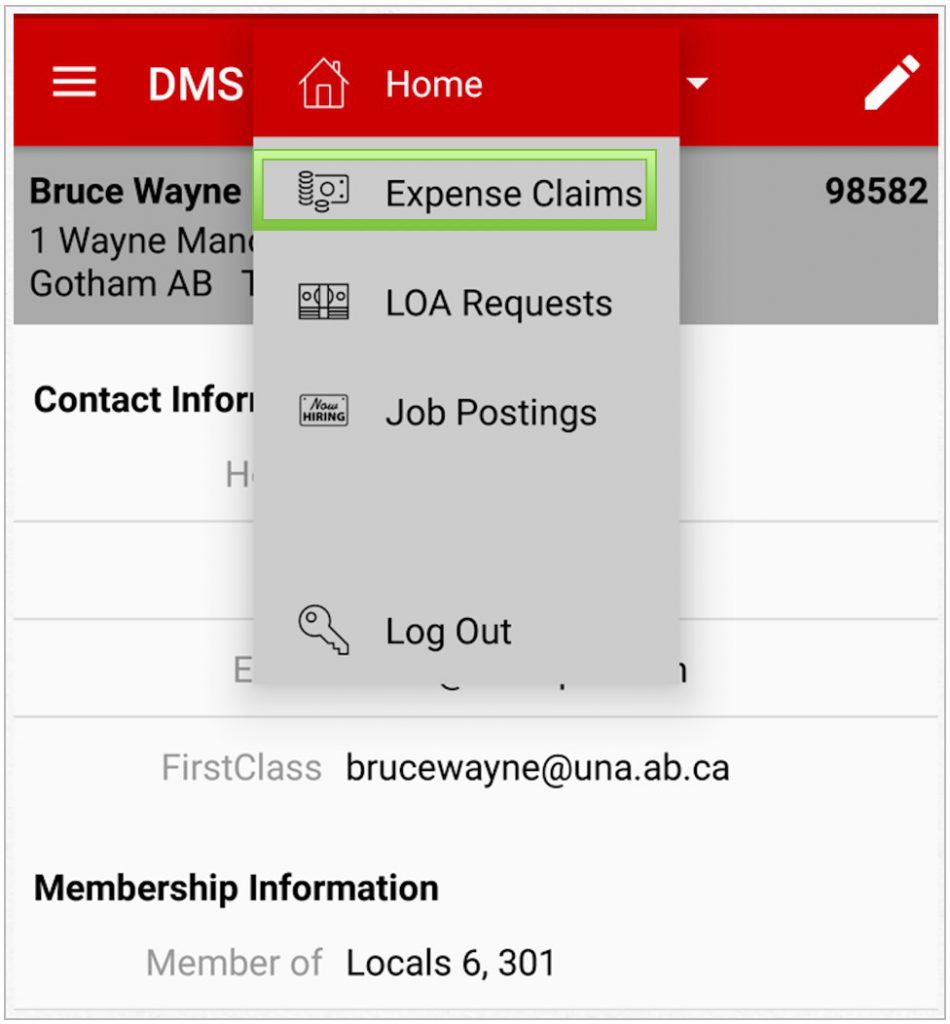
Once the Navigation Menu opens, tap Expense Claims (depending on the UNA positions you hold the screen may look slightly different).
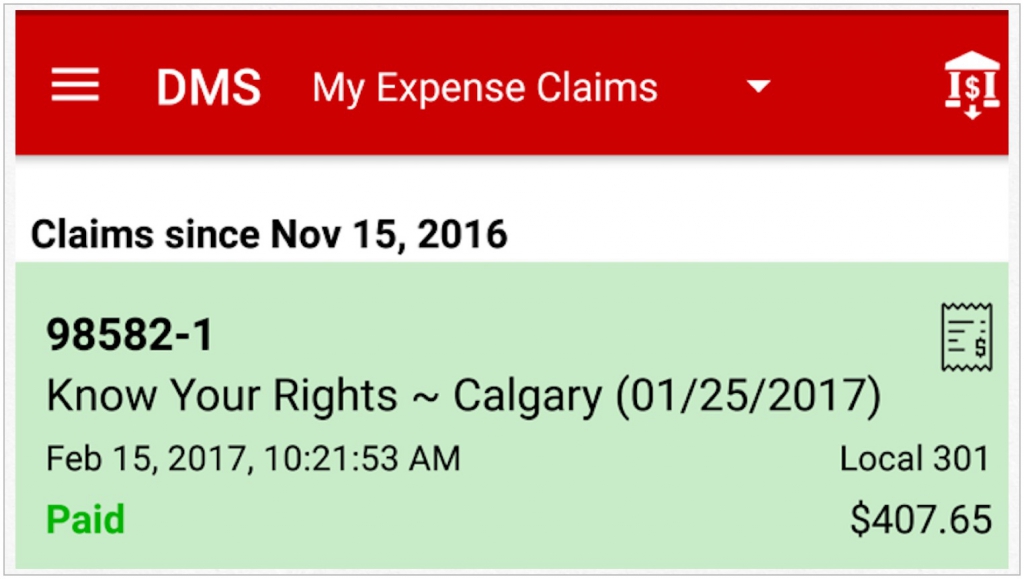
The My Expense Claim screen will open and display a list of claims if there have been any in the last 3 months. Tap the Plus Sign at bottom right-hand side of the screen to begin a new claim.
![]()
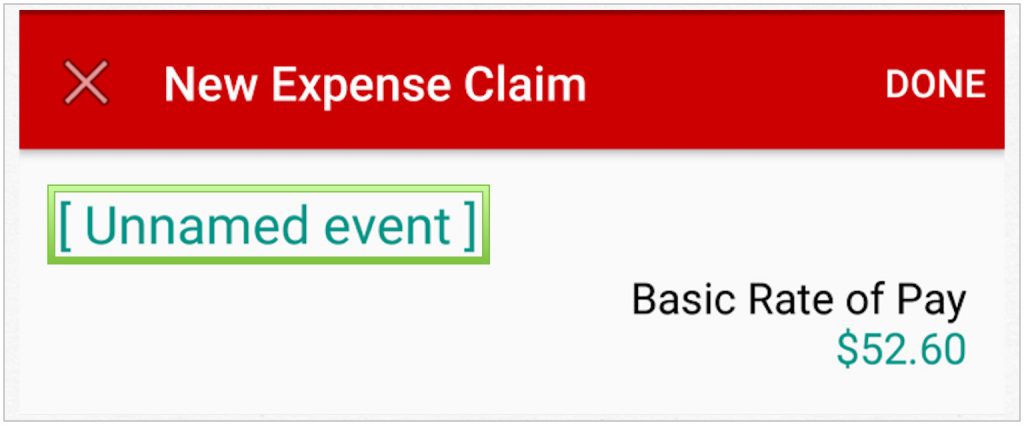
A new expense claim will open. Tap the Unnamed Event, and select Manually Entered or Recent Event Attendance to specify what the expense claim is for.
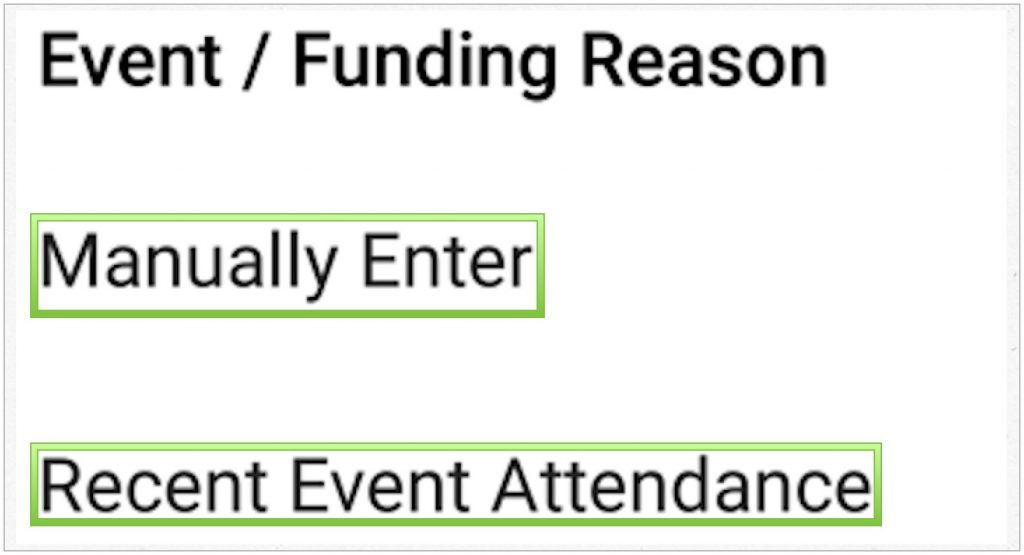
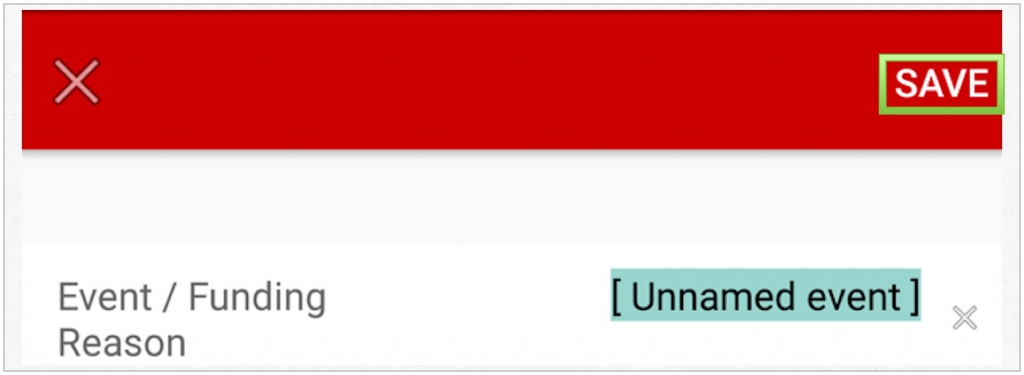
By selecting Manually Entering the Event/Funding Reason will indicate Unnamed Event, manually type in the Event. Tap Save to hide the keyboard.
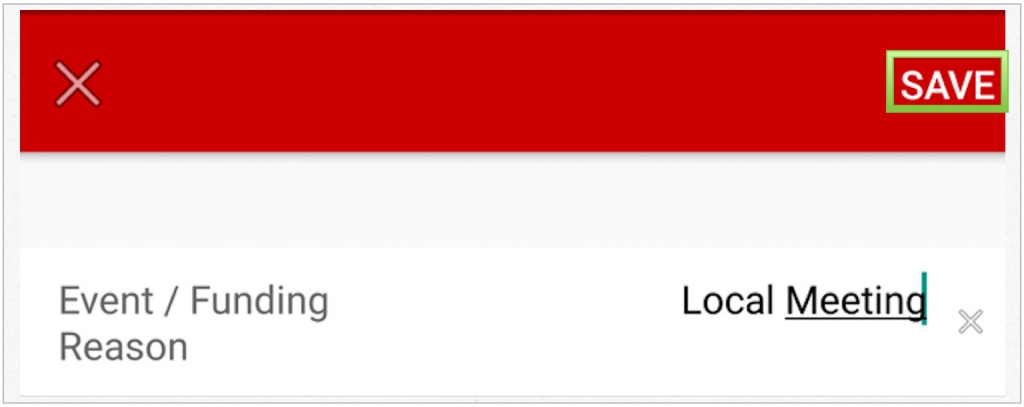
The Event name will populate. Tap Save.
Another option is to choose Recent Event Attendance to specify what the expense claim is for. This will populate a list of events that the member has attended in the last 6 months. If there are no recently attended events on file this option will not be visible.
A list of Recent Events Attendance will appear. Choose the correct event by tapping on the event.
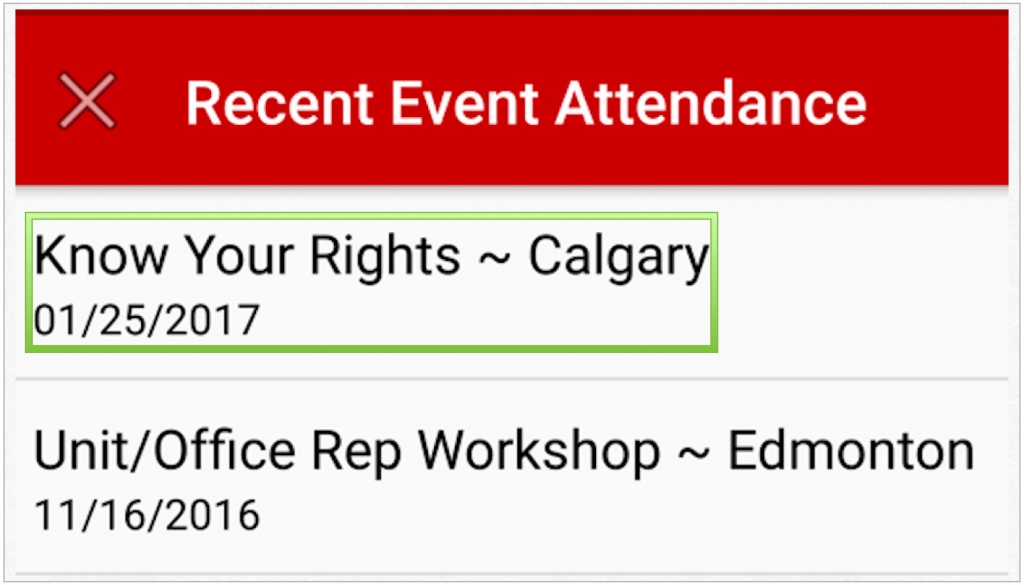
The name of the event will now appear.
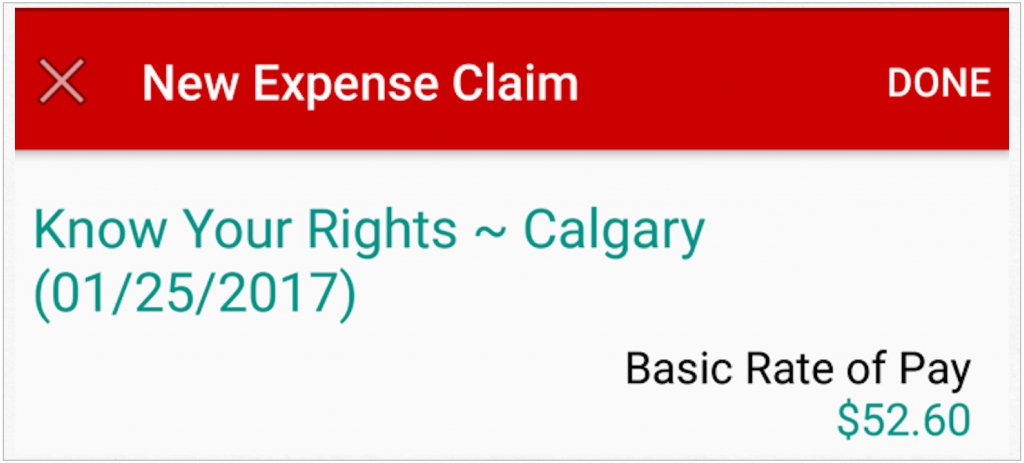
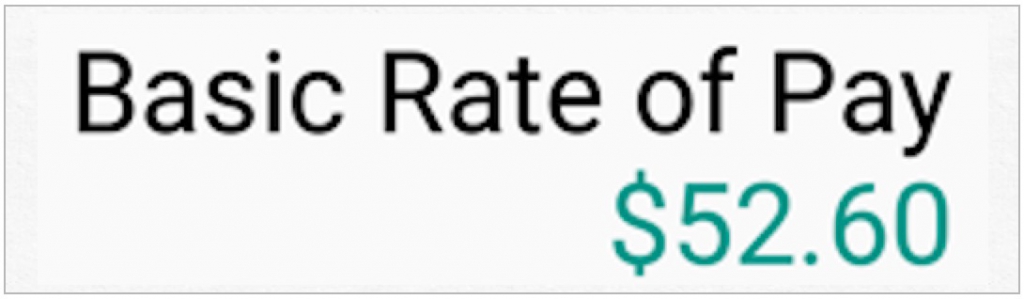
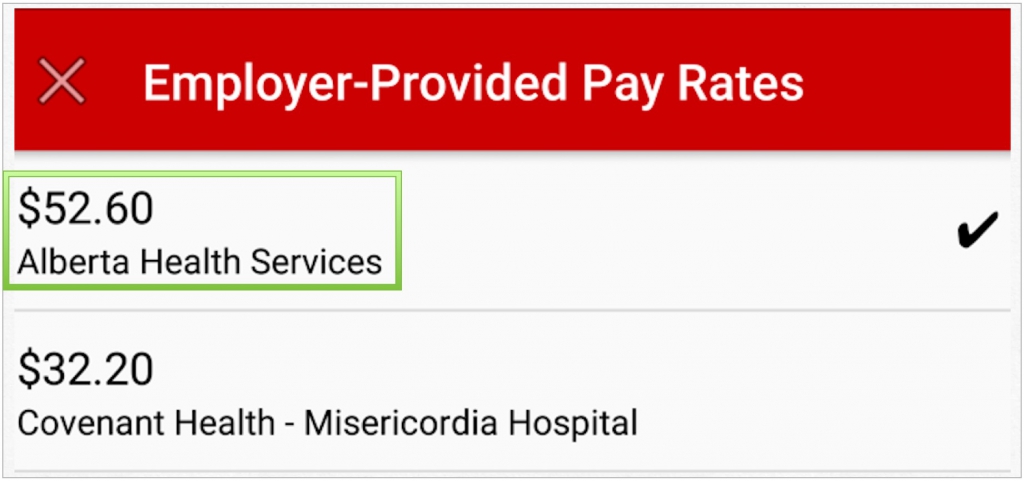
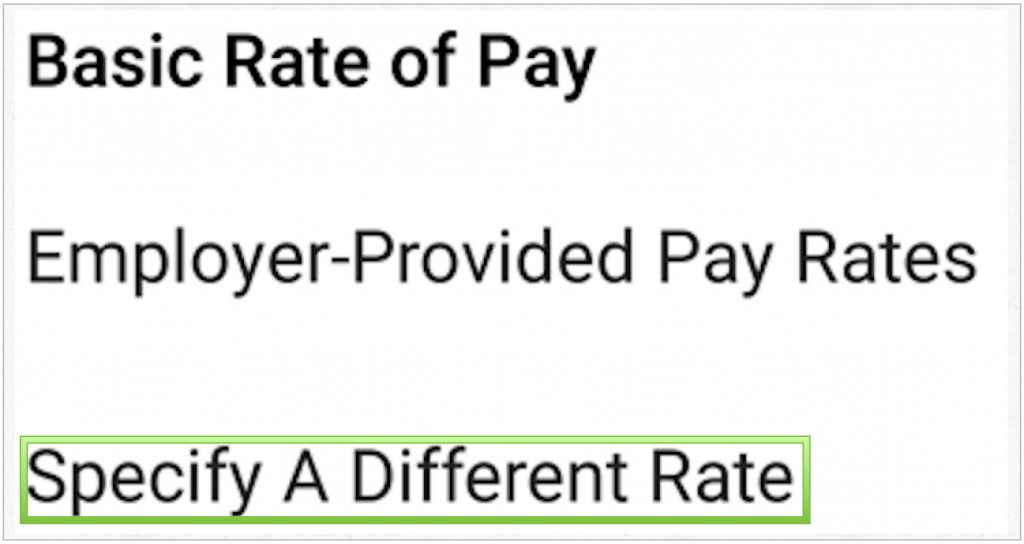
A Basic Rate of Pay will appear on the screen. To change the rate of pay, tap on the tourquoise text and enter in your Basic Rate of Pay or choose the Employer – Provided rate.
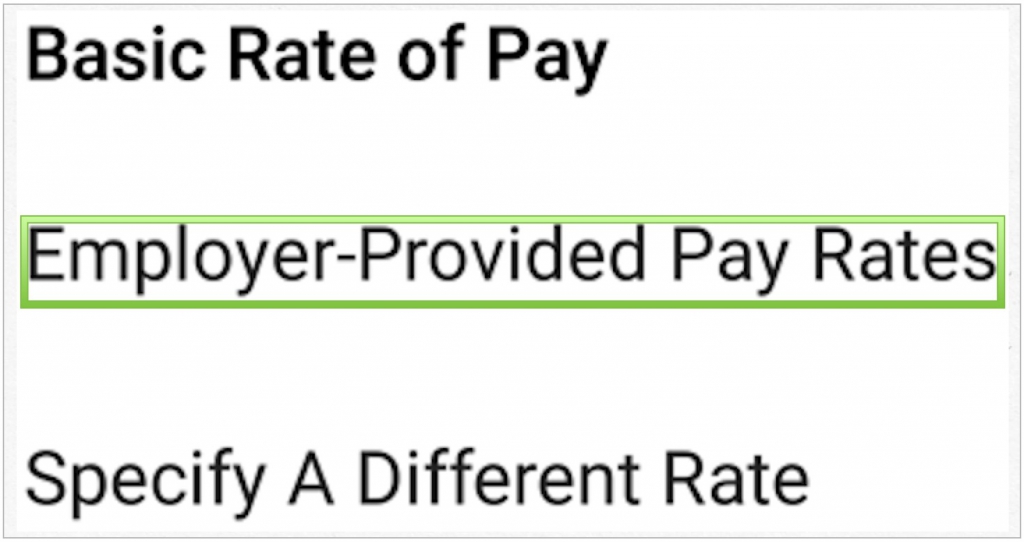
If rates are available in the system, they will display. Choose the appropriate rate for the event.
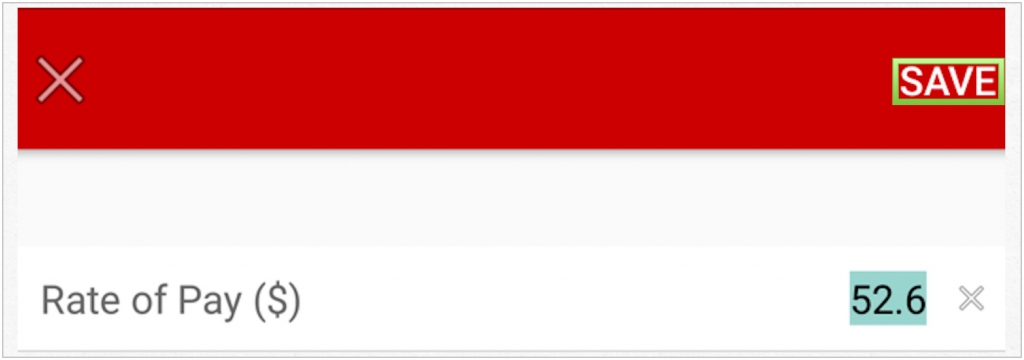
Specify a Different Rate allows the ability to manually enter in rate of pay.
Manually enter in the basic rate of pay and tap Save.
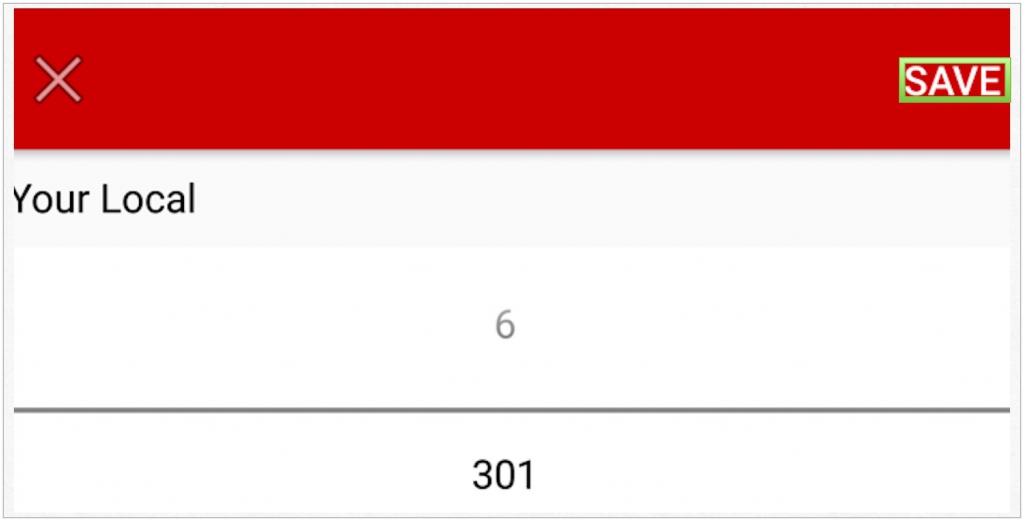
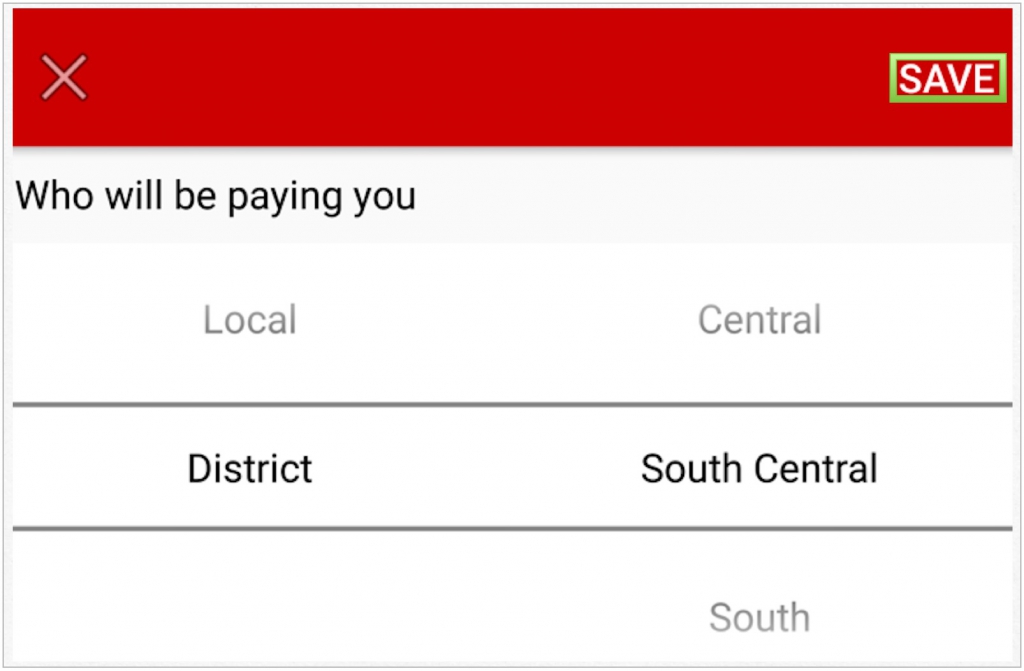
To select Your Local, tap the line and the name of the Local will appear. A list will appear if the member belongs to more than one Local. The member can select the Locals which they belong to.

Tap Save once the Local has been chosen.

The option for Provincial, Local or District are available by scrolling and selecting the correct one. Then tap Save.
The Notes line is accessed by a tap the line.

Manually enter text for the claim.

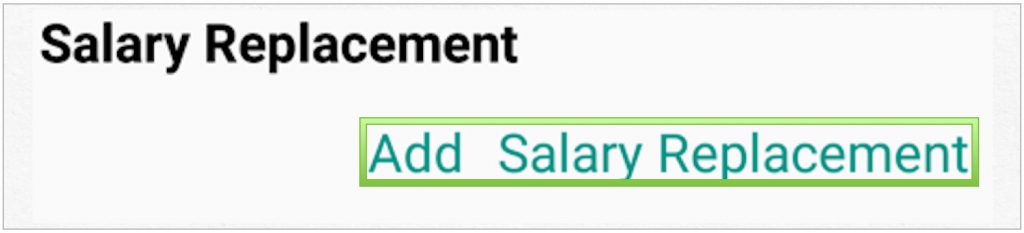
If the member is claiming a Salary Replacement Tap Add Salary Replacement.
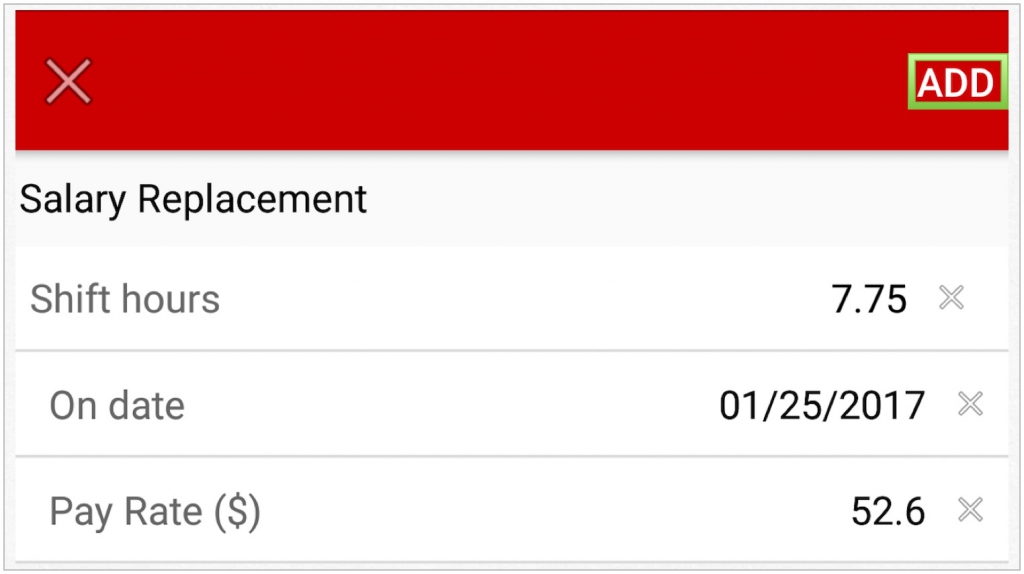
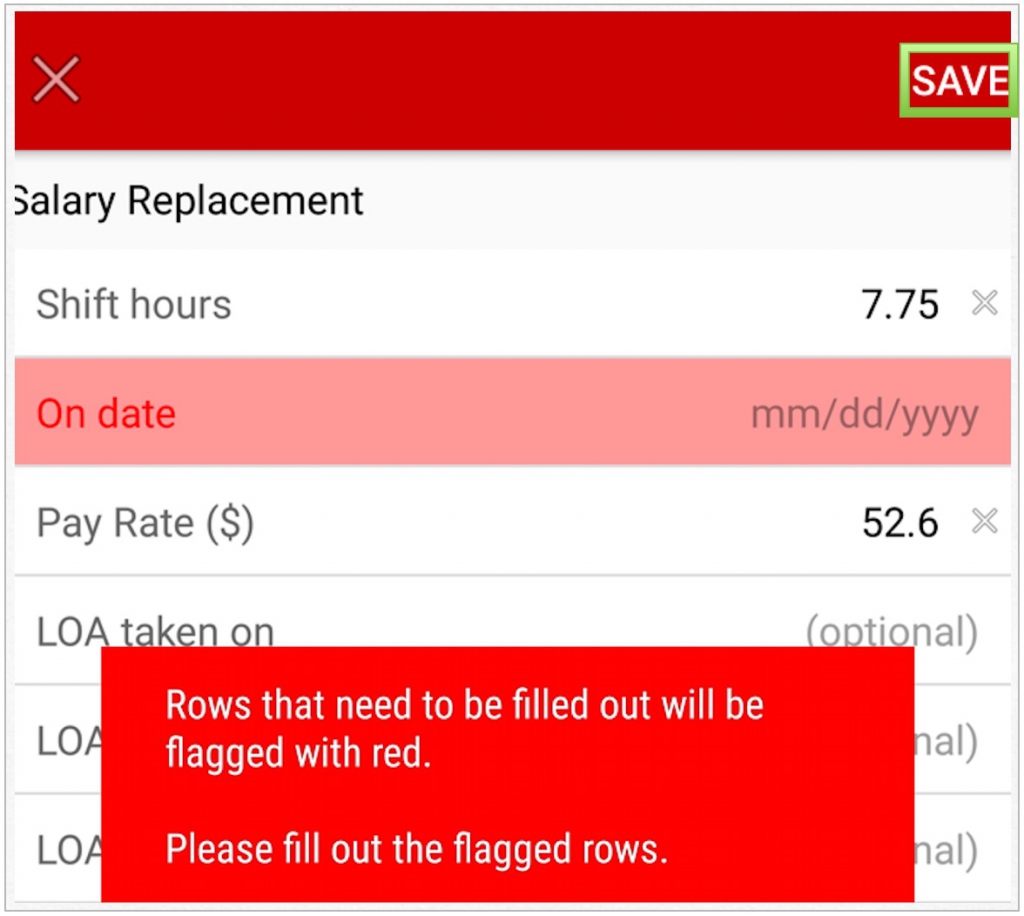
The Salary Replacement screen will open and the On date will auto fill to the day of the event if an event was chosen. The Pay Rate will also autofill provided the rate was selected in previous steps. The Shift hours will need to manually entered. Tap Add once the information is complete. When claiming for more than one day the system will auto populate the information to the second line.
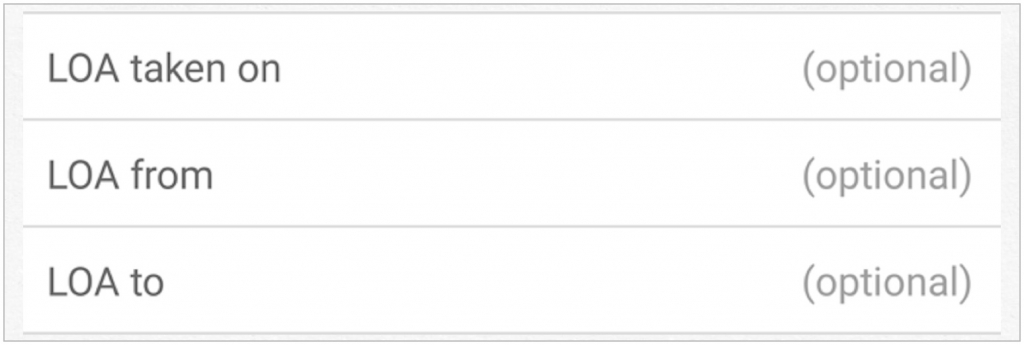
If a Leave of Absence has been taken, complete the fields by manually entering in the text.
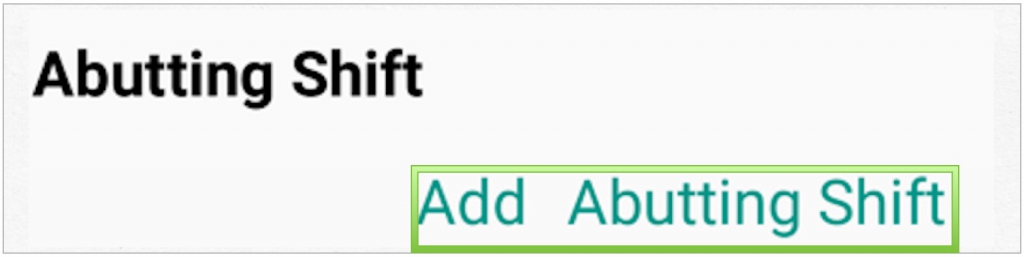
The option to Add an Abutting Shift is available, just tap Add Abutting Shift to open.
When the SAVE button is tapped and the required fields are not all completed a Red Error will appear.
Tap on Done.

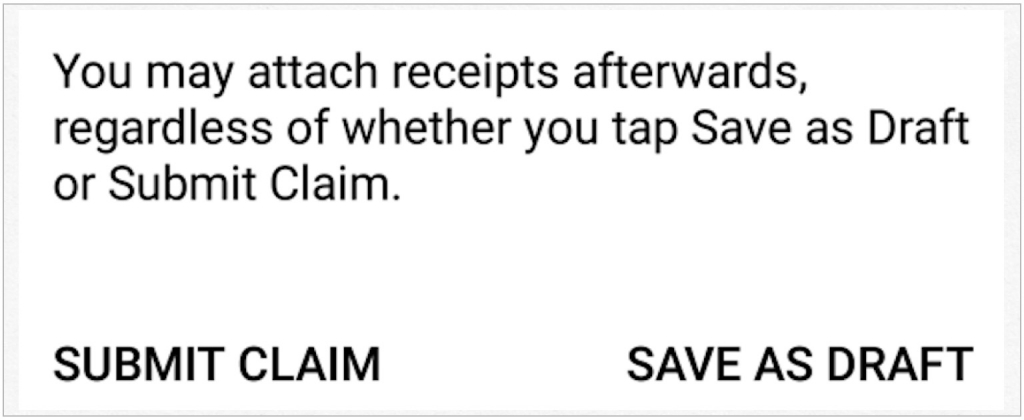
The options to Save As Draft or Submit Claim will appear. Save As draft if changes are required to be made to claim. Submit Claim when the form is complete.
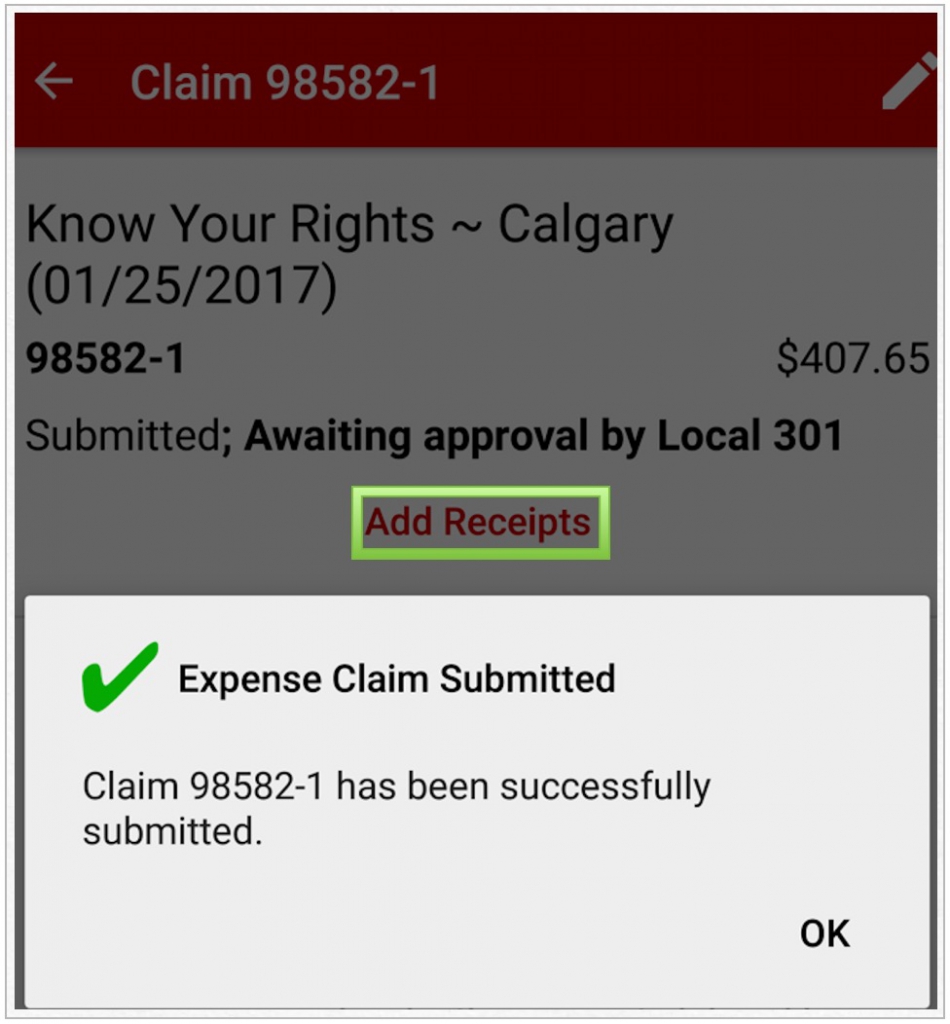
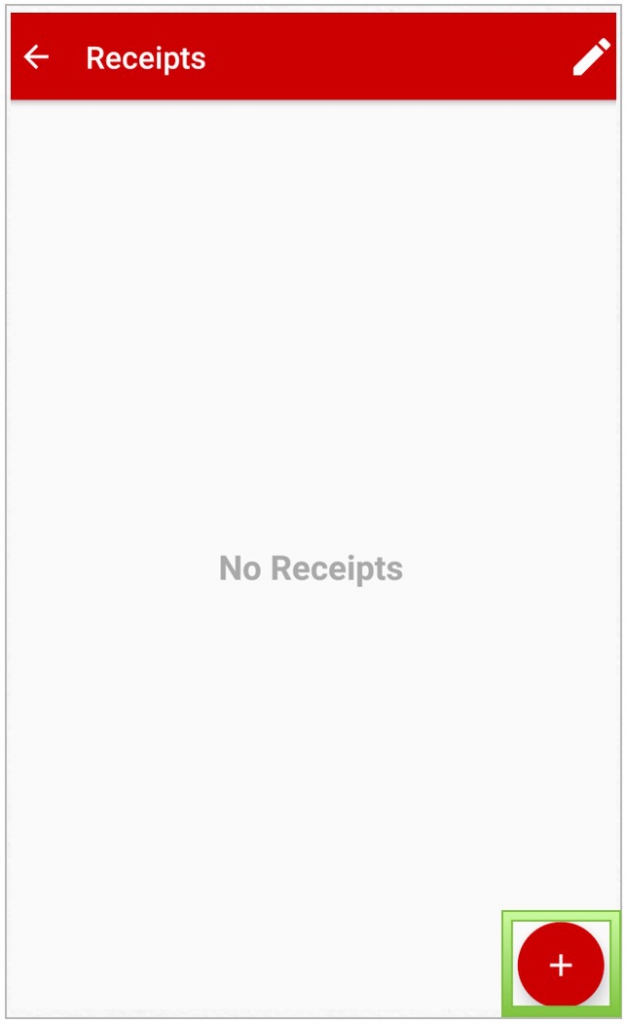
Once submitted, a message confirming the Expense Claim Submitted will appear. An Edit option allows for changes to be made to the form. Receipts can be attached to the expense claim by tapping Add Receipts.
Tap on Plus Sign in bottom right-hand corner.
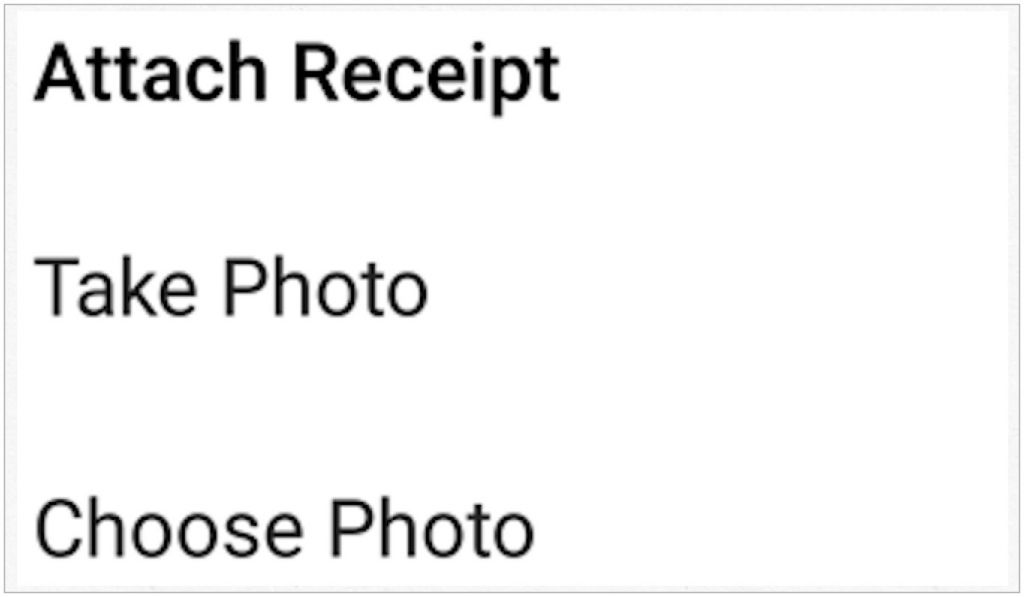
Allowing the options to Take Photo,or Choose Photo will allow receipts to be attached. Receipts pictures must be clearly visible.
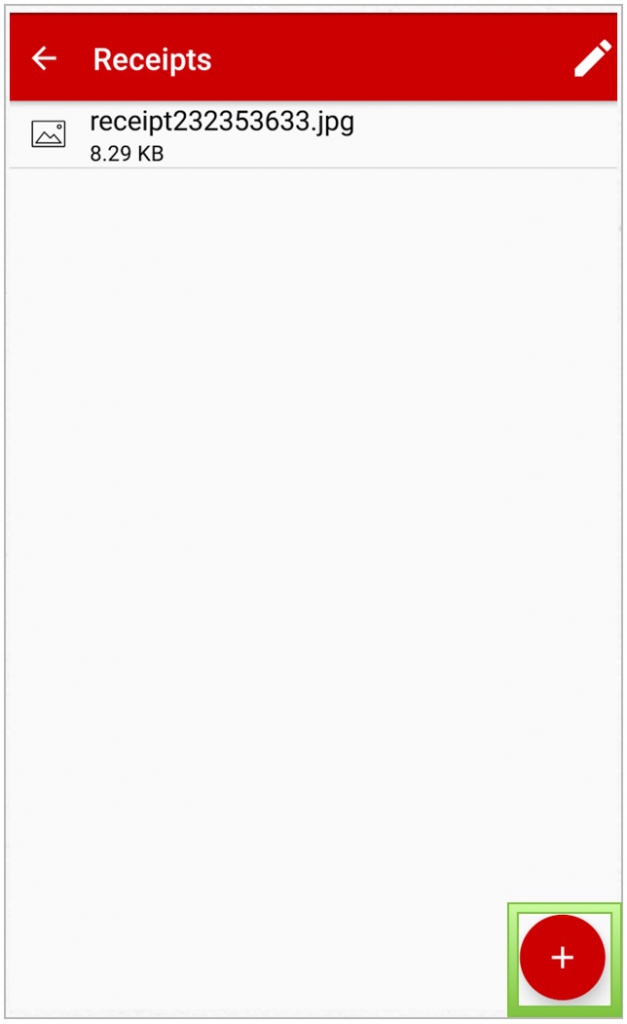
The receipt will attach to the expense claim. To add additional receipts, tap Plus Sign located in bottom right-hand corner.
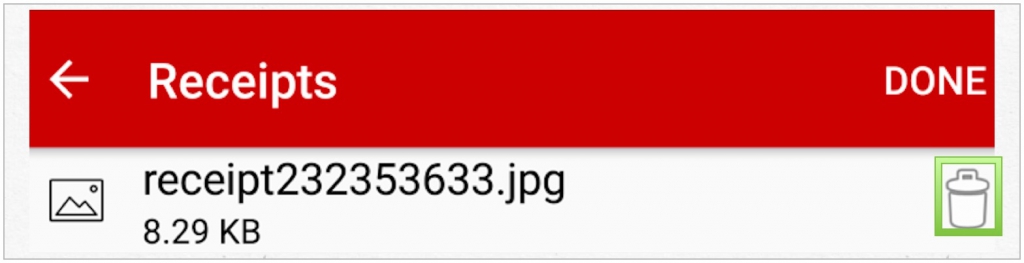
To delete a receipt tap the Pencil in top right-hand corner for the Delete option to appear.
Once the receipt is attached to the claim it will show on form.
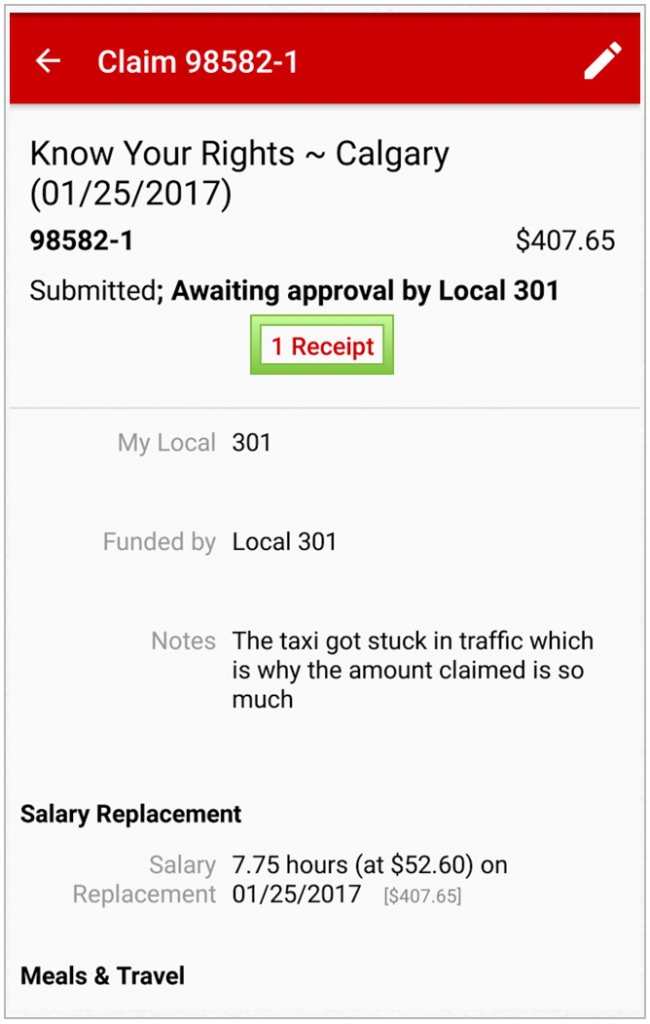
An icon on the My Expense Claims will indicate a receipt is attached.

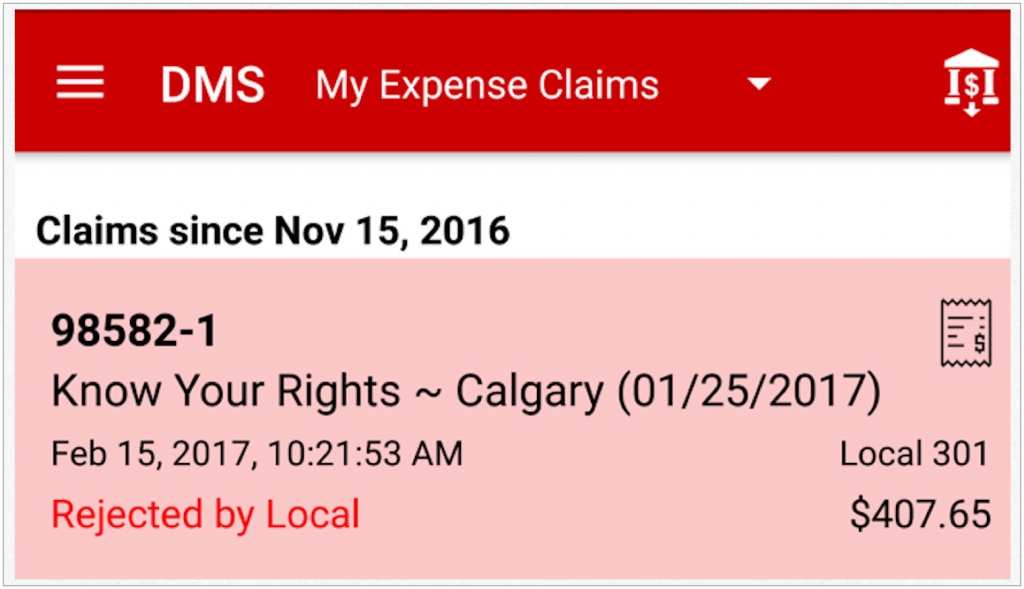
Rejected by Local:
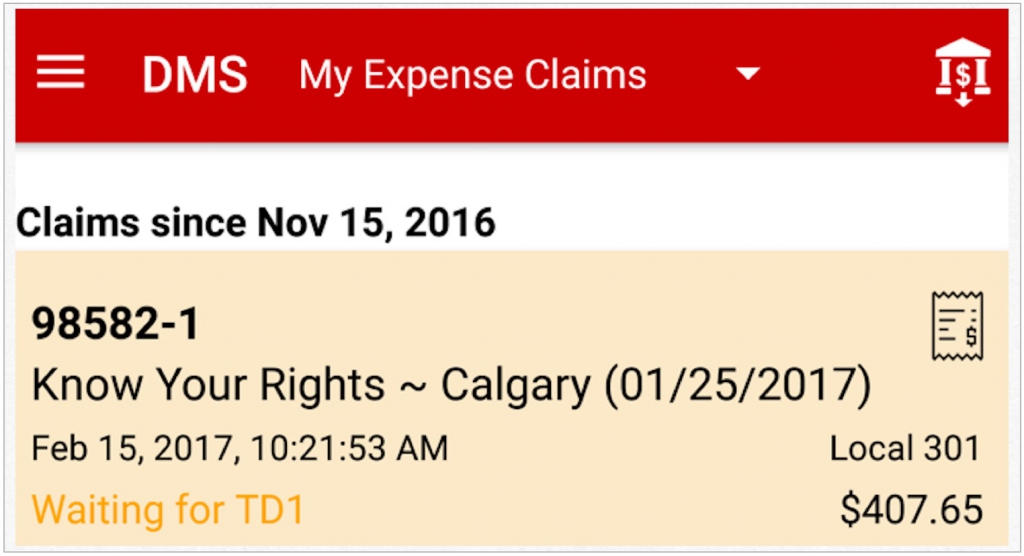
Waiting for TD1:
Paid: