Data Management System (DMS) Web – Members
Please avoid the use of the Back Button on your browser to navigate while using this system. This can create a situation in which your forms are submitted twice, or not submitted at all.
Creating an Expense Claim
You can submit your own expense claims for locally or provincially funded events. Locally funded forms are submitted to the Local Executive for review. Provincially funded forms are submitted to the UNA Finance Department for review. An ongoing record of your personal expense claims builds as you continue to submit. Monitor the status of claims as they change from Submitted to Rejected/Approved to Paid.
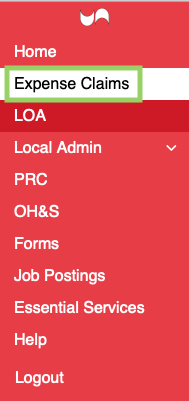
To create a New Expense Claim, click on the Expense Claims tab.
Select the type of funding for the new expense claim: Local funding, Provincial funding or District funding. This can be changed later. Ensure the line items included are all the correct type – Provincial, Local or District. If you have more than one type complete an expense claim for each type of funding. NOTE: Selecting the incorrect type will delay processing of expense claim.
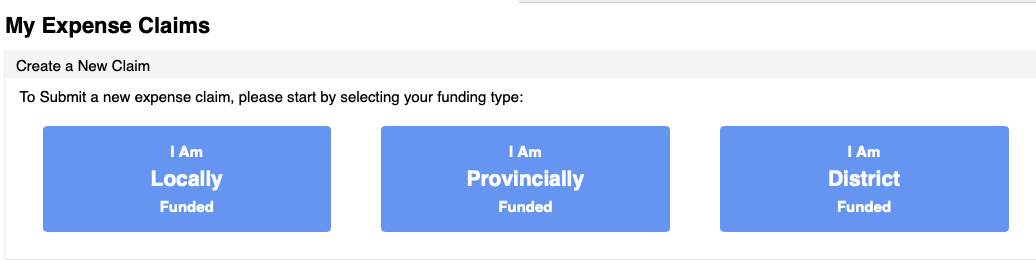
Click on the required link to select Local funding, Provincial funding, or District funding.
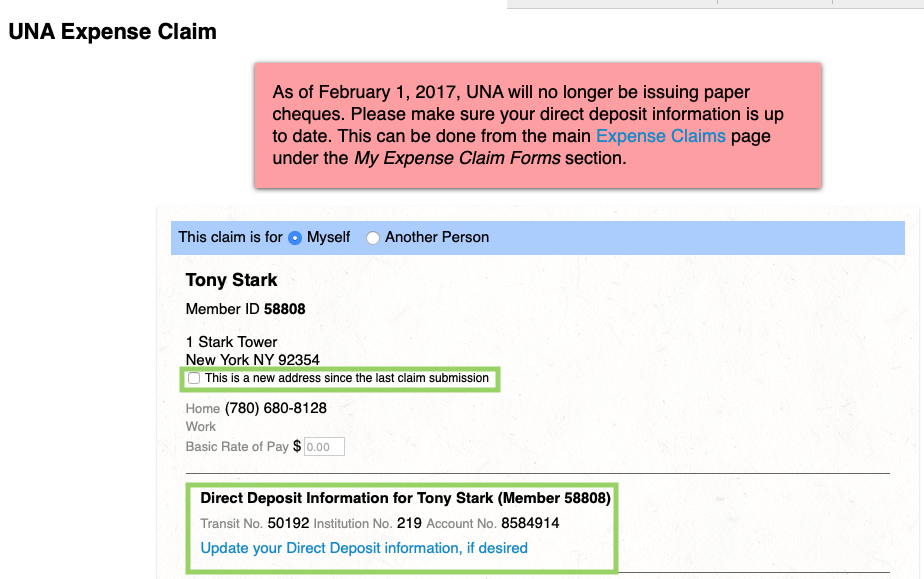
Your name, address, Member ID and local are filled in automatically. If mailing address has changed since last expense claim, click the small check box to indicate. Direct Deposit Information will also be automatically filled in if the information has been entered in the past. If there is no Direct Deposit Information, click on Update Your Direct Deposit Information, if desired. (See Instructions on Updating Direct Deposit Information.)
Enter the appropriate event name. If you have registered and attended a UNA event related to this expense claim, once the attendance has been processed a drop down list allows you to select the appropriate item.

If you do not see a drop-down menu or your event does not show up in drop-down menu, enter your event in the blank box by Event Attended/Funding Reason. Please add a date to allow for easy interaction with the expense claim records.
The editable version of an expense claim form has a yellow background. Anytime you see this background you can add/modify entries.
If you need an entry in a particular area, use the Plus button. Where dates are required a small calendar appears. Click the calendar on the correct date to move the date to the field. Or, you can manually enter the date in the format of mm/dd/yyyy.
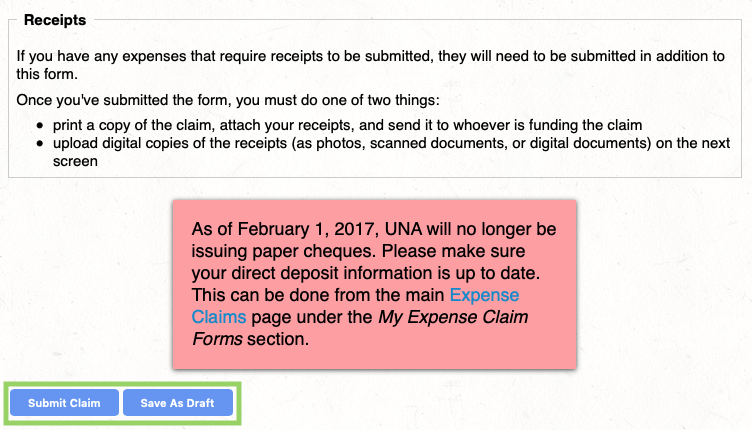
The expense form goes to your own local executive or to the UNA Finance Department for review/reimbursement. If your expense form shows No TD1 on file, send a completed copy to UNA.
If you have started the wrong type of expense claim, you can scroll down to locate options for changing the expense claim type.

For all options, the Submit Claim and Save As Draft buttons will float on the form as you work.