Creating E-Mail Filters for Internal Distribution Lists
A distribution list is a list of employee email addresses that are grouped together and behave like a single recipient, which are ideal for when you want to send the same email to a group of people without typing each individual email address. This can be especially useful when working for a larger organization and managing email and communications for several departments and business units. For example, a list of contacts may be organized under the group email contact@company.com, support@company.com, or certain districts.
Setting up a filter for these lists allow users to maintain an organized inbox. To do so, follow the steps below.
- In Zimbra, navigate to the Preferences tab and locate ‘Filters’ on the left column.
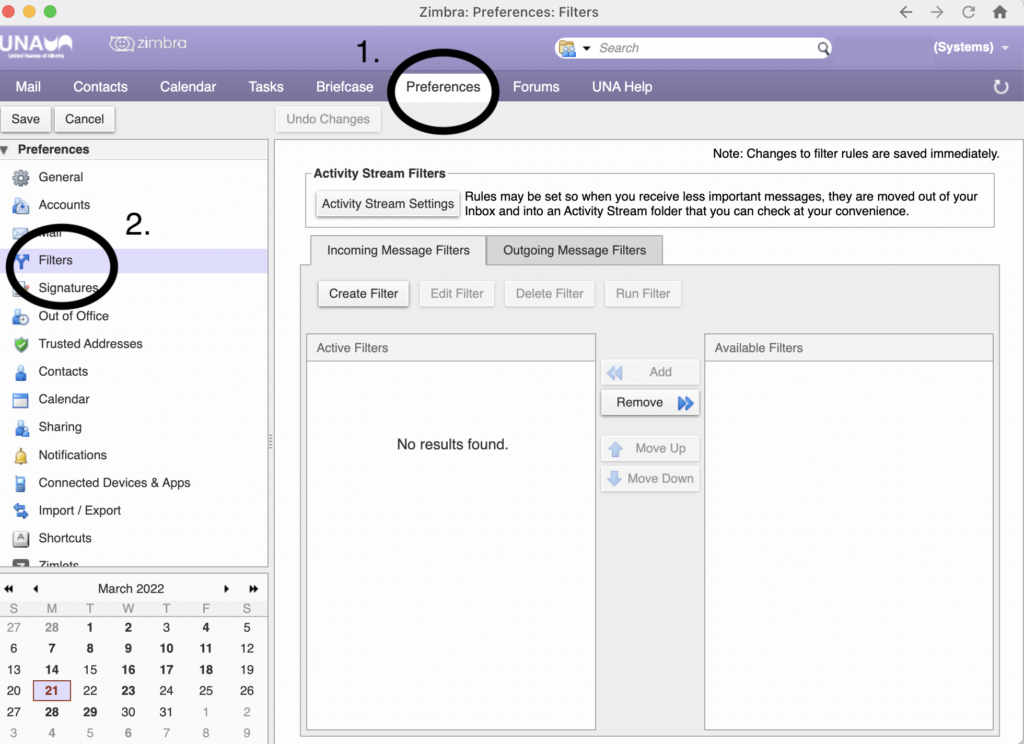
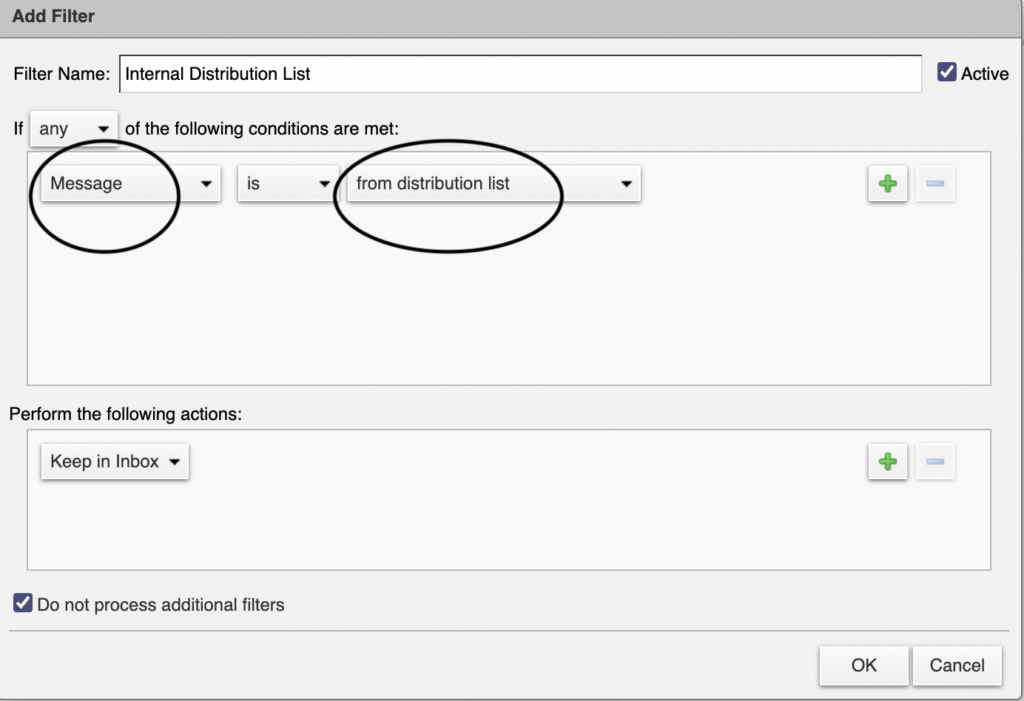
- From here, you’ll hit Create Filter. A new window will pop up, where you can add in a Filter Name. For the purpose of this example, this will be called Internal Distribution List. Next, you’ll ensure that in the two drop down fields outlined below the left field is set to ‘Message’, and the right is set to ‘from distribution list‘.
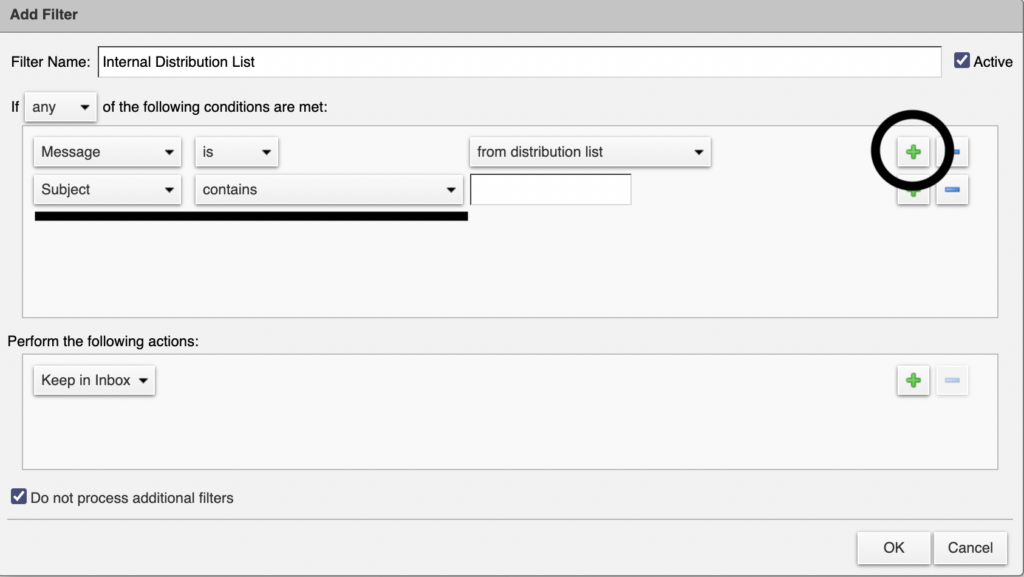
- Click the Green plus on the right side of the box, allowing you to create another line of parameters. The second set of parameters are automatically set to ‘Subject‘. However, when clicking on the drop down arrow you can then set how you’d like the e-mails to be sorted. In this example, we will set all examples from a specific e-mail.

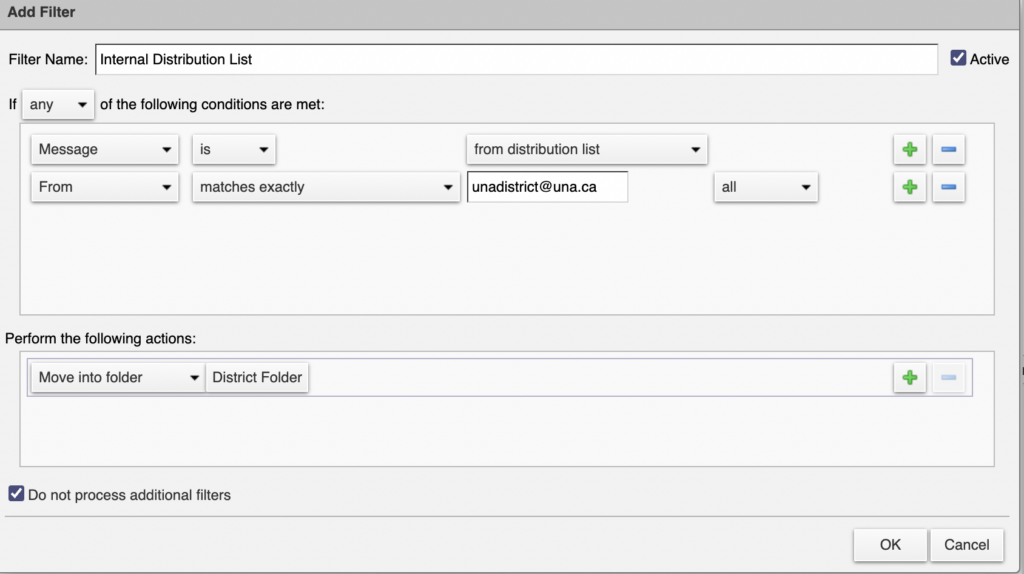
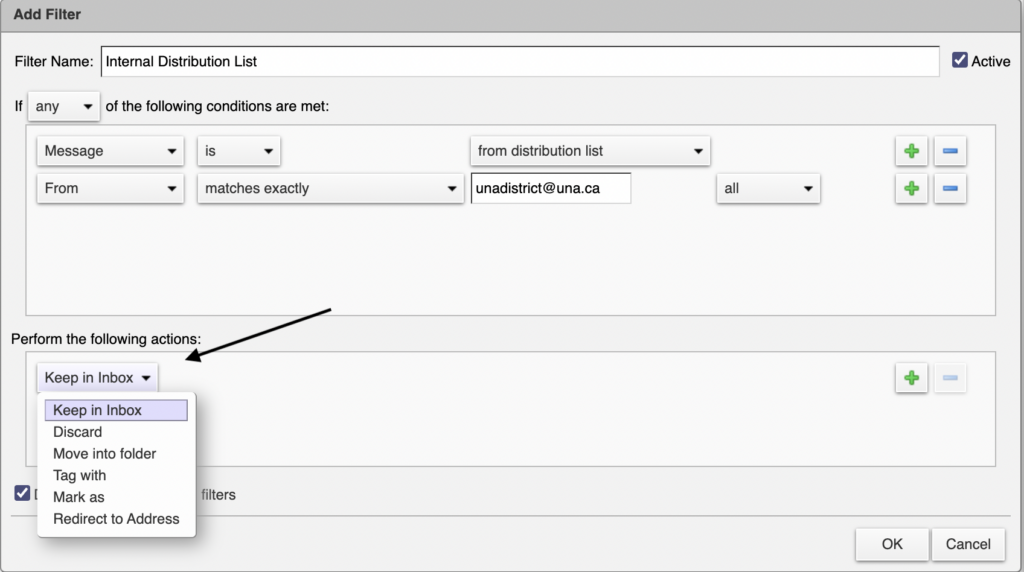
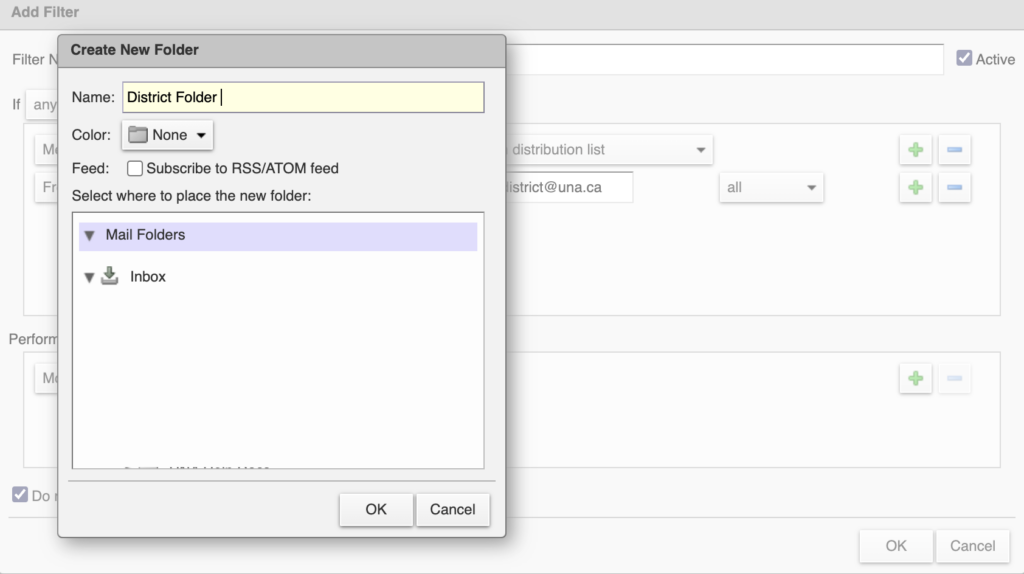
- Next, you will ensure all fields have been filled to completion. If you are using the From sorting option, you will then type the e-mails that are from a specific distribution list. In the bottom half, you can dictate where you want these e-mails to go. from here, you can move them into a folder or flag them with a coloured tag, which will ensure an organized inbox. At this time if you choose to sort into a folder, you can create a new folder specifically for that list.

Finish by hitting OK in the bottom right corner. - When completed, your filter should look as below. Again, finish by hitting OK in the bottom right corner.