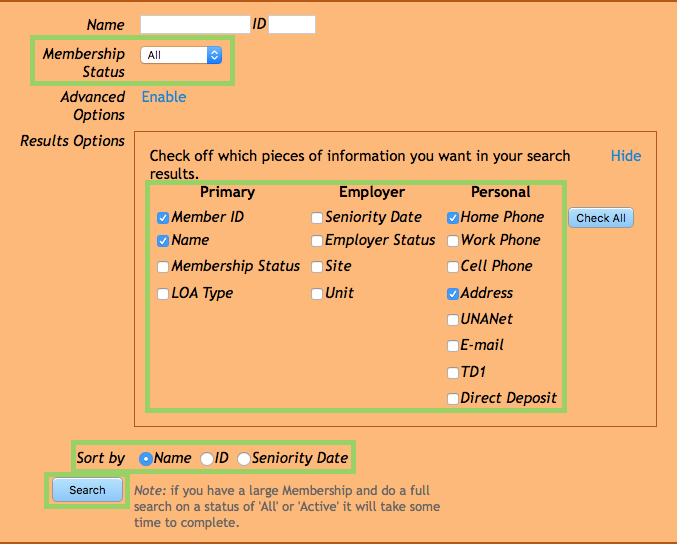
You can search the membership list by entering a Name (or partial) and ID number, or by setting the choice in Membership Status (All, Active, Pending, Associate) to reflect your needs.
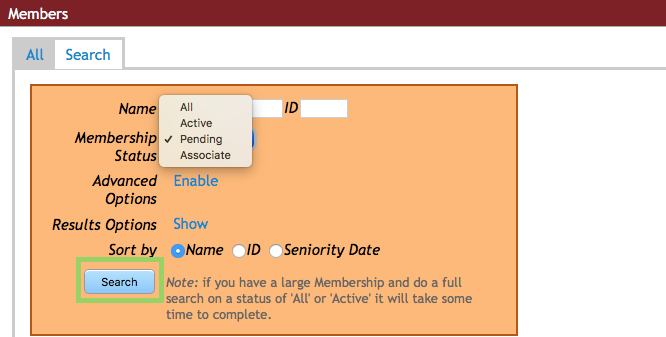
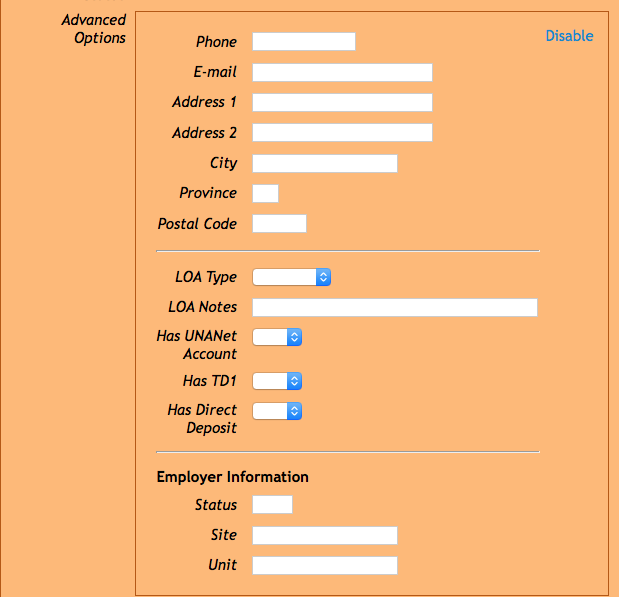
There are multiple choices available if you Enable the Advanced Options, allowing you to add various parameters to your search. You can search based on data supplied by the Employer.
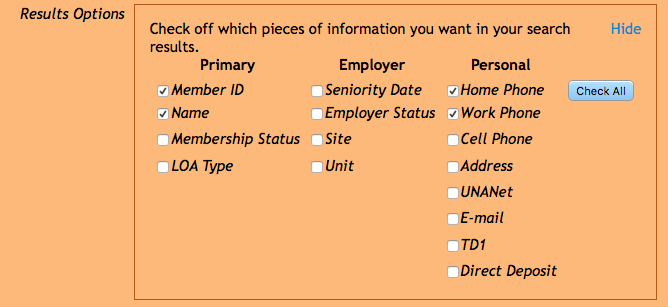
You can control the display of the search results. Use the show button to Results Options. Defaults can be deselected by clicking on the check box. Others can be added by clicking their check box. If you add the UNANet option to the results, you will have a column showing the status of FirstClass usage – active, pending, or inactive. No entry indicates no UNANet account.
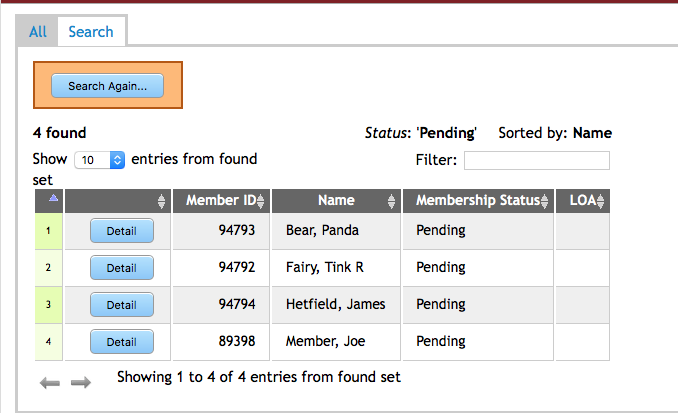
Note the default settings that are applied, such as the Membership Status, set to All and the Sort being done by Name. These settings can be changed to better meet your needs.

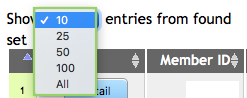
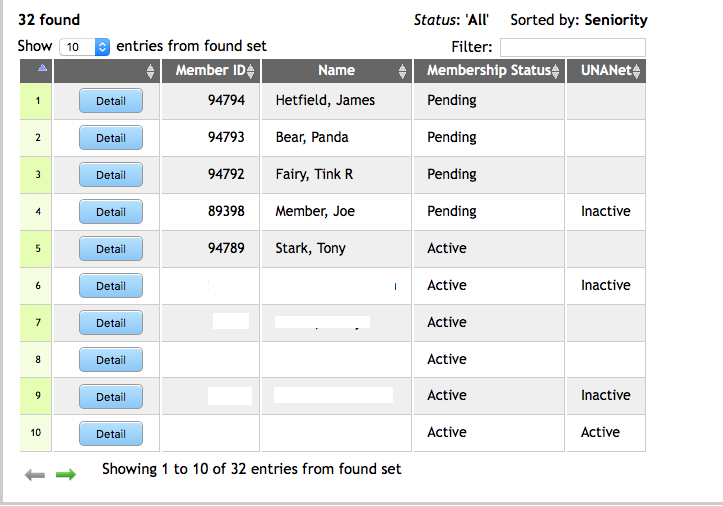
When a search is completed, the results are set to Show 10 entries and arrows allow you to move through the entire list. Depending on what you intend to do with your list, you can change this setting. Options include:

Controls for how many items show at once: upper left corner of table.
Arrows to navigate through the table of entries: bottom left corner of table.

Filter to search for a particular value: upper right corner of the table.
![]()
If you want to print lists, set the results to Show All Entries. Then the entire lists will be printed rather than just those that are visible.
Examples of some searches:
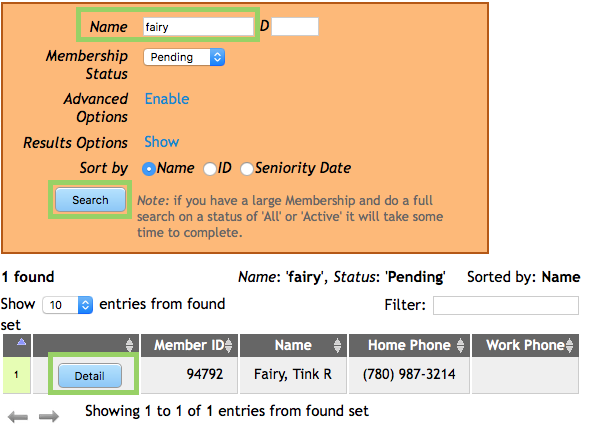
Example 1:
You need the address and phone number for a member
Enter the person’s name in Name Field. (partial or full name)
Click the Search button.
Click the Detail button to show all information.
Example 2
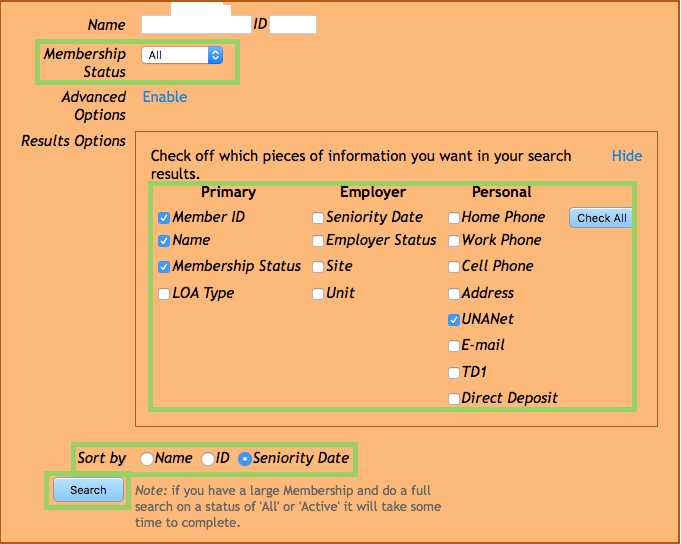
You need a list of all members sorted by Seniority.
Leave the Name and ID fields blank.
Membership Status set to show All.
Skip the Advanced Options.
Set Results Options: click Show and select/deselect each information category you need.
Sort by: Click the button beside Seniority Date.
Click the Search button.
Example 3
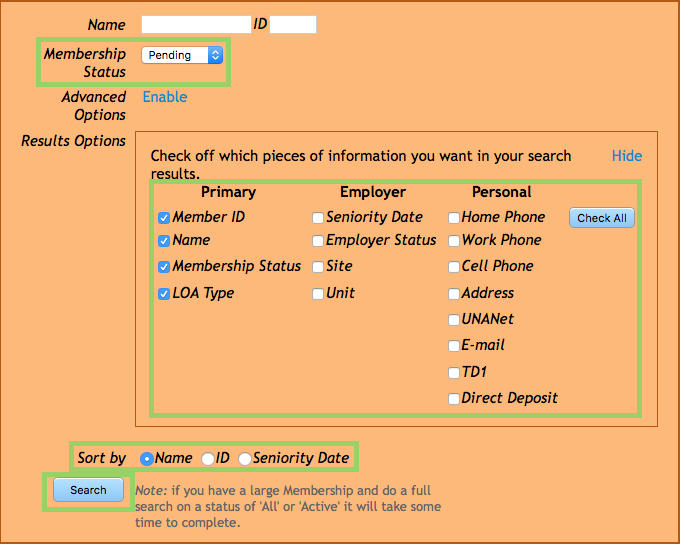
You need a list of people who membership is Pending
Set Membership Status to Pending.
Ignore Advanced Options.
From Results Options select/deselect appropriate category for list.
In Sort by select Name.
Click the Search button.
Example 4
You need a list of members showing UNA member ID, names, address and home phone numbers. You need to have a hard copy to take to a meeting and an electronic copy to send.
Do not enter anything in Name/ID and leave Membership Status set to All.
Do not set any Advanced Options.
Result Options – use the Show button to reveal the available choices.
Some of the needed options are selected by default. Add Address and Remove Work Phone.
Leave Sort by to present the list alphabetical by Name.
Click Search button.
Change the options at the top of list to Show All entries.

If you desire more information on each page, remember that you can make the text smaller by clicking the first A beside Text Size on the upper right of the page.
![]()
Click the Print this Page button on the upper right of you page. The usual print dialog box will appear. To produce a paper version of the list to bring to a meeting, use the standard Print button on the lower right.
![]()
To produce a PDF version, again select Print this page. When the Print dialog box appears select PDF on the lower left and select Save As PDF. Give the file an appropriate name and save to the desktop of your computer.

Login to your FirstClass account. Create a message addressed appropriately and attach the PDF file before sending.
Example 5
Advanced Options: Enable/Disable
The Advanced Options allow you to connect to various parameters. You can enter professional numbers as the search parameter or produce a list of UNANET users. The LOA Type is not always available though executive members can add/edit data to include LOA Type. LOA Type includes designations such as short term disability (STD), maternity leave (MatLv), etc. This is used only by the local and may not be necessary.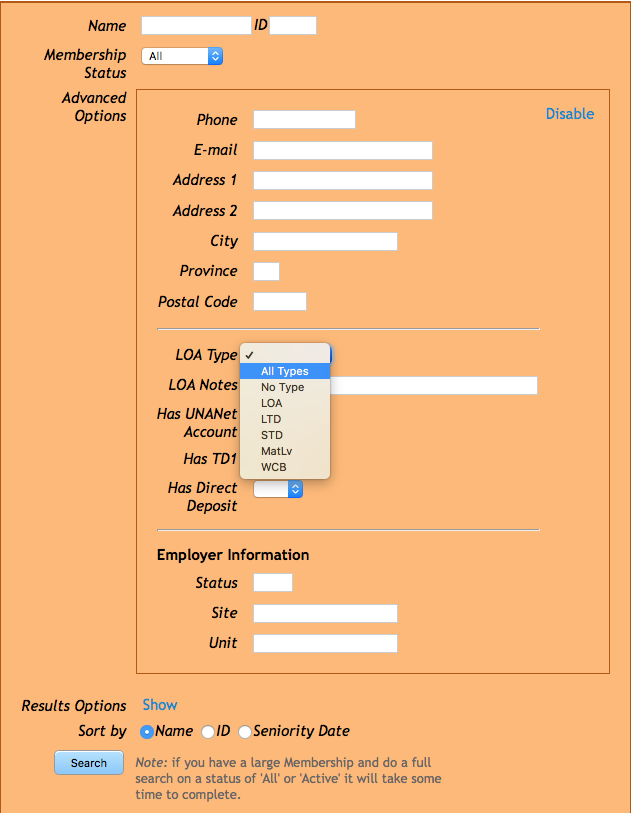
Some Employer data can be added to the list.
If you are setting parameters in the Advanced Options, be sure to leave them visible as you the search. Once you Disable the Advanced Option, the setting no longer apply to the search.