List Manager is found in the Local Admin and is used to build and save your own lists in order to conveniently send emails to and view information from different sites, units, and individuals.
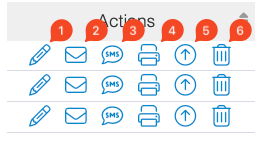
There are 6 actions you can do once you have created your custom list:
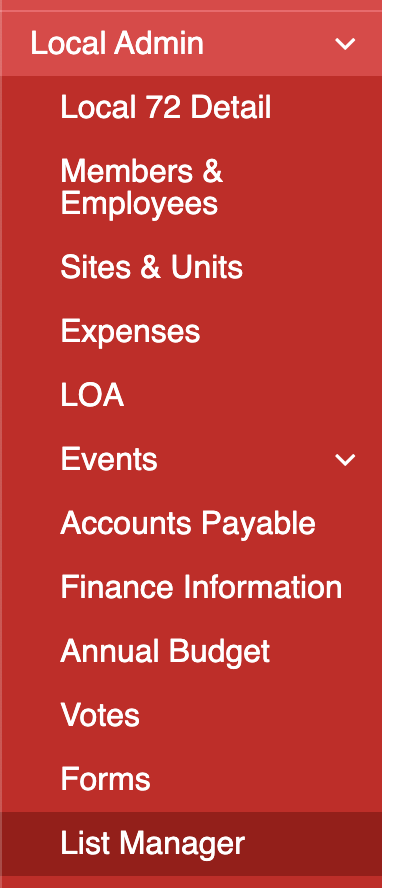
To start creating a List, first navigate to the Menu Bar > Local Admin > List Manager:
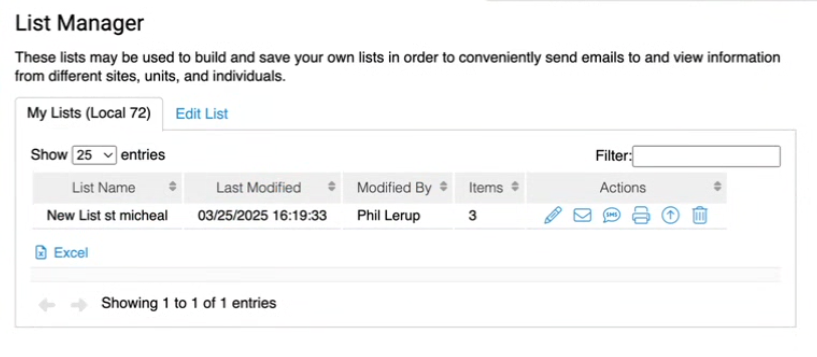
When List Manager opens there are two options Edit List and My Lists (Local XXX).
Edit List is where you are able to create new lists and everyone on the executive for the local will be able to see and use the list.
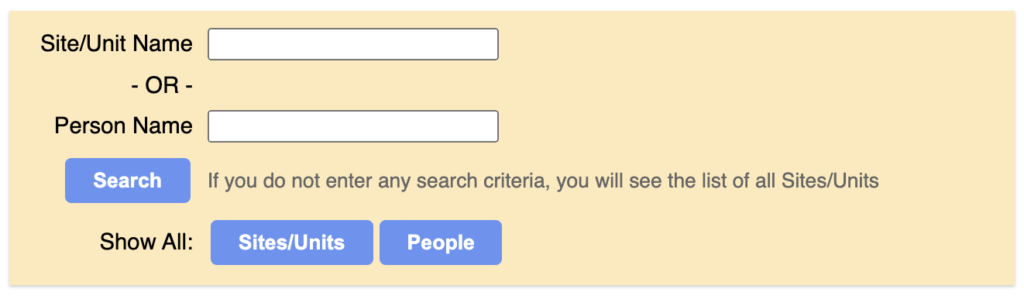
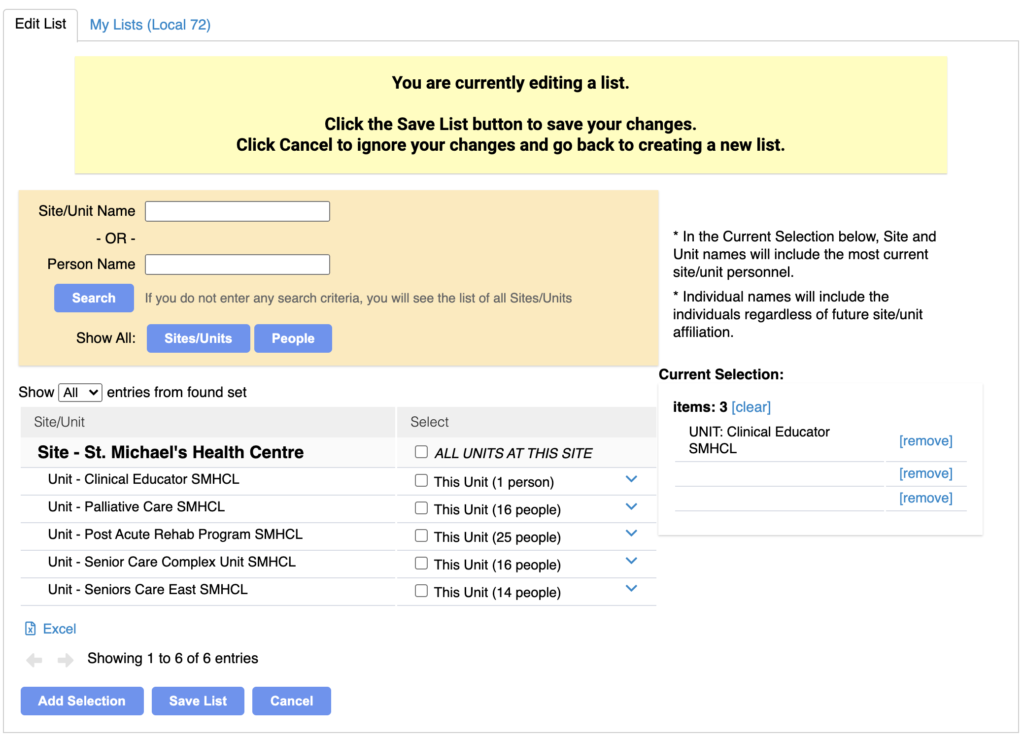
You are able to Search by Site/Unit Name or Person Name or you can search by Show All and click on the Sites/Units or People button.
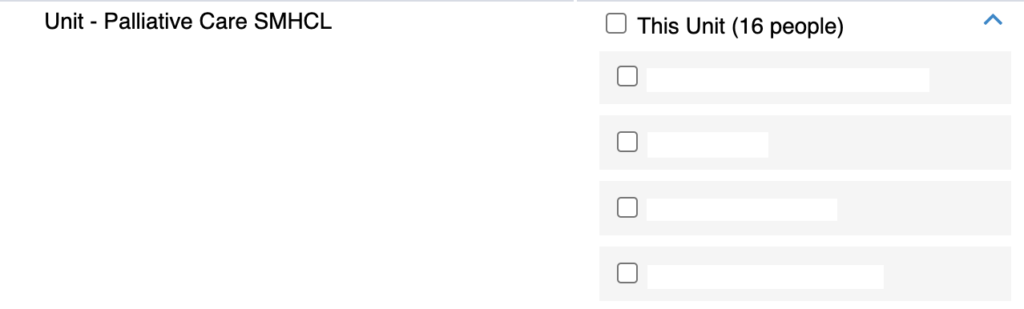
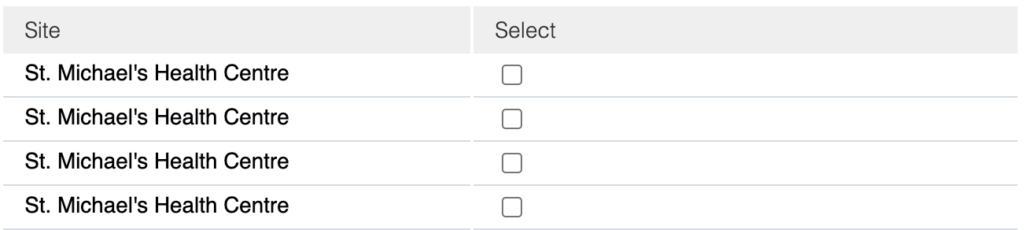
Sites/Units will show all the sites and units for the local with the amount of people in each unit. This can fluctuate. To see the individual people for each unit click on dropdown arrow and a list will populate beneath in the Select column. To collapse the list click once again on the same dropdown arrow.

When the List is open you are able to click in the Box Beside the name to add them to the new email list you are compiling.
When you click on People you will get a current list of everyone in the local. Again click on the Box Beside their name to add them to a list.
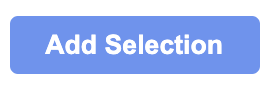
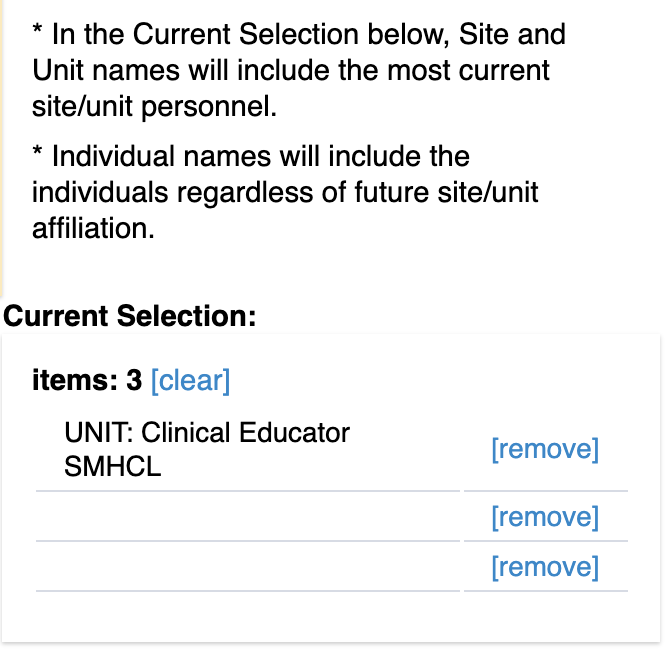
Once you have checked off those for the email list at the bottom of the screen you will see the Add Selection button. Click Add Selection and the names will populate on the right hand side of the screen.
If you have added someone in error click on the [remove] text and the name will be removed.
You can also click on the [clear] text to remove all the list contents.
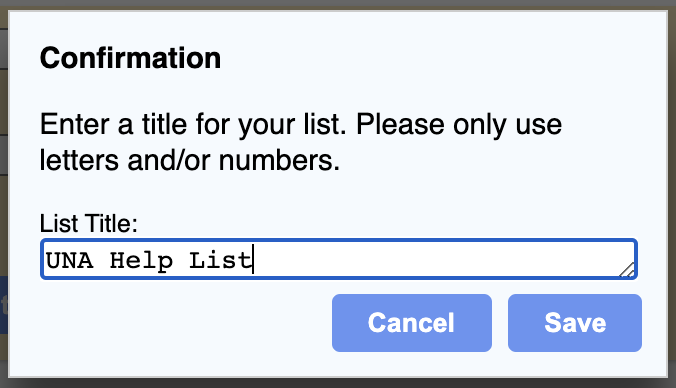
Once you have all the people for your email list click on Save List which is found at the bottom of the screen.

A Confirmation pop up box will appear. Enter in the name for your list in List Title field and click on Save.
Now to see the list you just made, click on My Lists (Local XXX) and the most recent list made will show up here.
Edit an Existing List
Edit allows one to edit the list by adding or removing members and groups.
When in Edit mode there will be a Yellow Highlight at the top of the screen indicating you are editing a list.
At the bottom of the screen, there are three buttons you can click on while editing a list.
To add new items to your list, check off boxes in the Select column and then click on the Add Selection button.
To save your new changes to this list, click on the Save List button.
To cancel editing your list and ignore all changes, click the Cancel button.
When you click on Save List you will have the option to leave the list name as it was or to change it to a new name as the Confirmation pop up will appear again.
E-Mail/SMS – Bulk Messaging
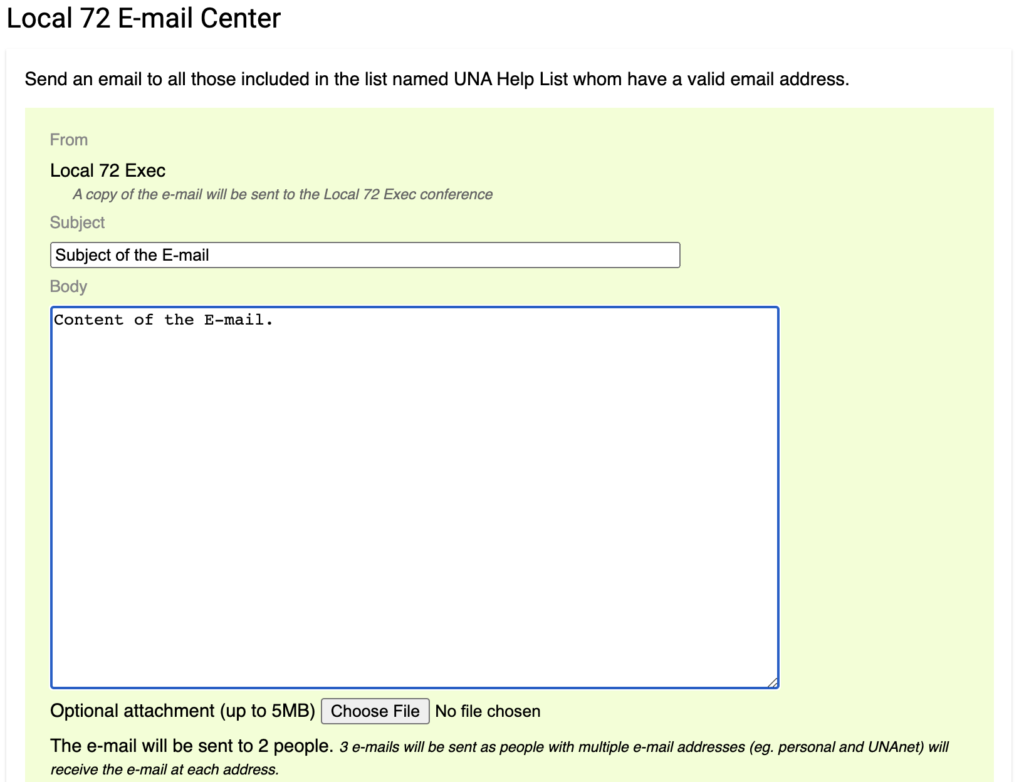
E-Mail allows you to send an email to all those on the list that have a valid email address on file.
The Bulk Message Center will open and you are able to add the Subject line and Body of the email along with the ability to add Optional Attachments.
In case you see a list of omitted individuals, those individuals may have been part of a unit on the list that has since changed locals, or the individuals themselves have since moved locals, or they just did not have an email address on file.
The SMS feature works the same way, but only if they have a cell number on file. If they have a number listed as “Home” – it will not send it to that number.
The See List button will allow you to to double check the list of names and email addresses of whom you would like to email.
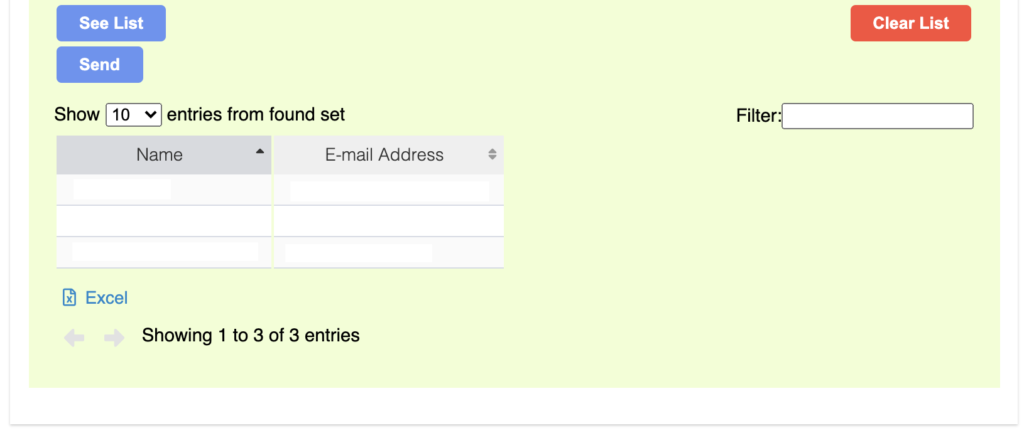
The Send button allows you to send the email and will usually be sent in the next half hour of clicking the button.

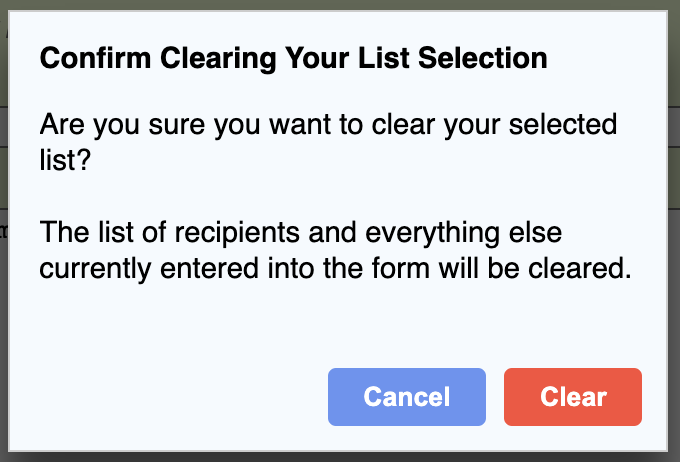
The Clear List button allows you to clear the currently selected list to and choose a new one.
The Confirm Clearing Your List Selection window will pop up where you can then click on Clear.
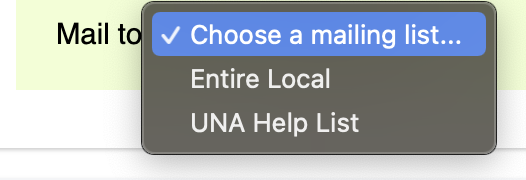
Back at the Bulk Message Centre you will be able to compose another email and in the Mail to: click on the list you would like to email from the drop down.
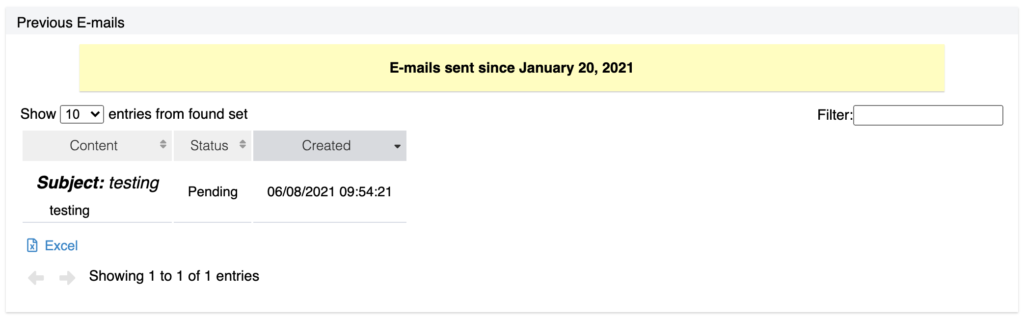
In the Previous E-mails section you will see all the emails that have been sent and their status Pending or Sent.
More about Bulk Messages can be read about here.
Print a List
Clicking the Print text beside a List in the My Lists tab will open up the print window in your browser and show a list of all the names along with the sites and units in the specified list.
Exporting a List
You can now export the contact information for any of your custom lists in the List Manager.
You can do this by clicking on the up-arrow icon beside any of your custom lists in the My Lists tab of the List Manager page in DMS Web, then clicking on the Excel button in the pop-up that appears to load your list information (screenshots below).

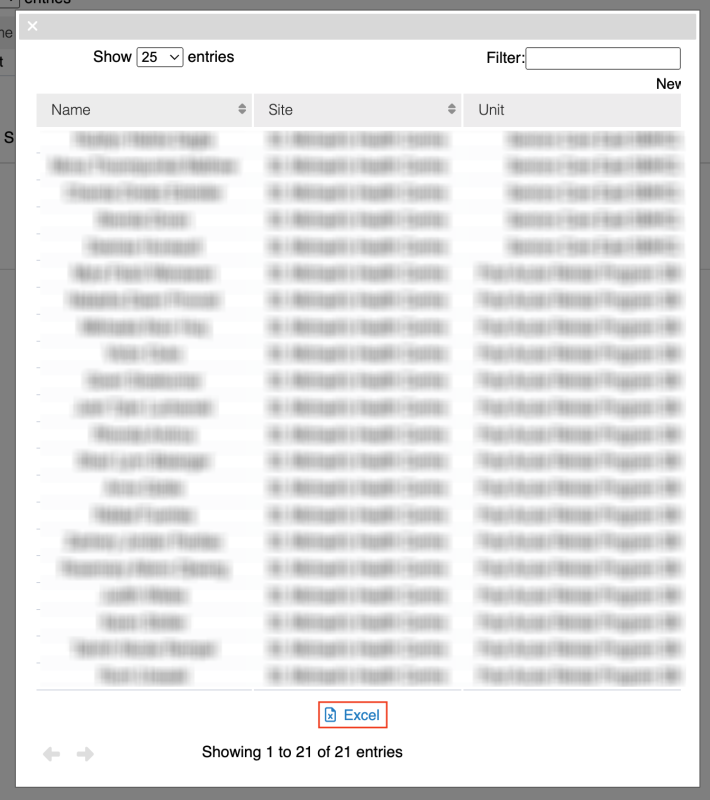
Depending on the size of your Local, loading this may take a few seconds.
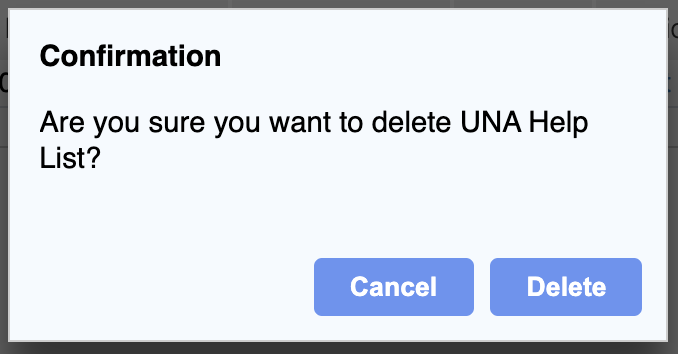
Delete a List
Delete will completely remove a list that has been created.
A Confirmation pop up will appear. Click on Delete to delete the list.